To add content to an empty course, access the course and go to the dashboard (1).

|
Note: When adding or replacing a course’s image, keep in mind that the ideal dimensions are 440x280 pixels. |
To start adding new content, you can use the shortcuts that appear on the course dashboard when a course is empty (2). The system will ask you to either drag and drop files directly into the content area or create a unit. To add content manually, click “Add Content” (3) and select the type of content you want to add.
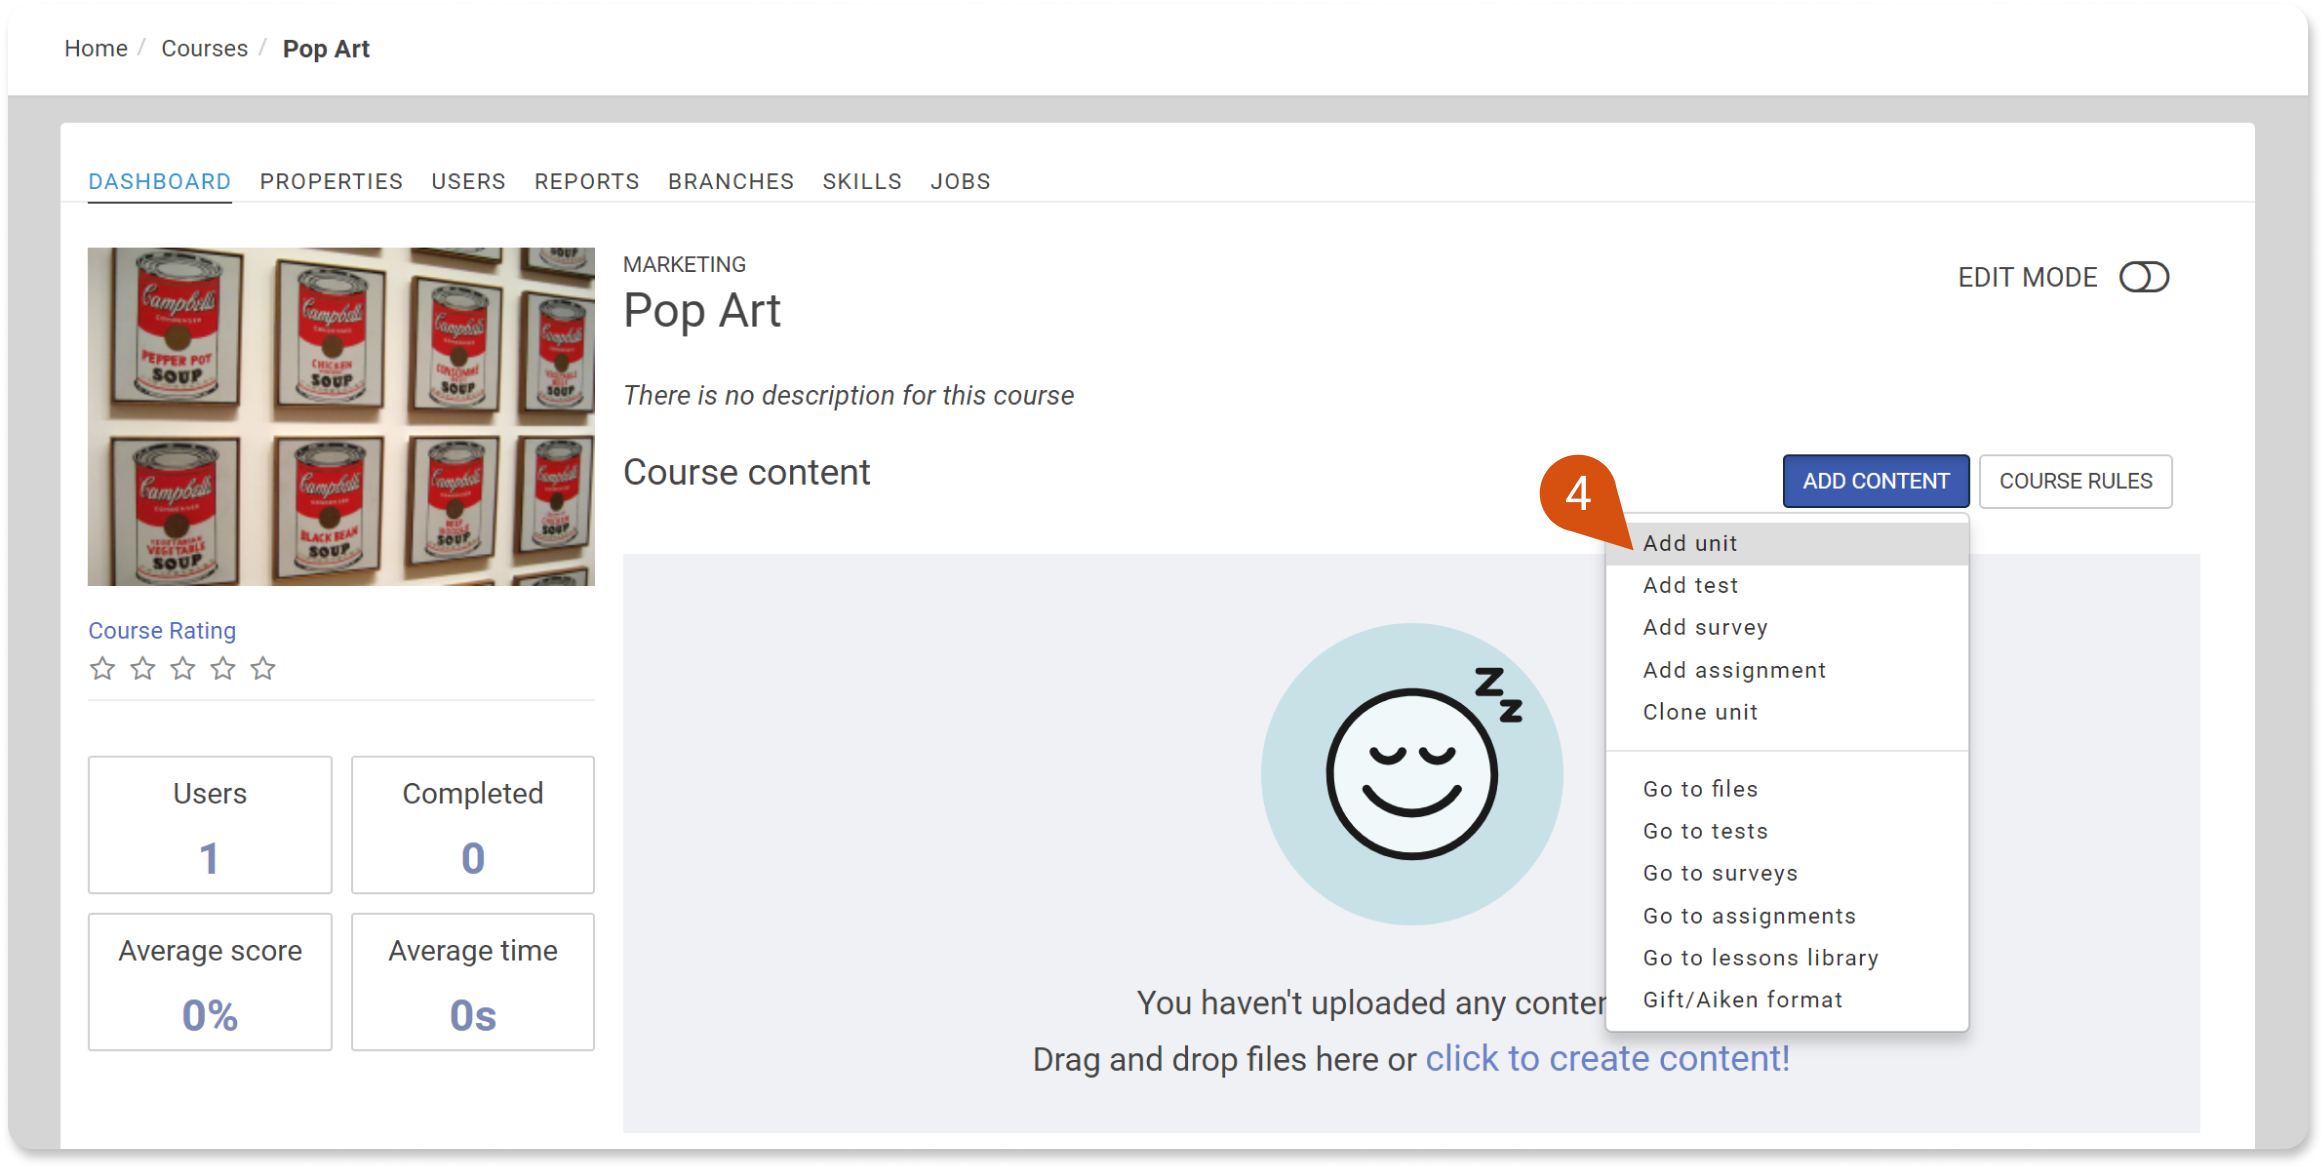
Clicking the “Add Content” button will open a drop-down menu with all the available options (4):
- Add unit - adds a new unit to the course
- Add test - adds a new test to the course
- Add survey - adds a new survey to the course
- Add assignment - adds a new project assignment to the course
Another option to add content to your course is to clone a unit, which copies a unit from a course of your choice and pastes it to another.
To add extra training materials, such as PDF, video, audio, and presentation files, you can use the “Go to files” option. You can either upload new files or select from the ones that are already uploaded to your portal.
Find more details on all types of content that can be added in this article.
|
Note: In eFront, content (i.e., uploaded files) is attached to a specific lesson and not to the course. For this reason, you will see as many “Add Content” buttons as the number of course lessons. |
Finally, you can add lessons to your new course. Lessons are an abstract collection of units (course content) that help you better organize and structure your training material. Click “Add Content,” and from the drop-down menu, choose “Go to lessons library.”
You will notice that there is already a lesson named after your course that has already been created and assigned to your course. If you want to create new lessons, follow the instructions provided in this article.