Audiences allow you to divide your users into logical groups based on certain conditions (rules), such as the branch they belong to, their job position, their user type, or custom criteria (custom Extended Fields you might set up previously).
Creating an Audience
To create a new audience:
- Sign in to your portal as an administrator.
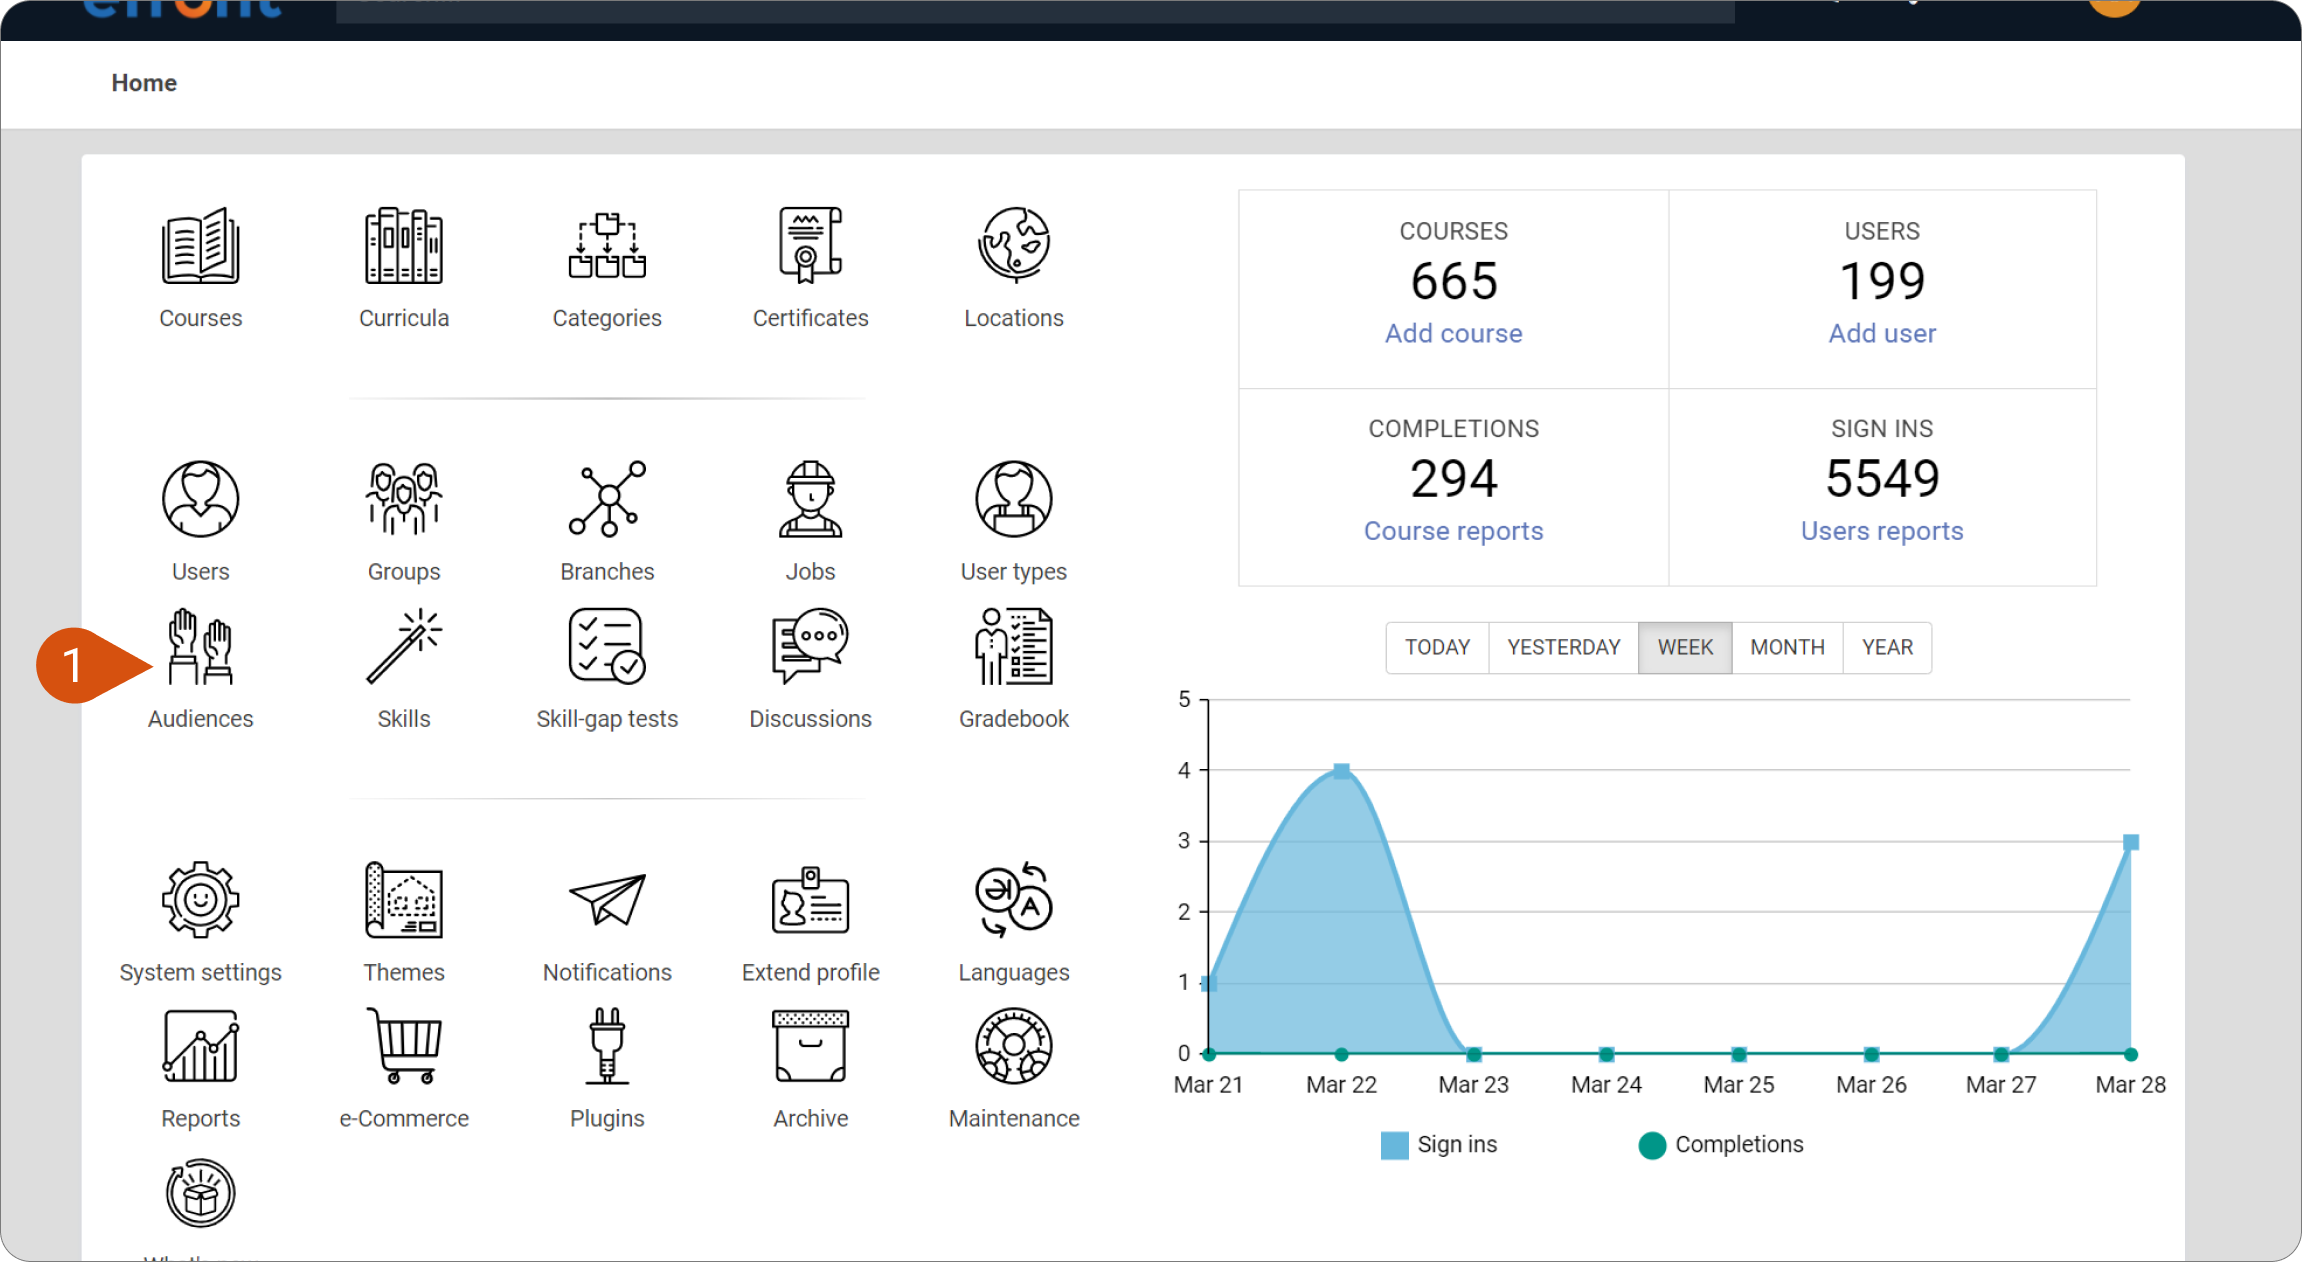
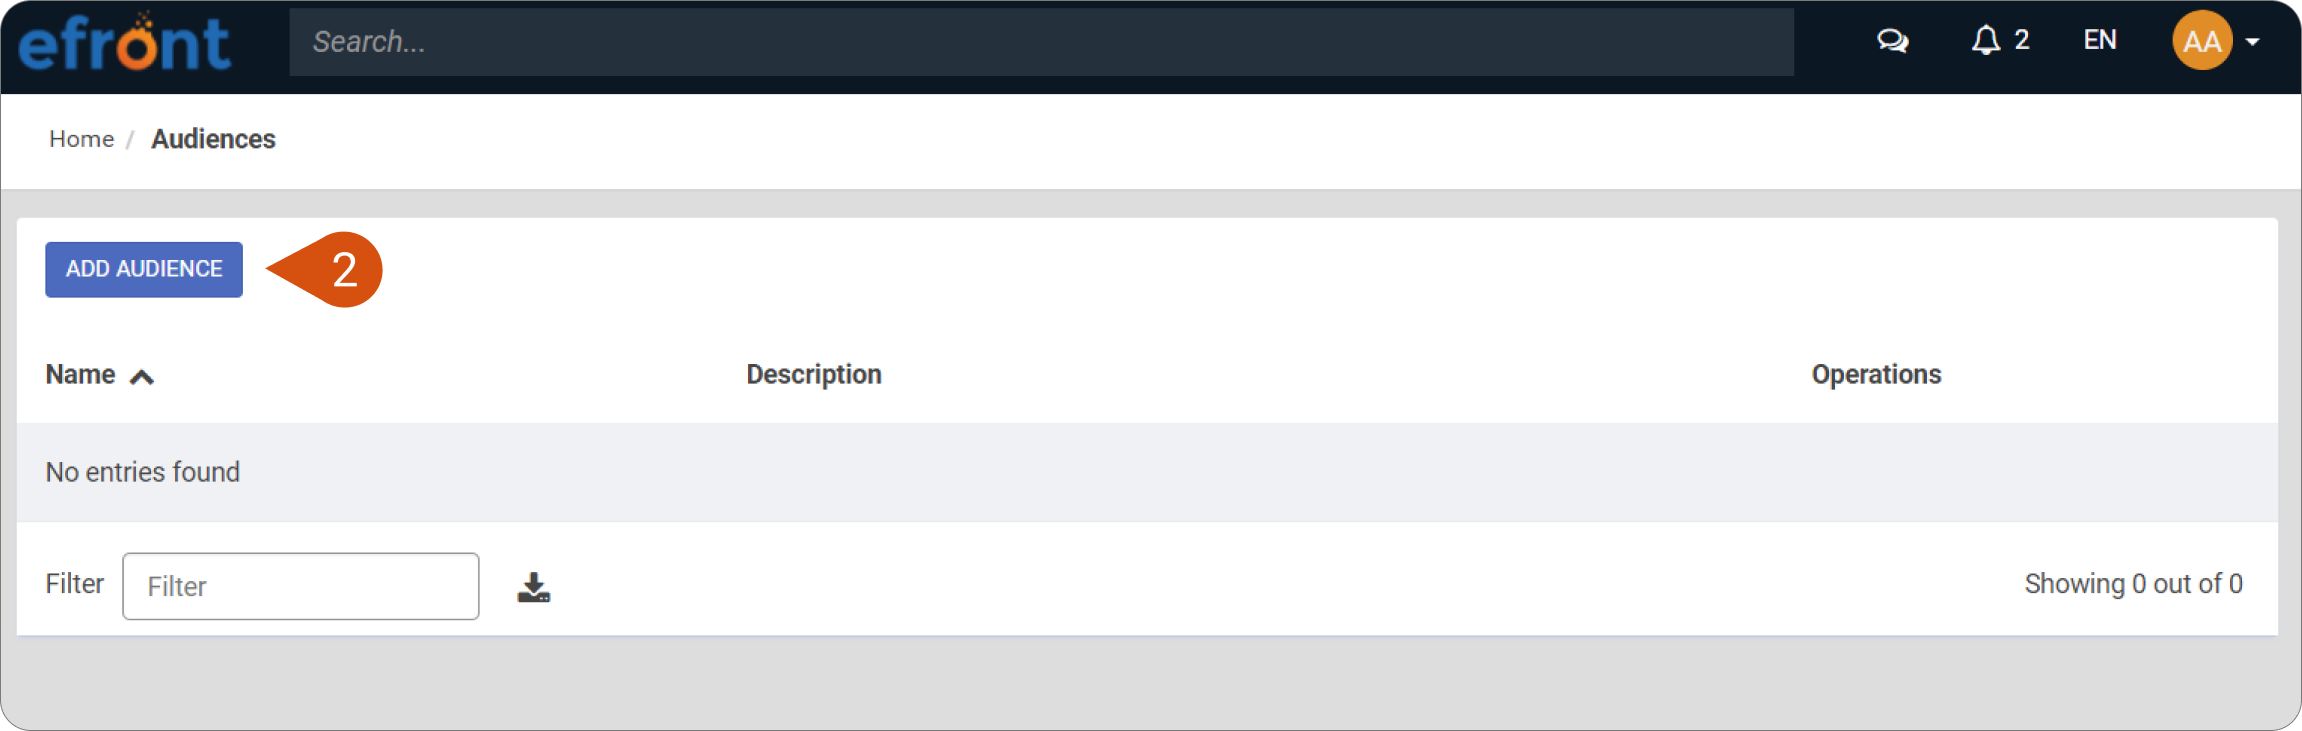
- Select Audiences (1) and then Add Audience (2).
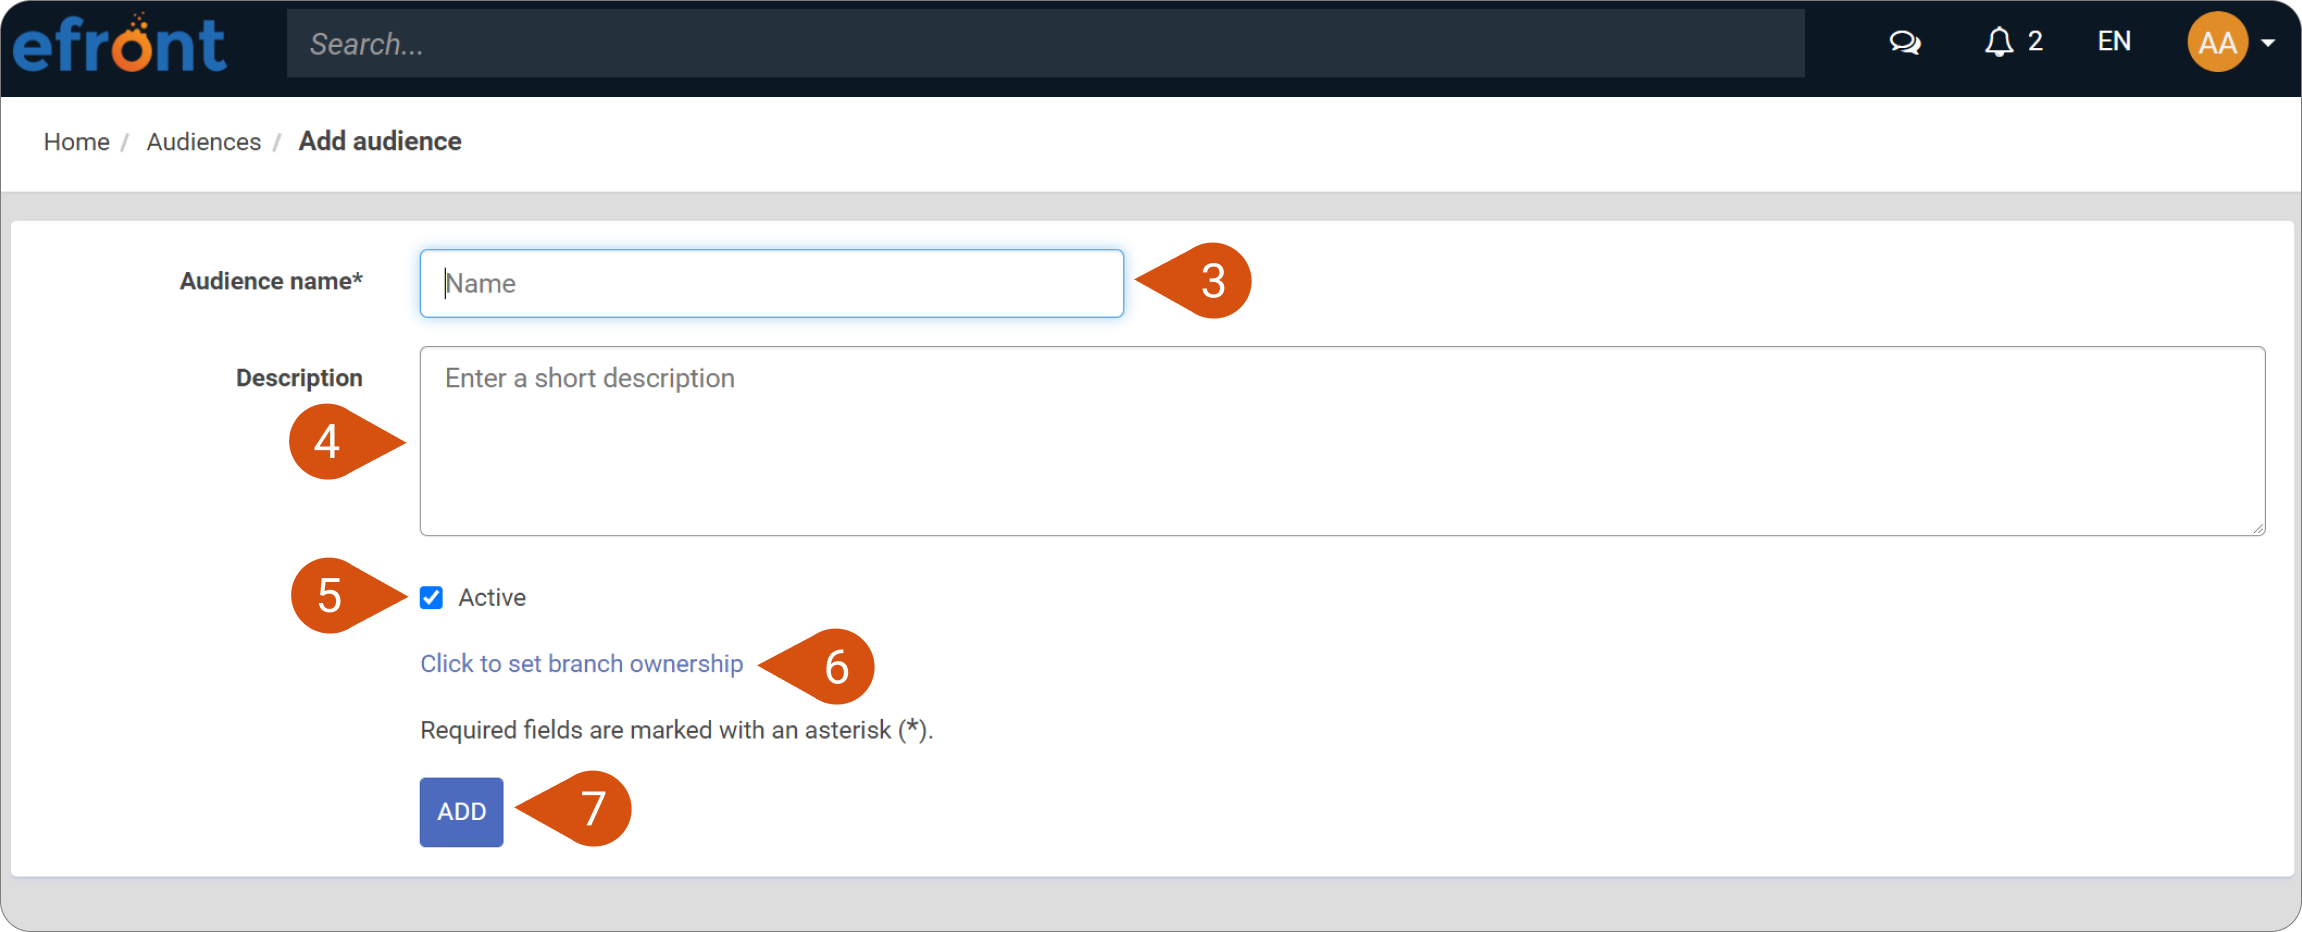
- Add a Name (3), Description (4) and make sure to set it as Active (5). If you want to assign the audience to a specific branch, select Click to set branch ownership (6) and choose a specific branch.
- Once you’re ready, click Add (7).
Now that you have created a new audience, you can define its conditions. These are the rules that apply to this audience in order to include or exclude particular users.
| Note: When an audience is created in a branch by a branch Administrator, only the users of that specific branch and its sub-branches can be added to it. Even if this audience is edited and modified by main Administrators later on, users will still be filtered according to the branch where the audience was created |
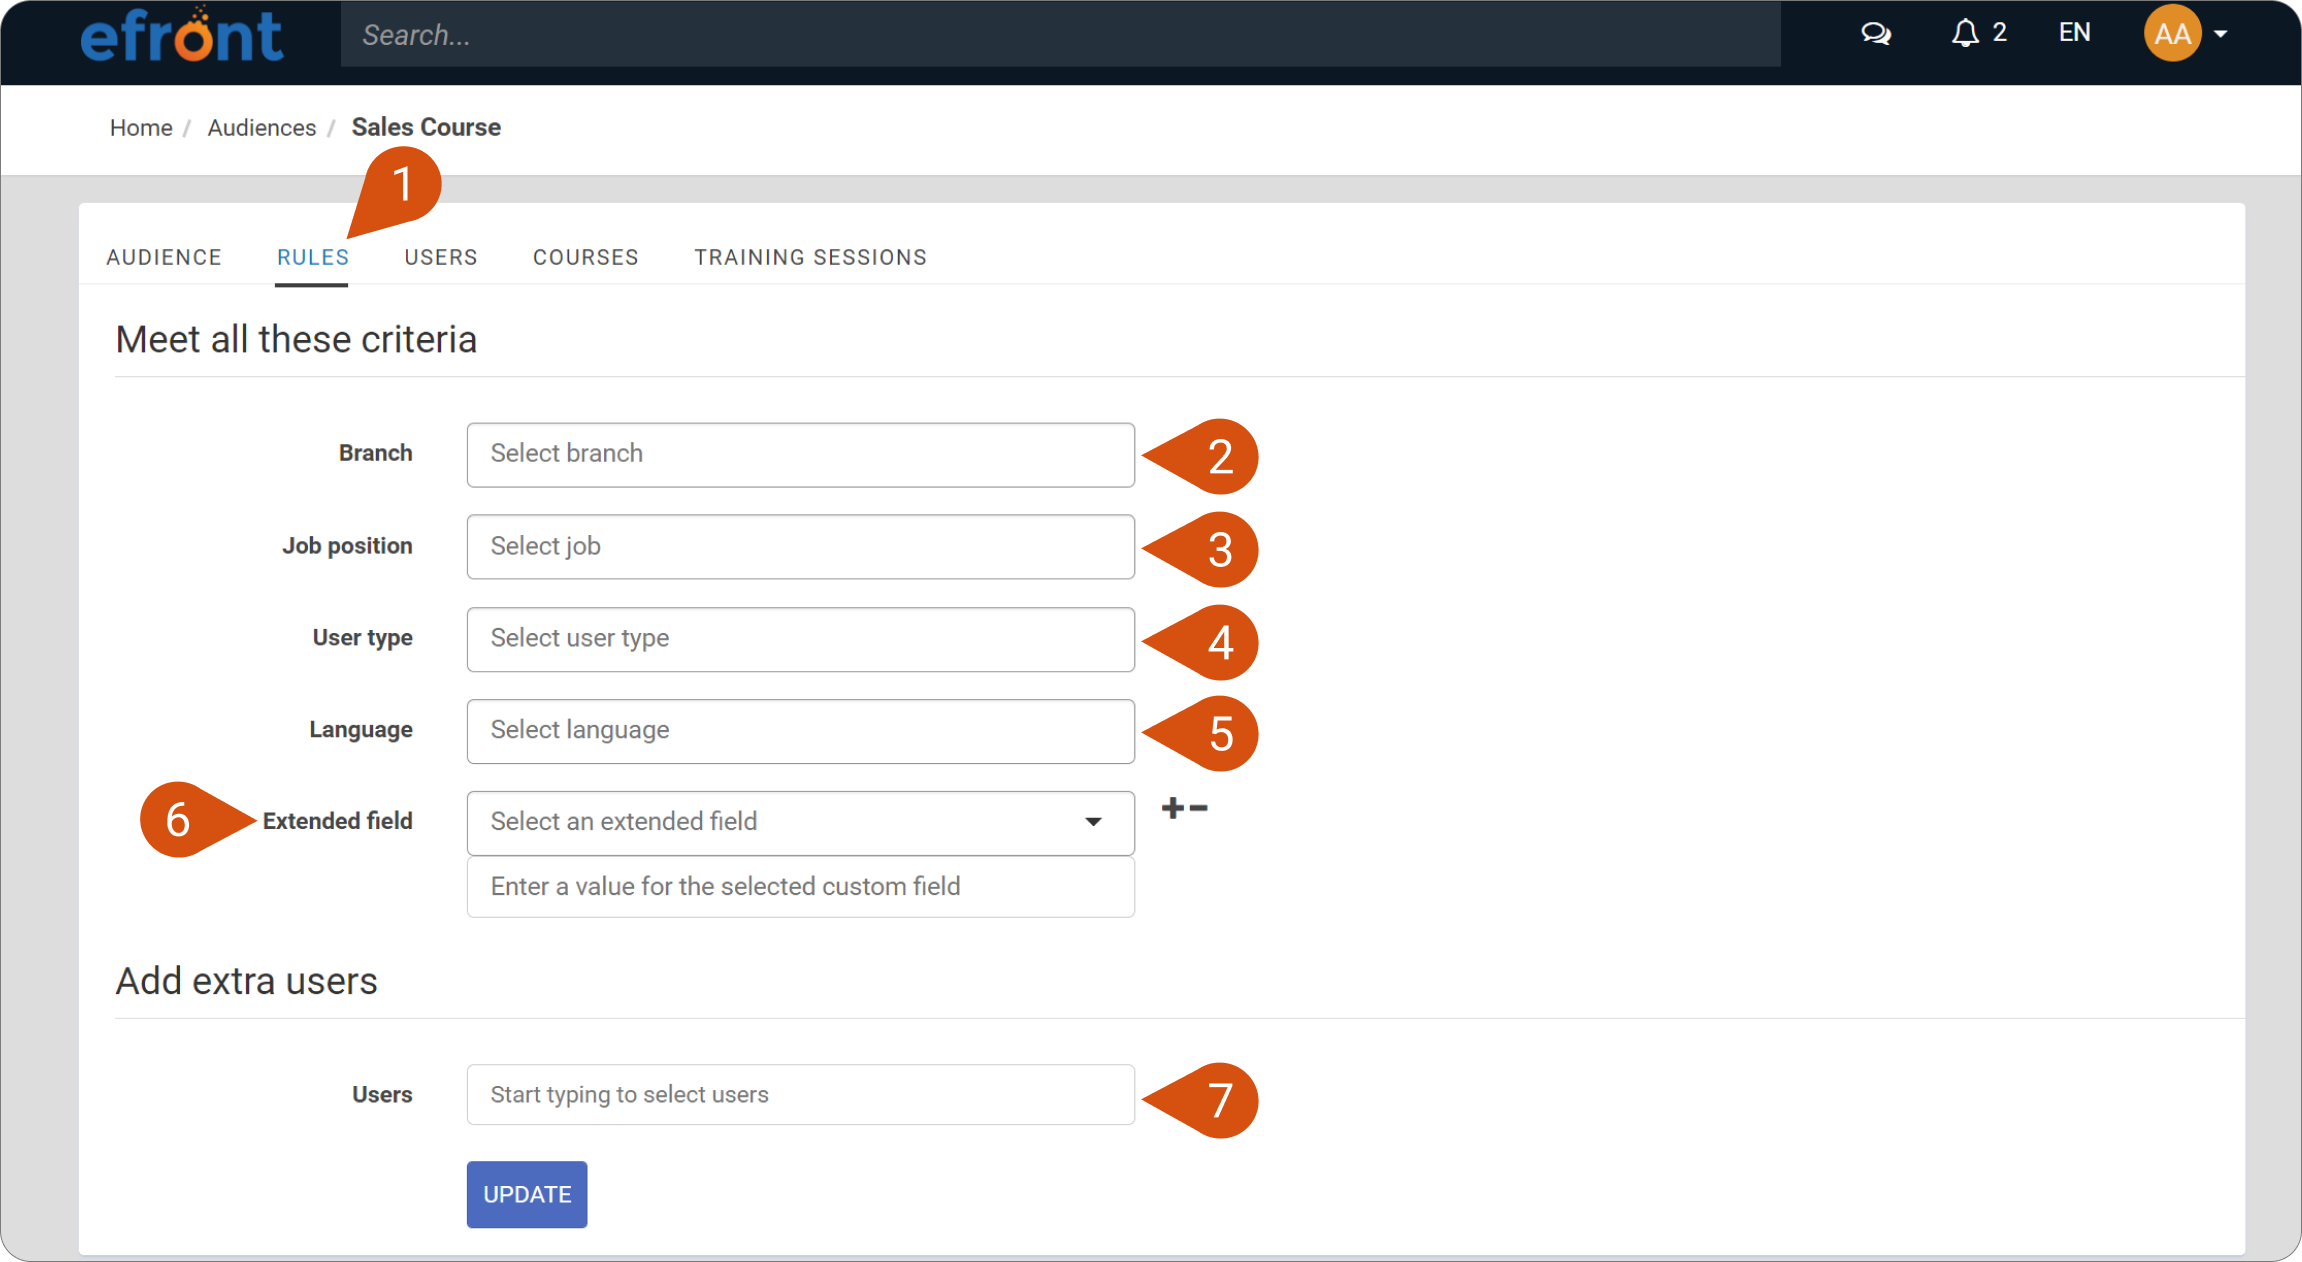
Changing the Audience Rules
To access the audience rules, select the audience you want to edit and then click Rules (1). The audience will consist of users that meet the selected criteria.
You can define rules such as:
- Branch (2): Select branches so that their users will be members of this audience.
- Job positions (3): Select job positions so that users with these job positions will be members of this audience.
- User type (4): Select members of this audience based on their user type in the system.
- Language (5): Select members of this audience based on their language.
- Extended field (6): Broaden your criteria based on the extended profile fields you have already predefined. Select the extended field and what value it should have in order to set users with this value as members of this audience.
- Users (7): Select specific users one by one to add them as members of this audience.
|
Note: The Rules section works in a way that, between the same criteria items, you have an OR rule applied, while, among different criteria, the AND rule is applied. Example: If the Branch field contains BranchX, BranchY, and BranchZ, while the Job position field contains Job1 and Job2, this means that the audience will have users belonging to either BranchX, BranchY, or BranchZ, and having as Job position Job1 or Job2. |
Assigning Courses and enrolling members in courses
Once you have set up the conditions for an audience, you can assign courses to this audience. To do so, select Courses (1). This will allow you to:
- Assign courses to this audience (2). Once you have done so, the courses you have assigned will be visible in these audience members’ catalog, where they can enroll in them if they choose to.
- Assign all members of this audience to the assigned courses by clicking the “Enroll Members to Courses” button (3).
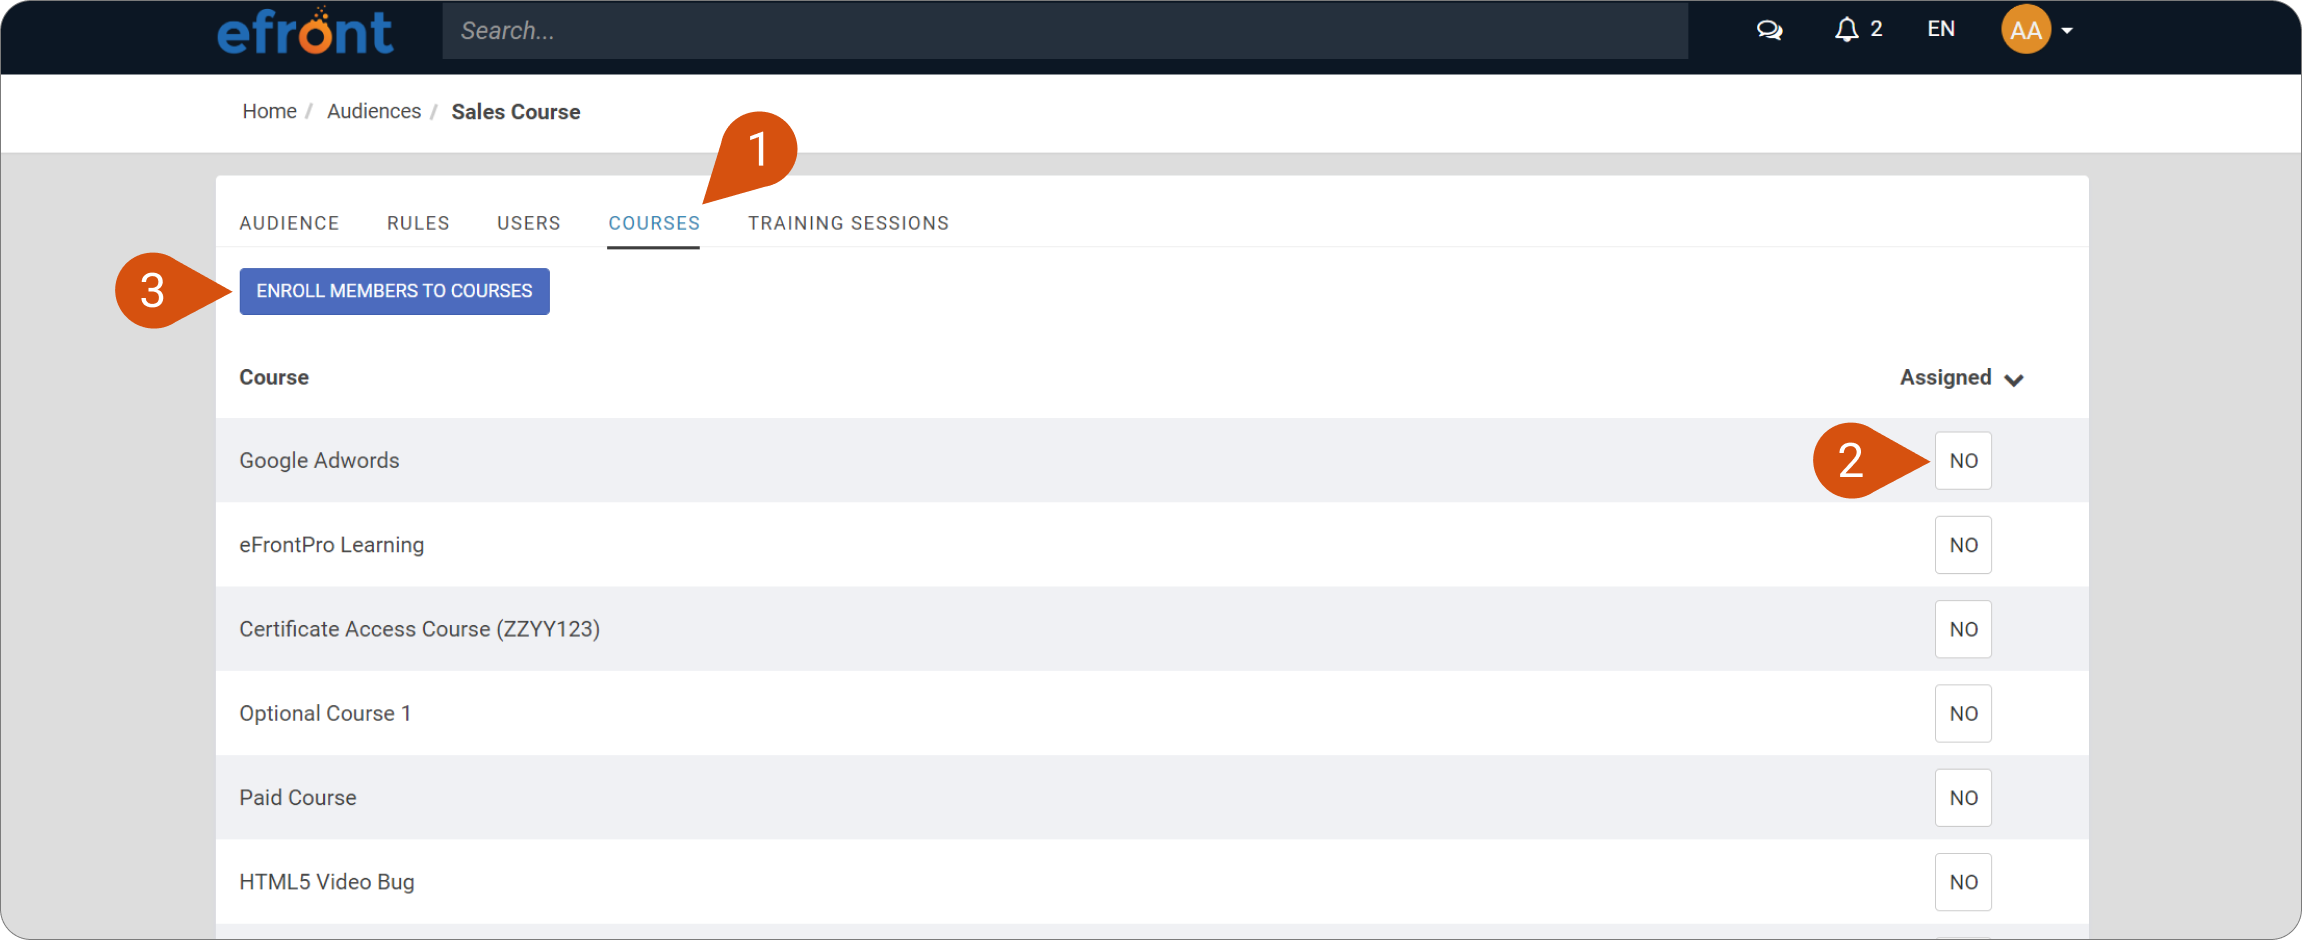
| Note 1: The Enroll Members to Courses button (3) will enroll all active users present in the audiences in the courses. This action will have no effect on inactive users. |
| Note 2: After clicking the Enroll Members to Courses button (3), you will be prompted to select if you want to enroll all audience members except members who have a Failed, Cancelled, or Expired status, or enroll all audience members regardless of their course status. |
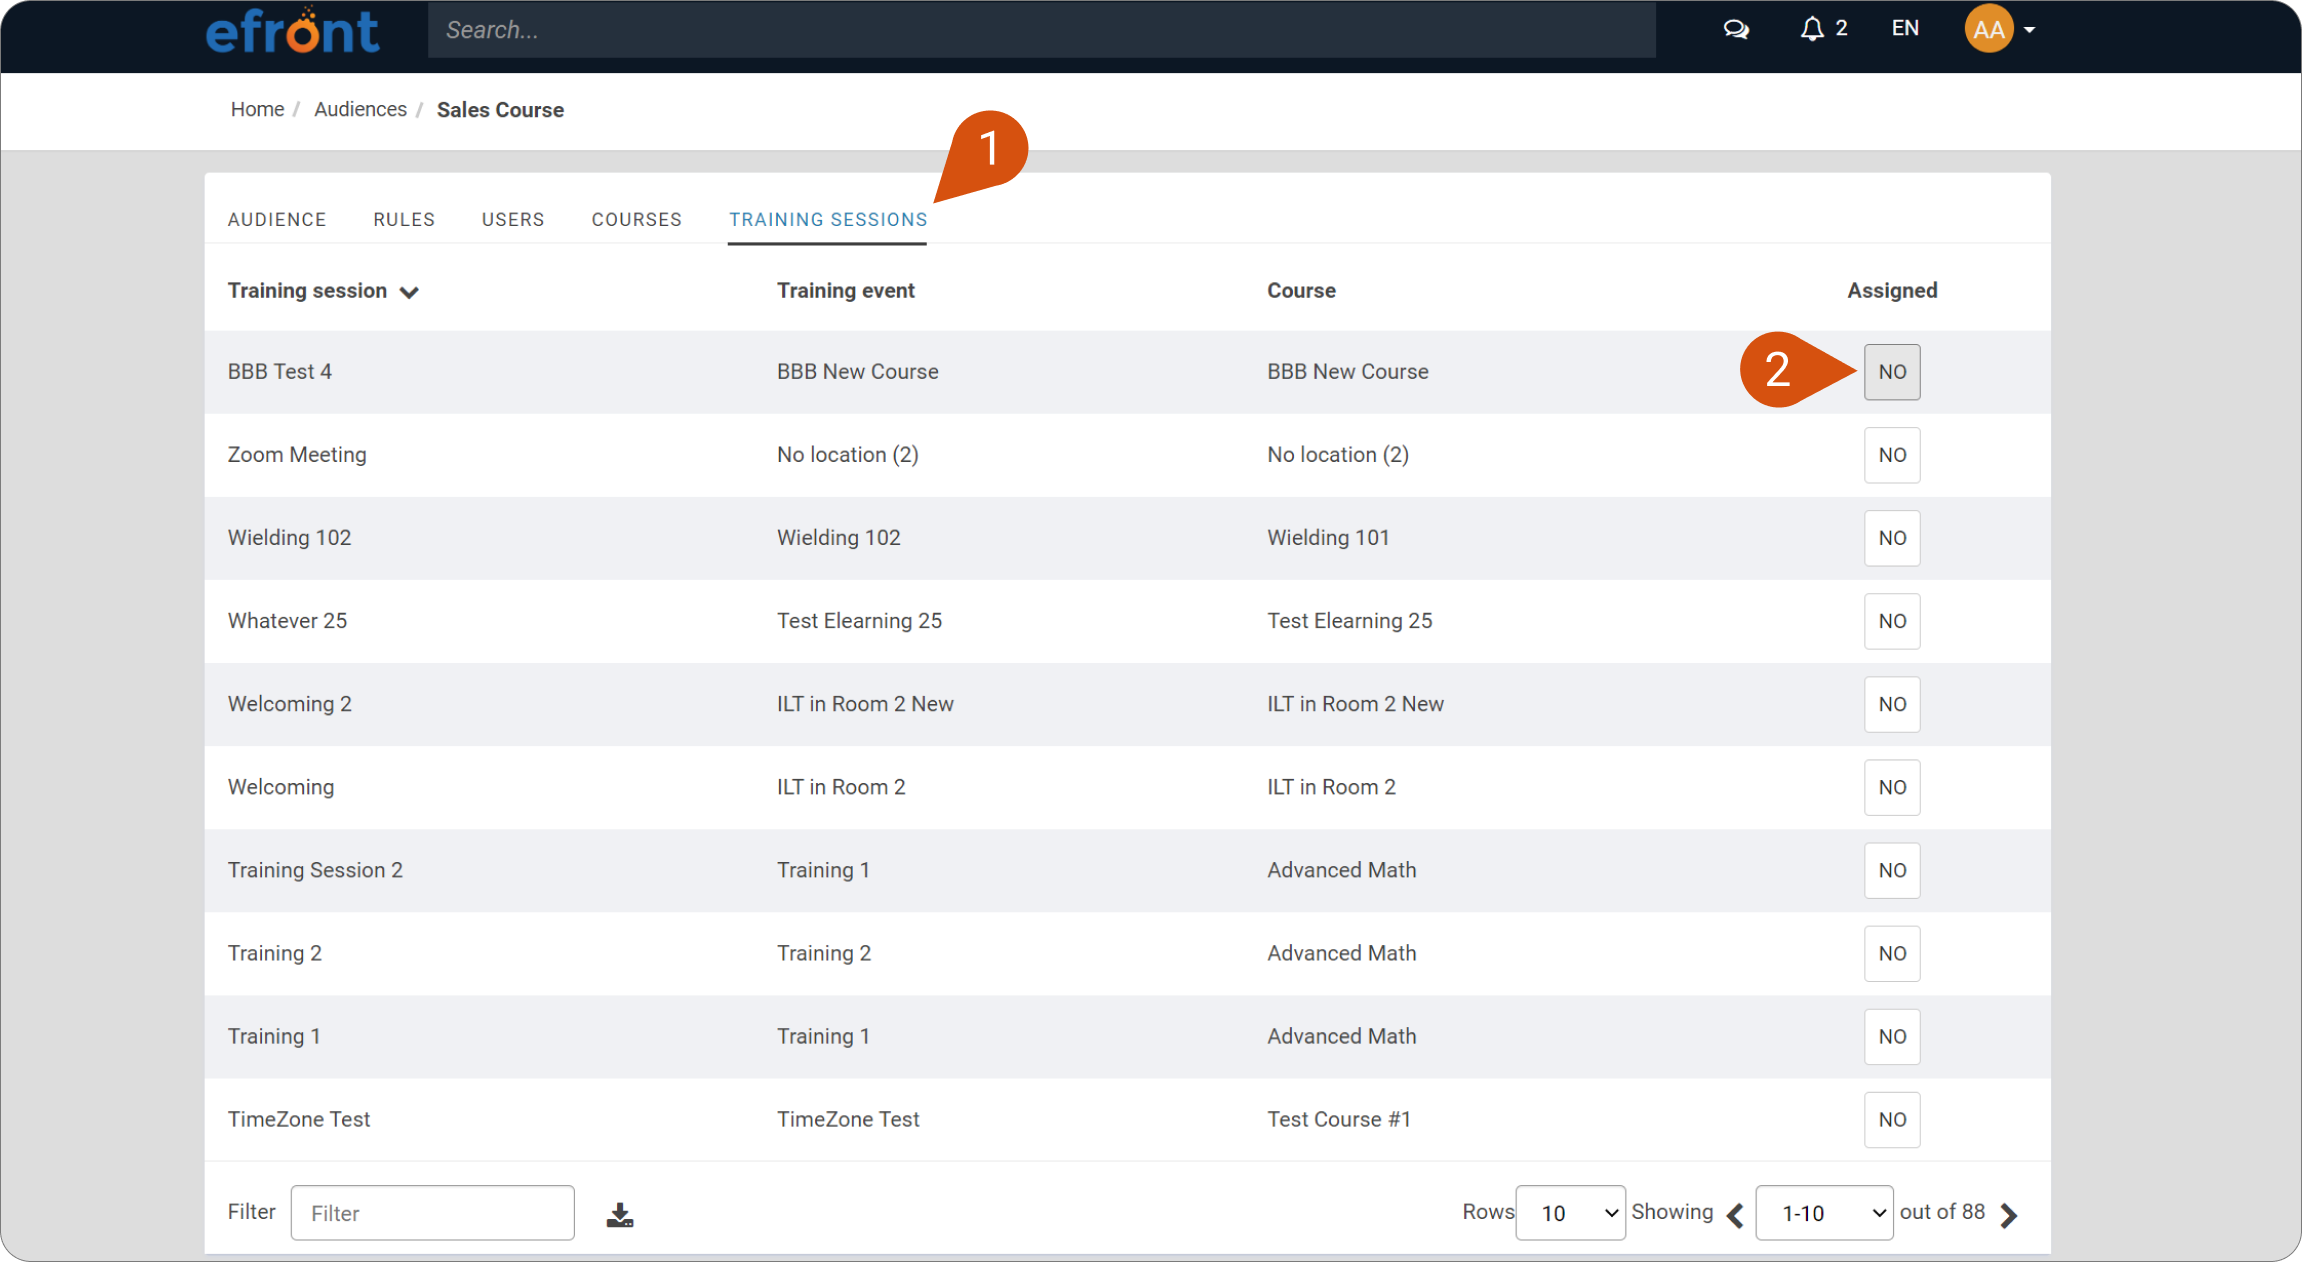
Assigning Training sessions
Lastly, you can assign training sessions to an audience. To do so, select the Training Sessions tab (1), and then select the training session you want to assign the audience members to (2). When you assign a training session, all of the members of the audience will be able to view this training session in their catalog.