Apart from your main portal, eFront also lets you customize the look and feel of each one of your branches. Here's a brief guide on creating unique themes and homepages for your branches.
| Note: If you haven't created a custom theme yet, create one as described in this article. |
Step 1:Assign a theme to a branch
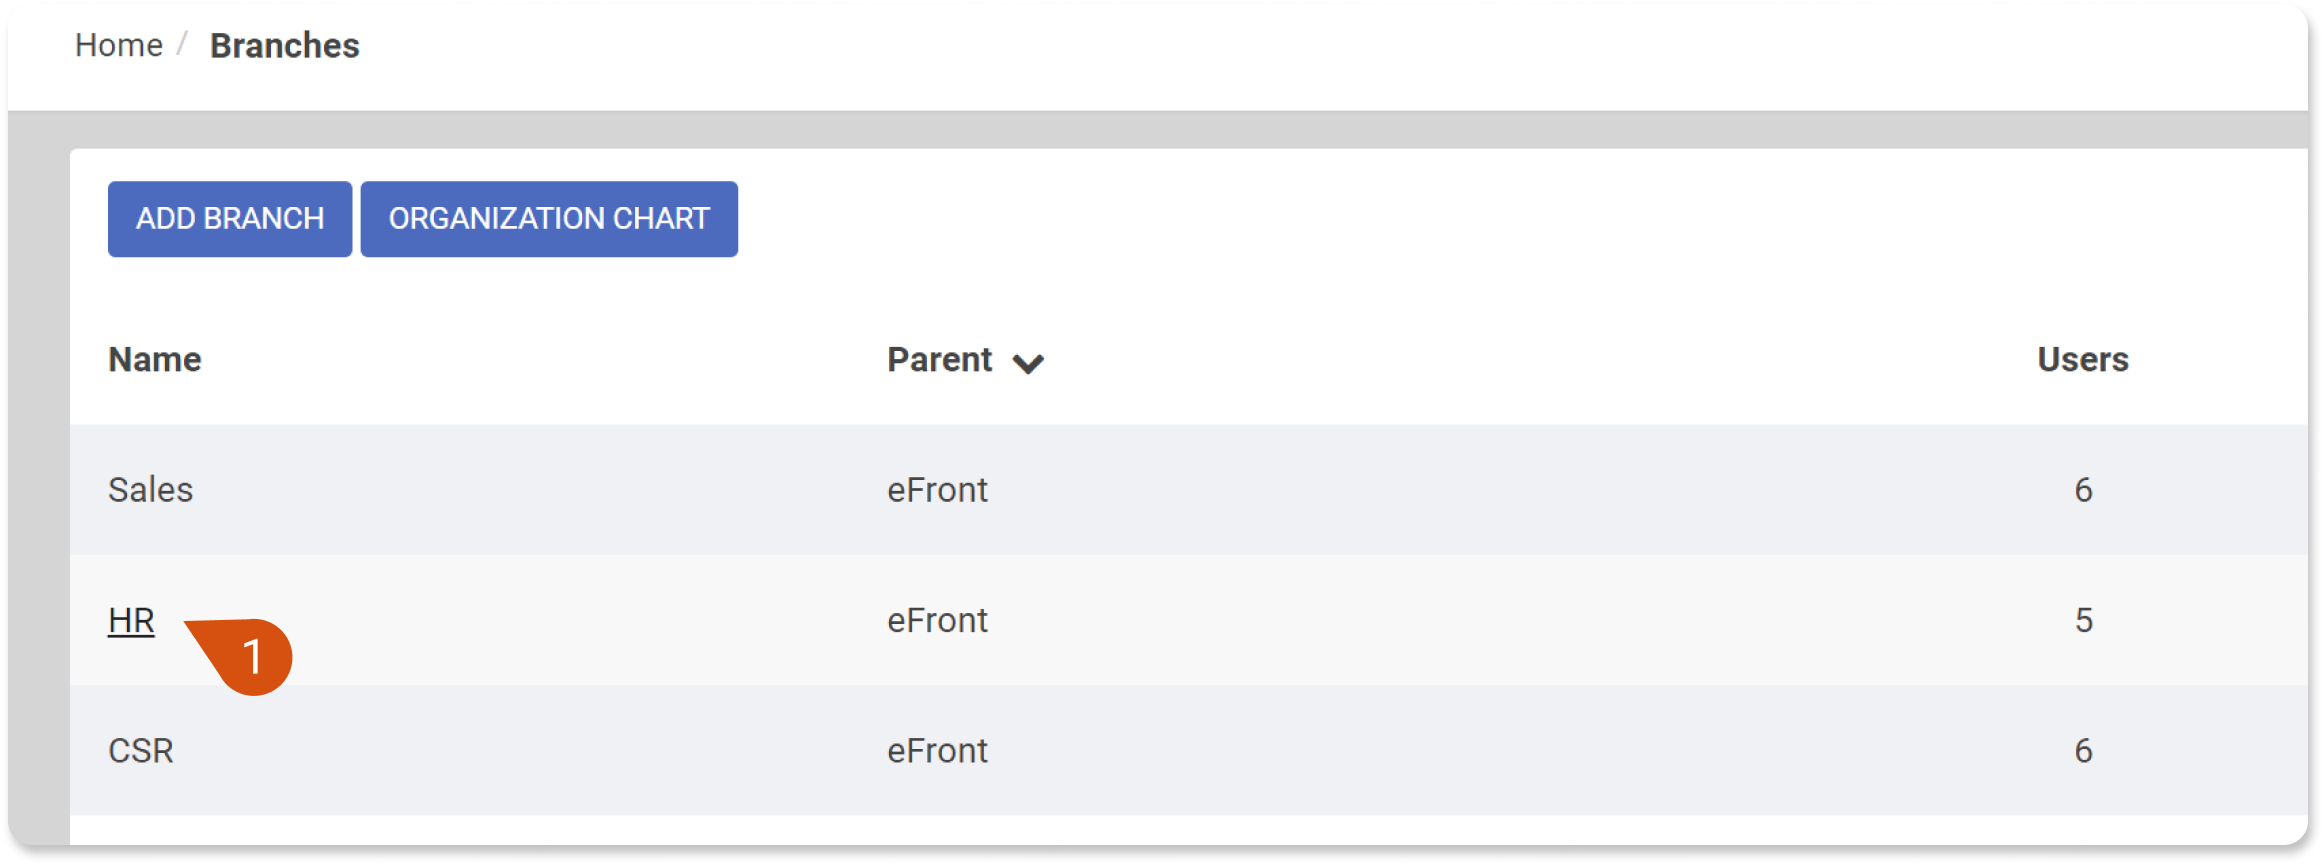
1. Sign in to your eFront account as Administrator and go to Home > Branches.
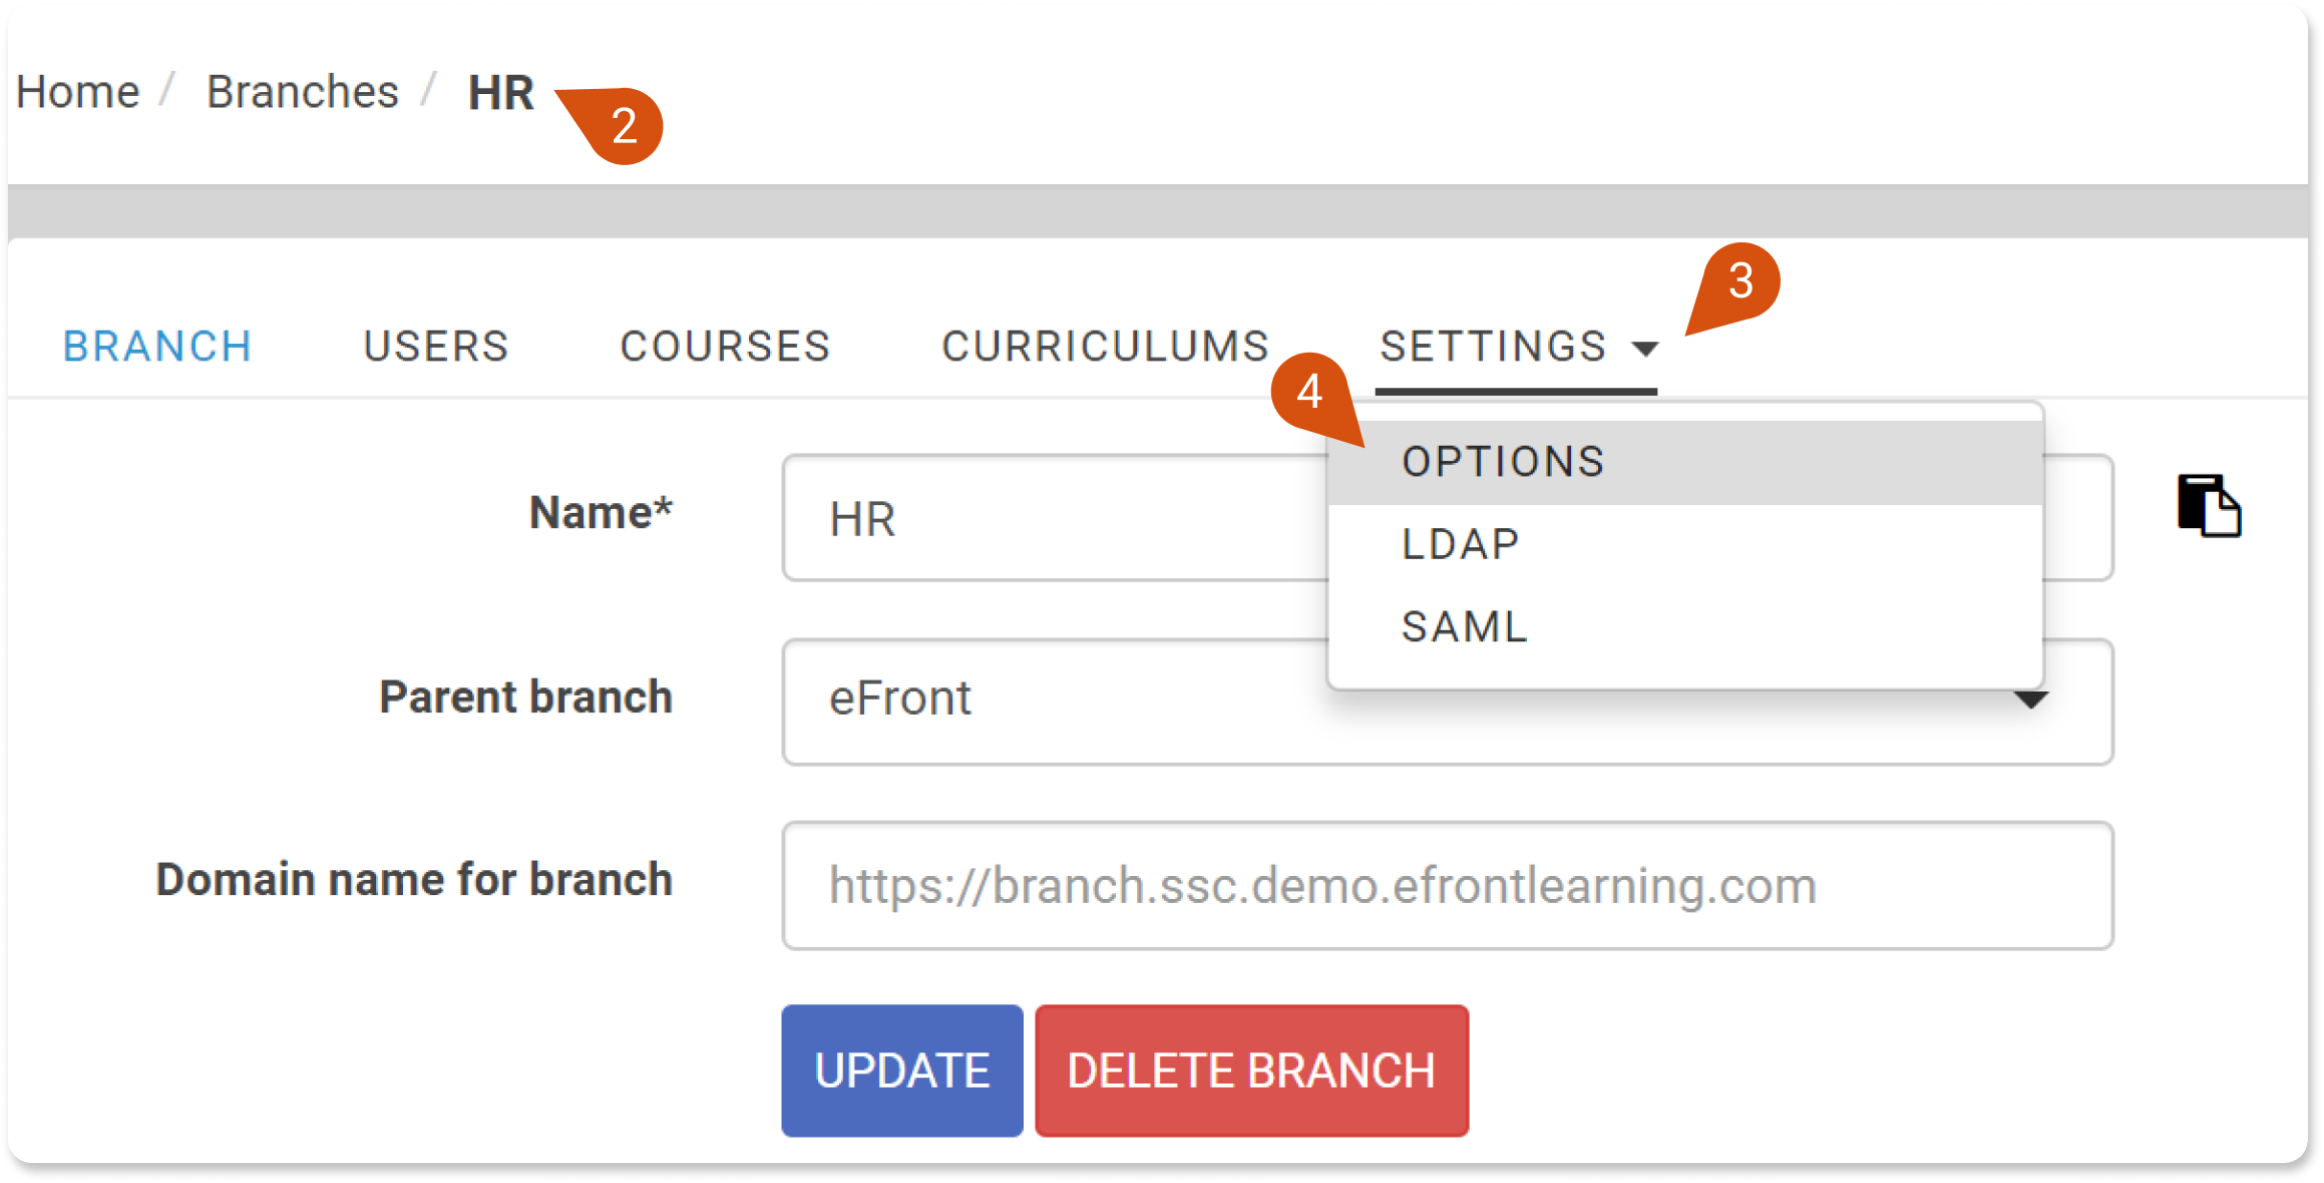
2. Click a branch (e.g., HR) (1) to go to the Branch page.
3. On the branch page (2), click the Settings (3) tab and, from the drop-down list, choose Options (4).
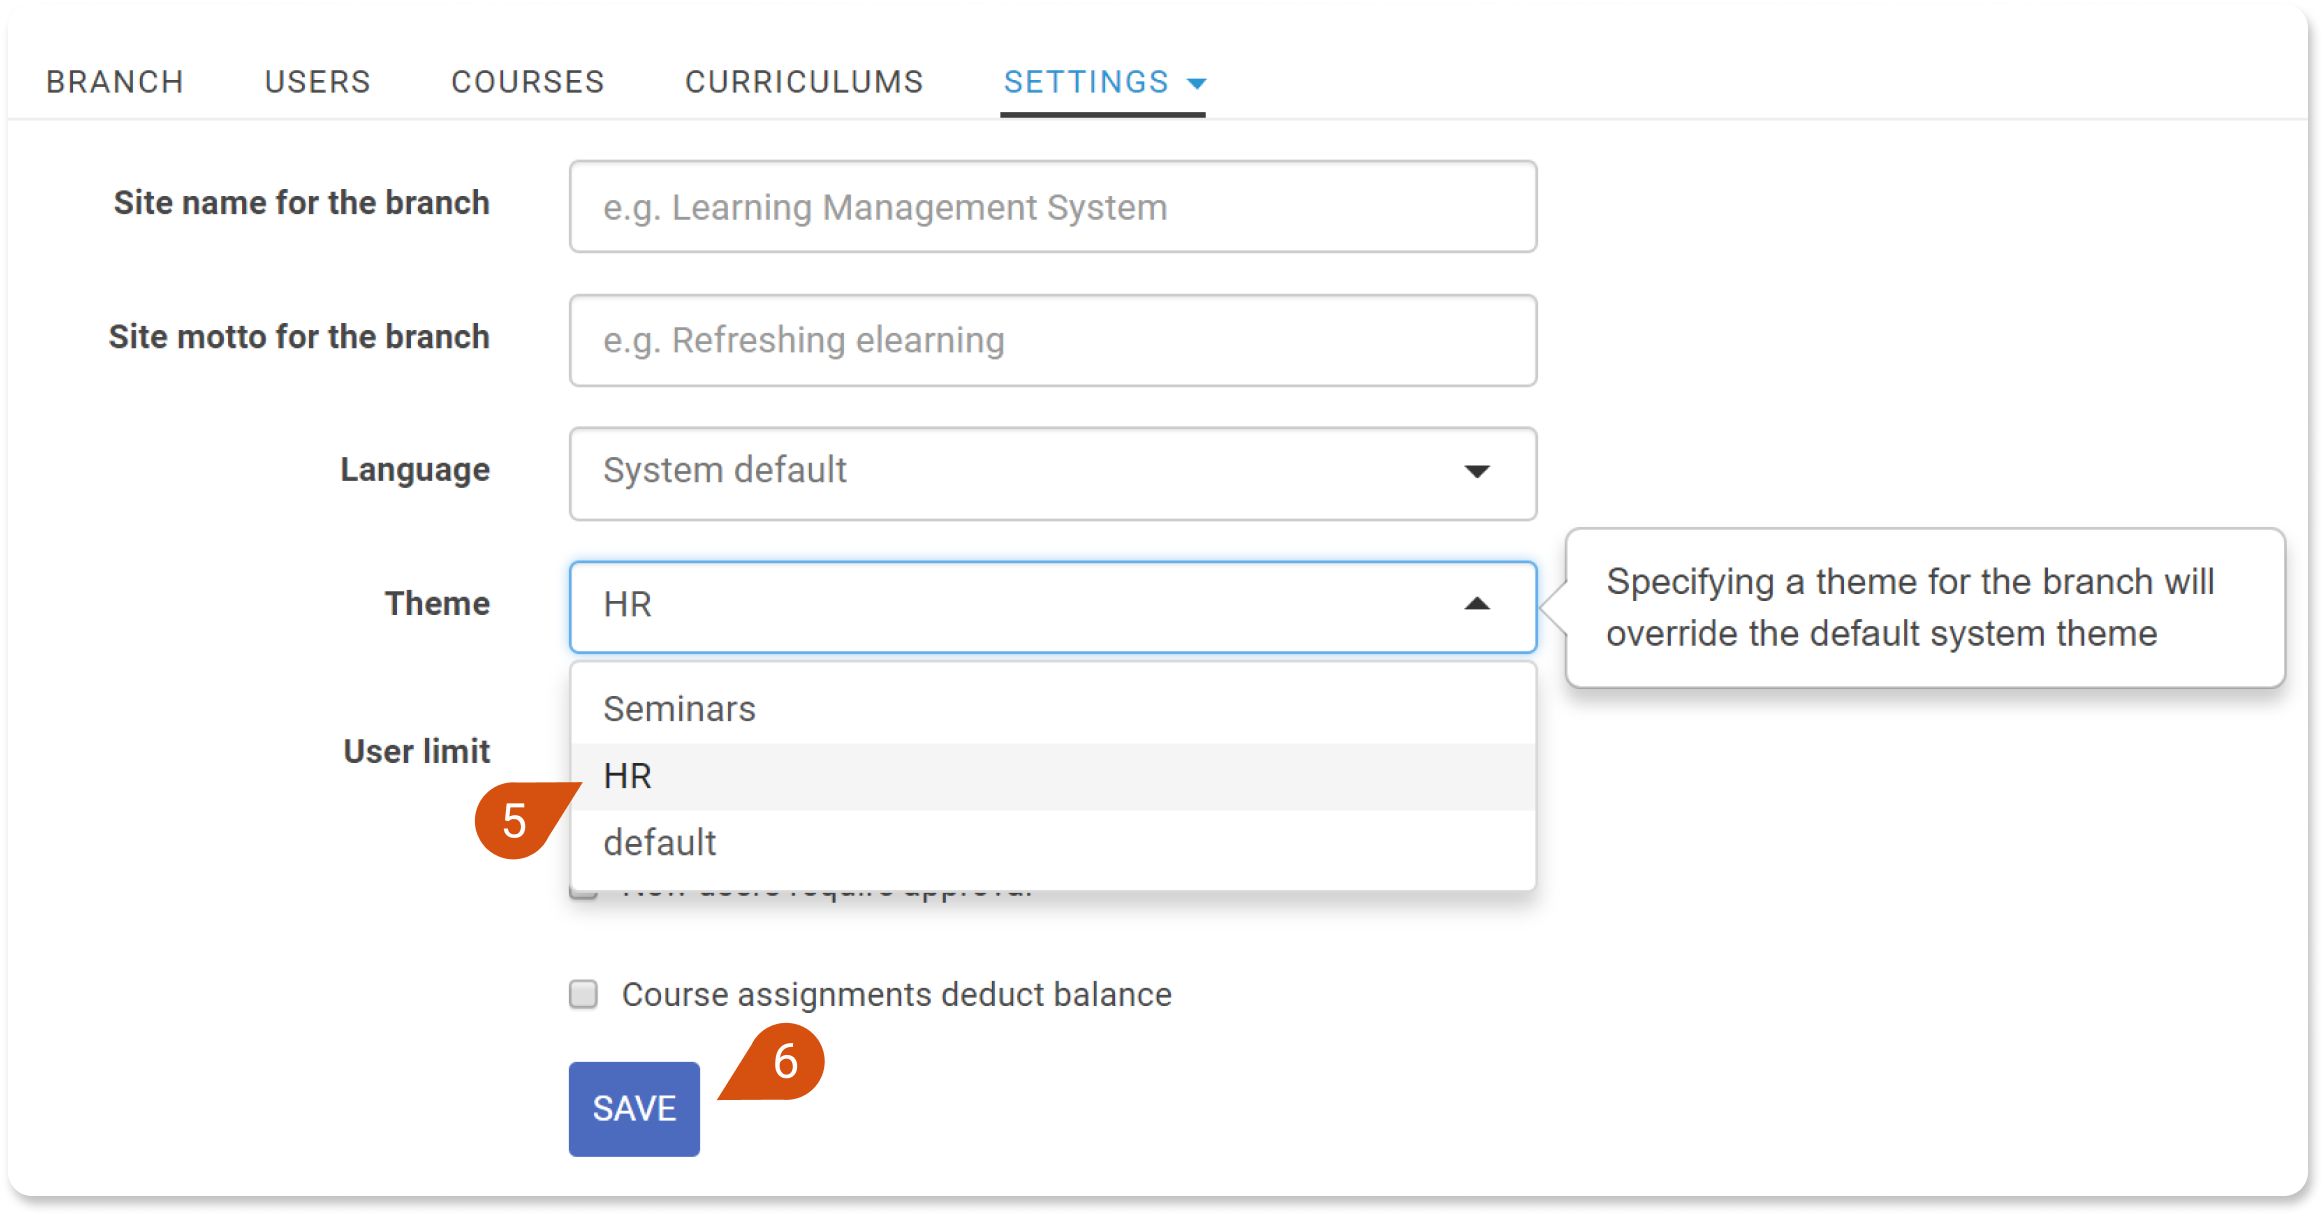
4. From the Theme drop-down list, choose one of your custom themes for the current branch (5).
5. Click Save (6) and your branch has a new theme.
Step 2: Set Branch ownership
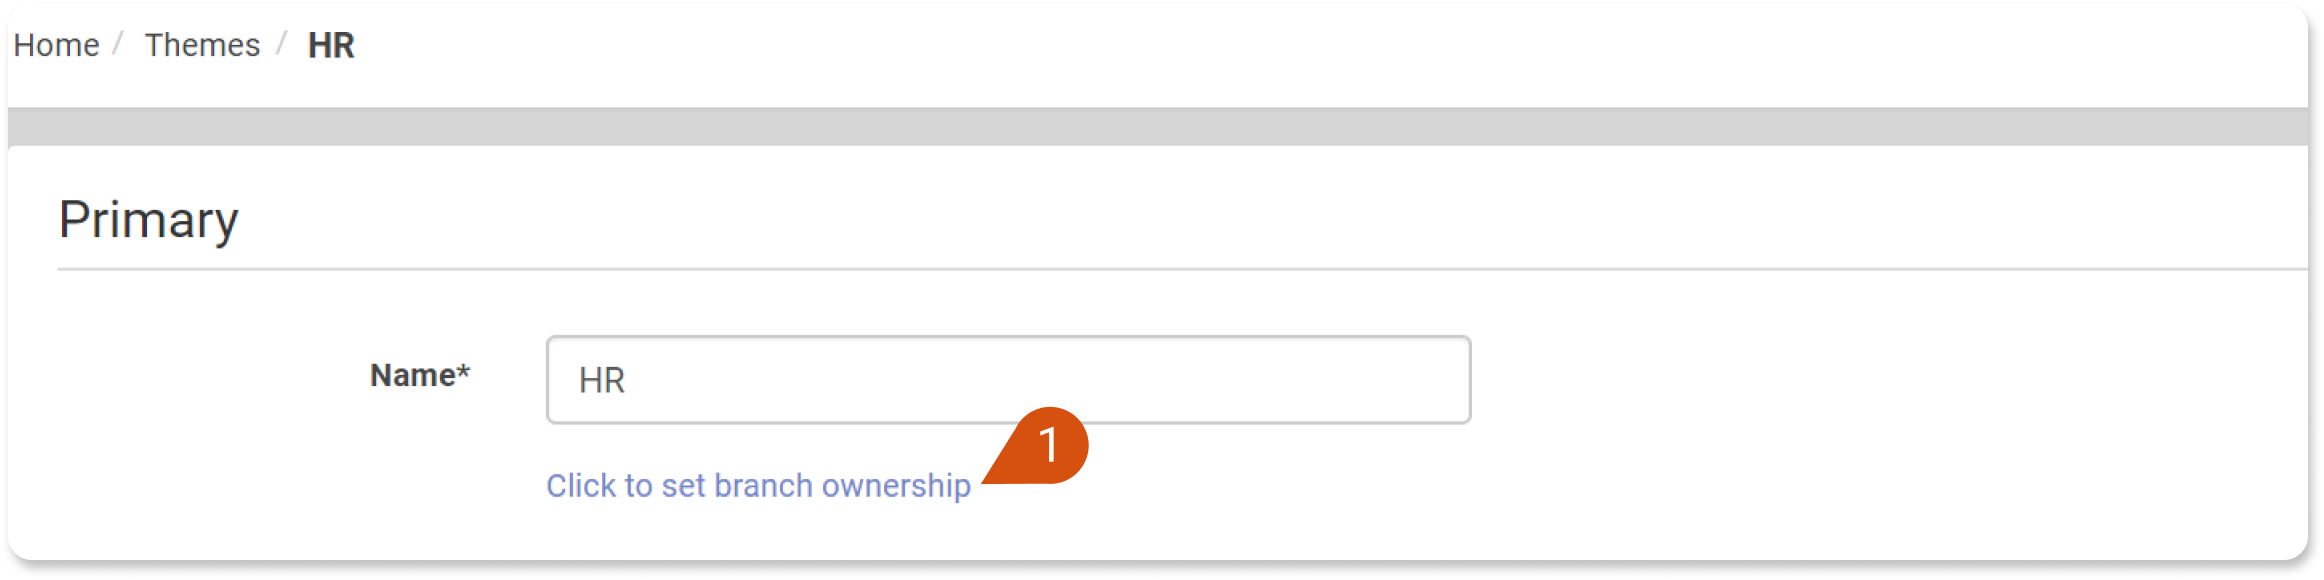
1. Go to Home > Themes.
2. Go to the Change Theme tab and click the theme you selected above.
3. Below the Name field, click Click to set branch ownership (1).
4. Click the Ownership field and, from the drop-down list, choose the branch you want the theme to be "owned by" (2). Now, the theme can be used exclusively on the specified branch and its sub-branches.
| Note: When no branch ownership is set for a theme, the theme is available to all branches. |
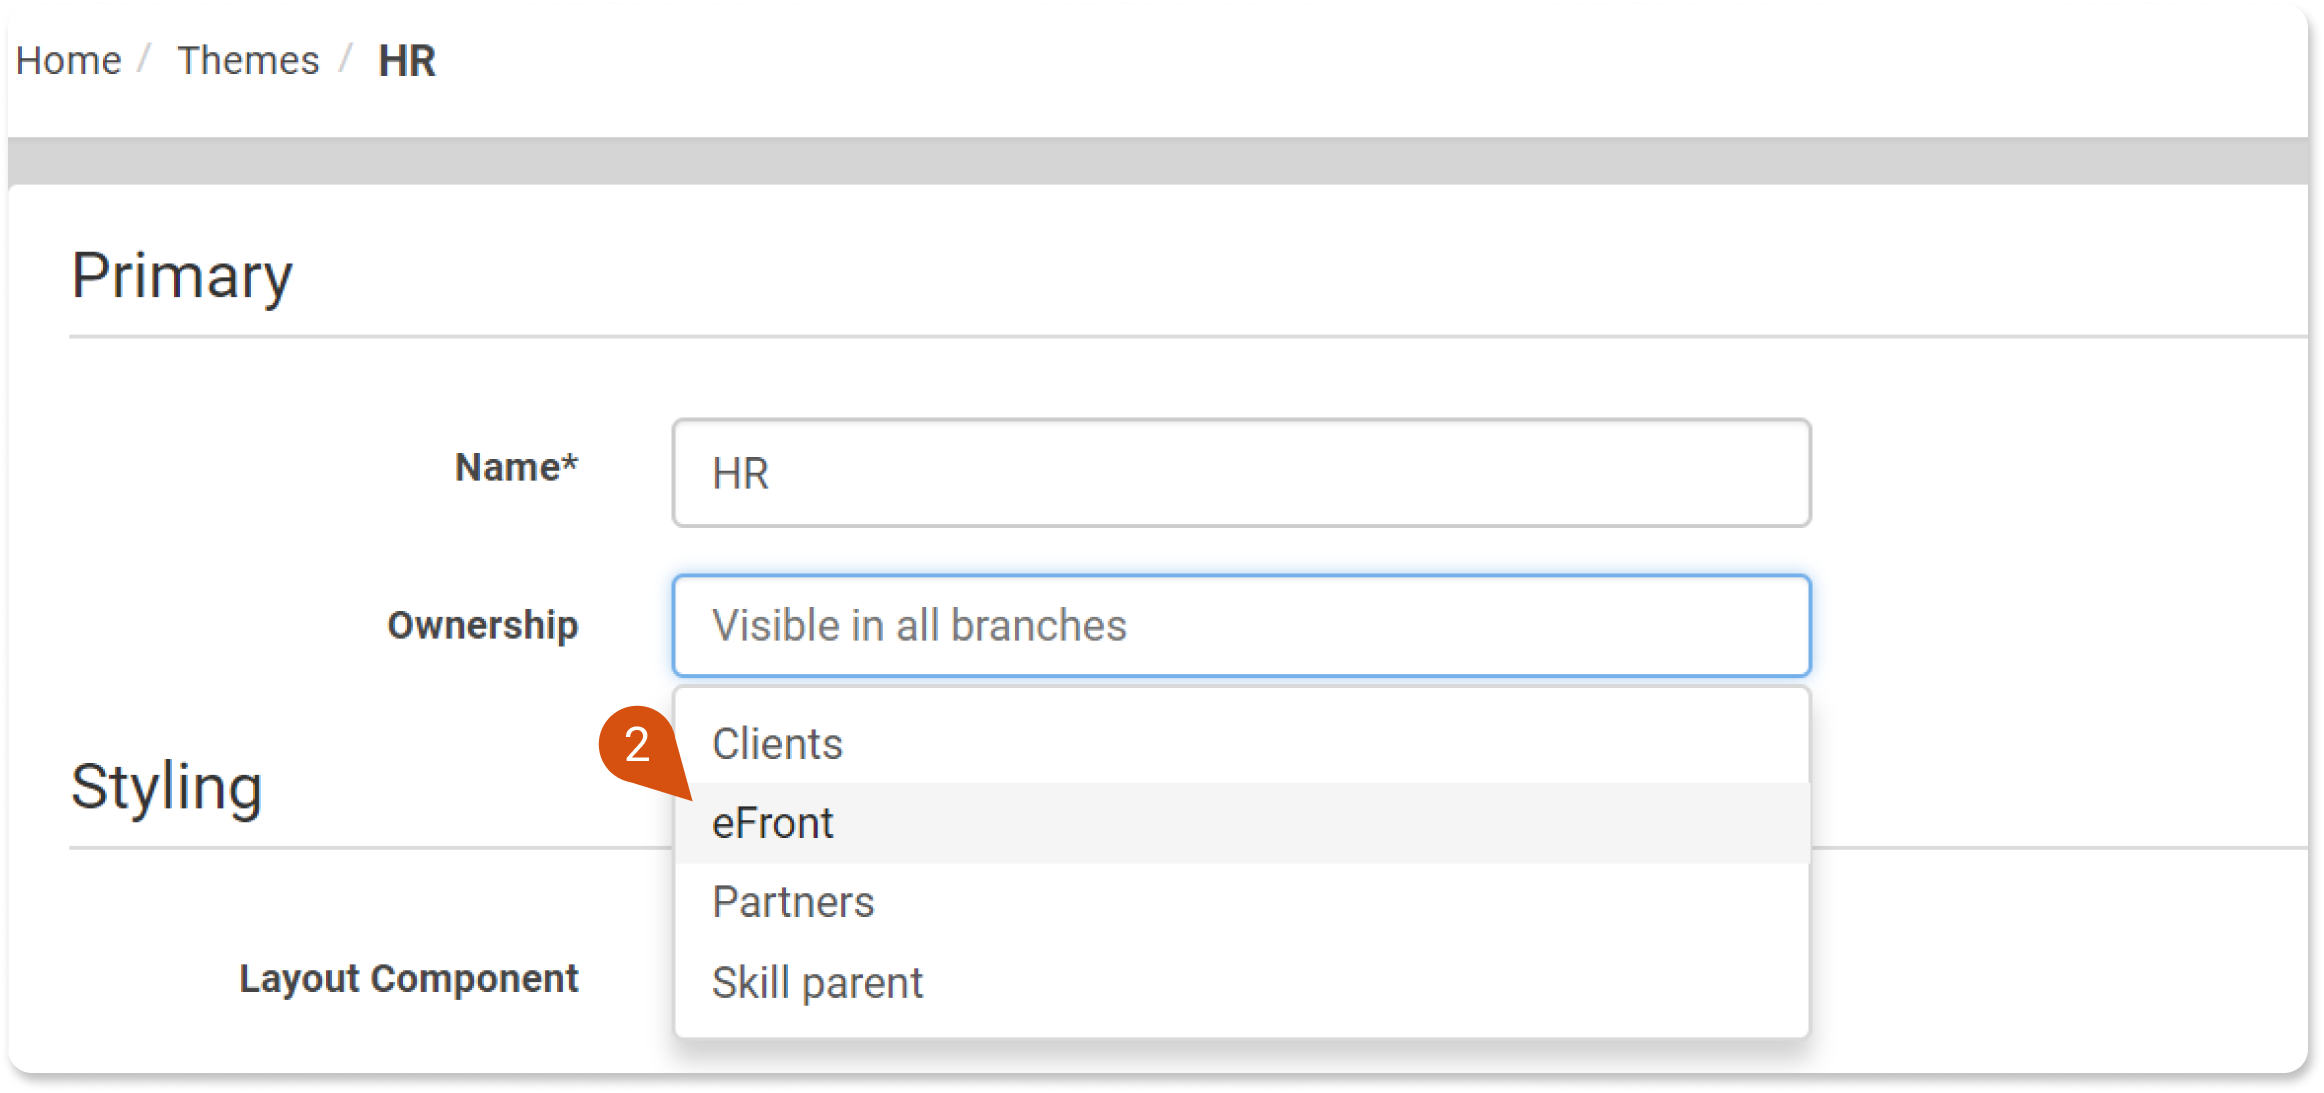
| Note: Setting branch ownership is not the same as assigning and activating a theme for a branch. Instead, it's making a theme exclusively available for use to the specified branch. It's up to the branch administrator to choose and activate that theme for their branch and its sub-branches. |
Step 3: Customize the Branch homepage
1. Go to Home > Themes.
2. Click the drop-down arrow (1) on the No Branch button and choose a branch to create a homepage for (2).
| Note: If you can't see a No Branch button, uncheck the Override branches layouts checkbox (3). When the Override branches layouts option is enabled your changes apply to all branches. |

After choosing a branch you see the branch name on the formerly No Branch button (4). Now, when you click Push Live (5), your changes apply exclusively to the specified branch.
| Note: For more on how to use the Site Builder see this article. |
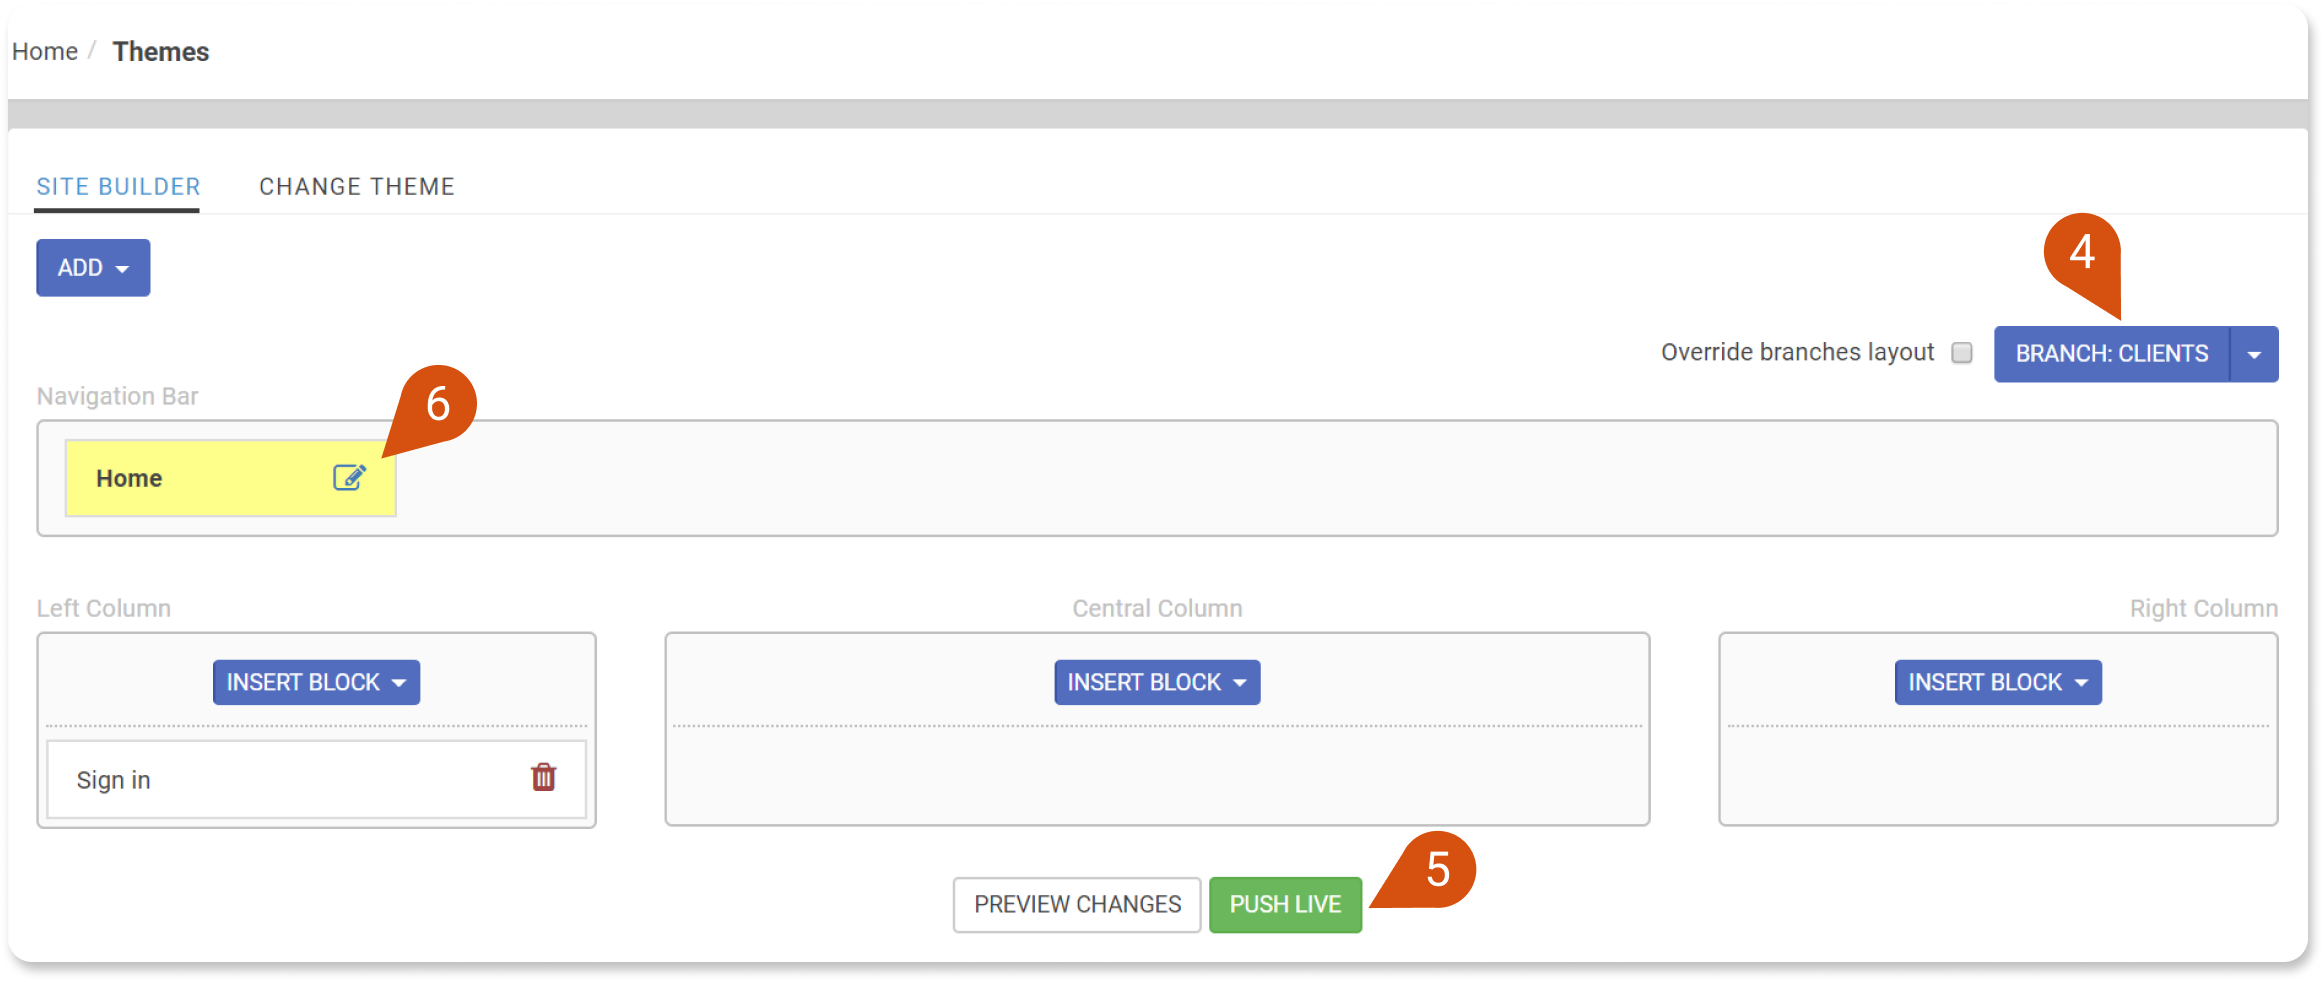
3. Click Home (6). Add a Description and a set of Keywords to your branch homepage, and click Update.
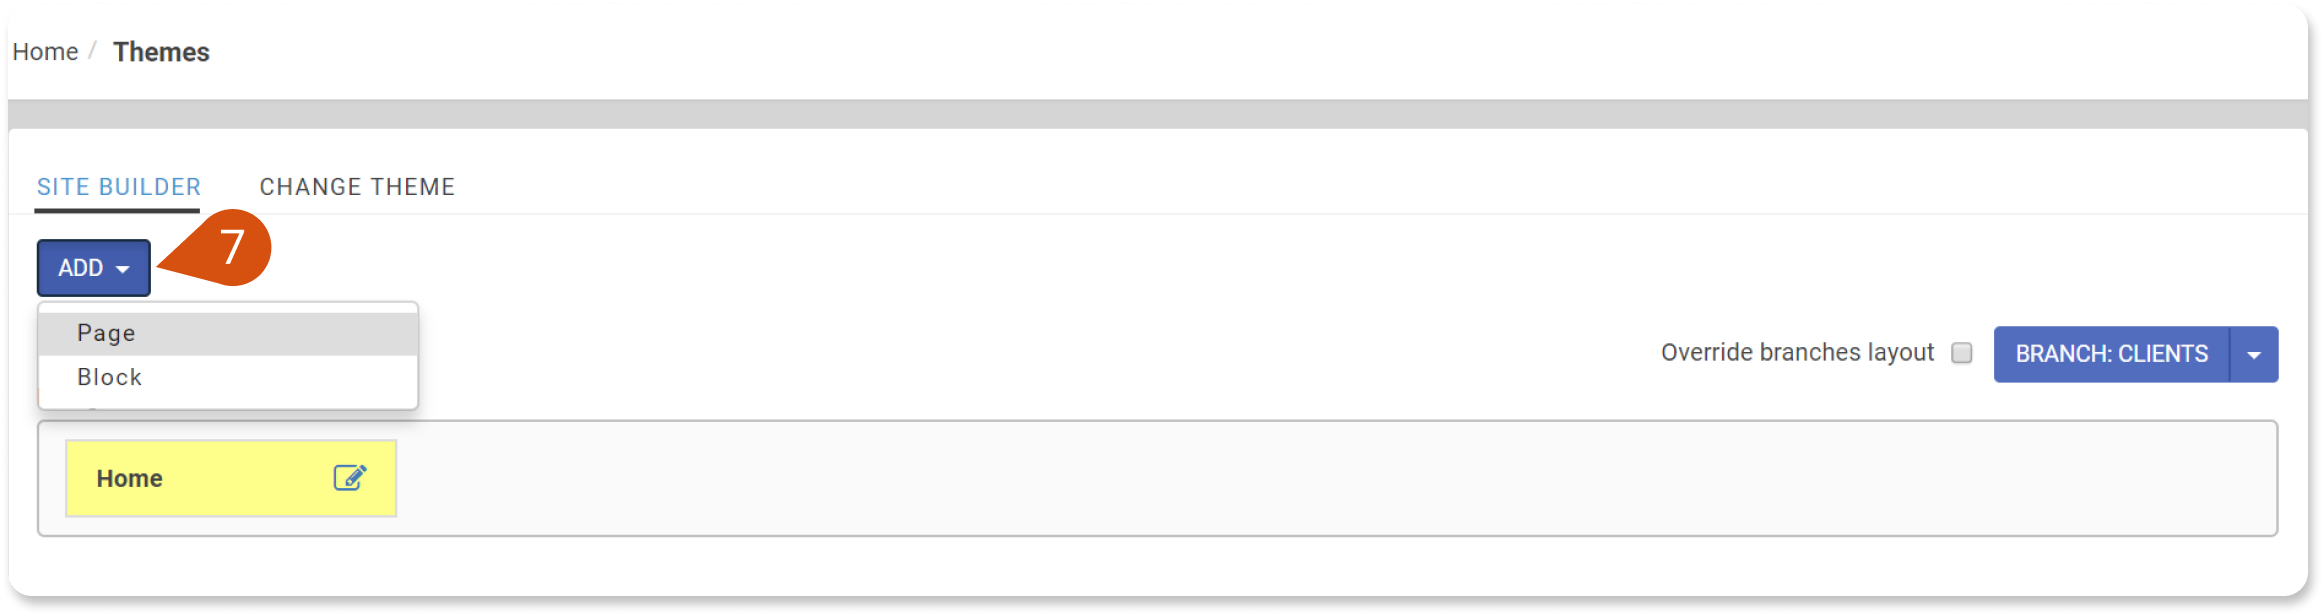
4. Click Add (7) to add new elements to your branch homepage.
5. Click Preview Changes to check if your new homepage looks like you intended and click Push Live to publish your changes.
| Note: To learn how to use a different logo for each branch see this article. See the last section of this article, instead, in case you'd like to add a custom JavaScript or a widget, or embed a code to a specific branch. Each code added to a theme will apply to all branches (and subbranches) where that specific theme is in use. |