'Auto Sync' is a unique eFront feature that allows for automatic data synchronization for a number of its modules through the use of plain .csv and JSON files.
The current list of supported modules includes:
- Users
- Courses
- Lessons
- Locations
- Training Sessions
- Branches
- Jobs
- Groups
- Skills
- Audiences
- Course Assignments
- Curriculum Assignments
- Lesson Progress
- Training Session Assignments
- Skill Assignments
- Job Assignments
- Group Assignments
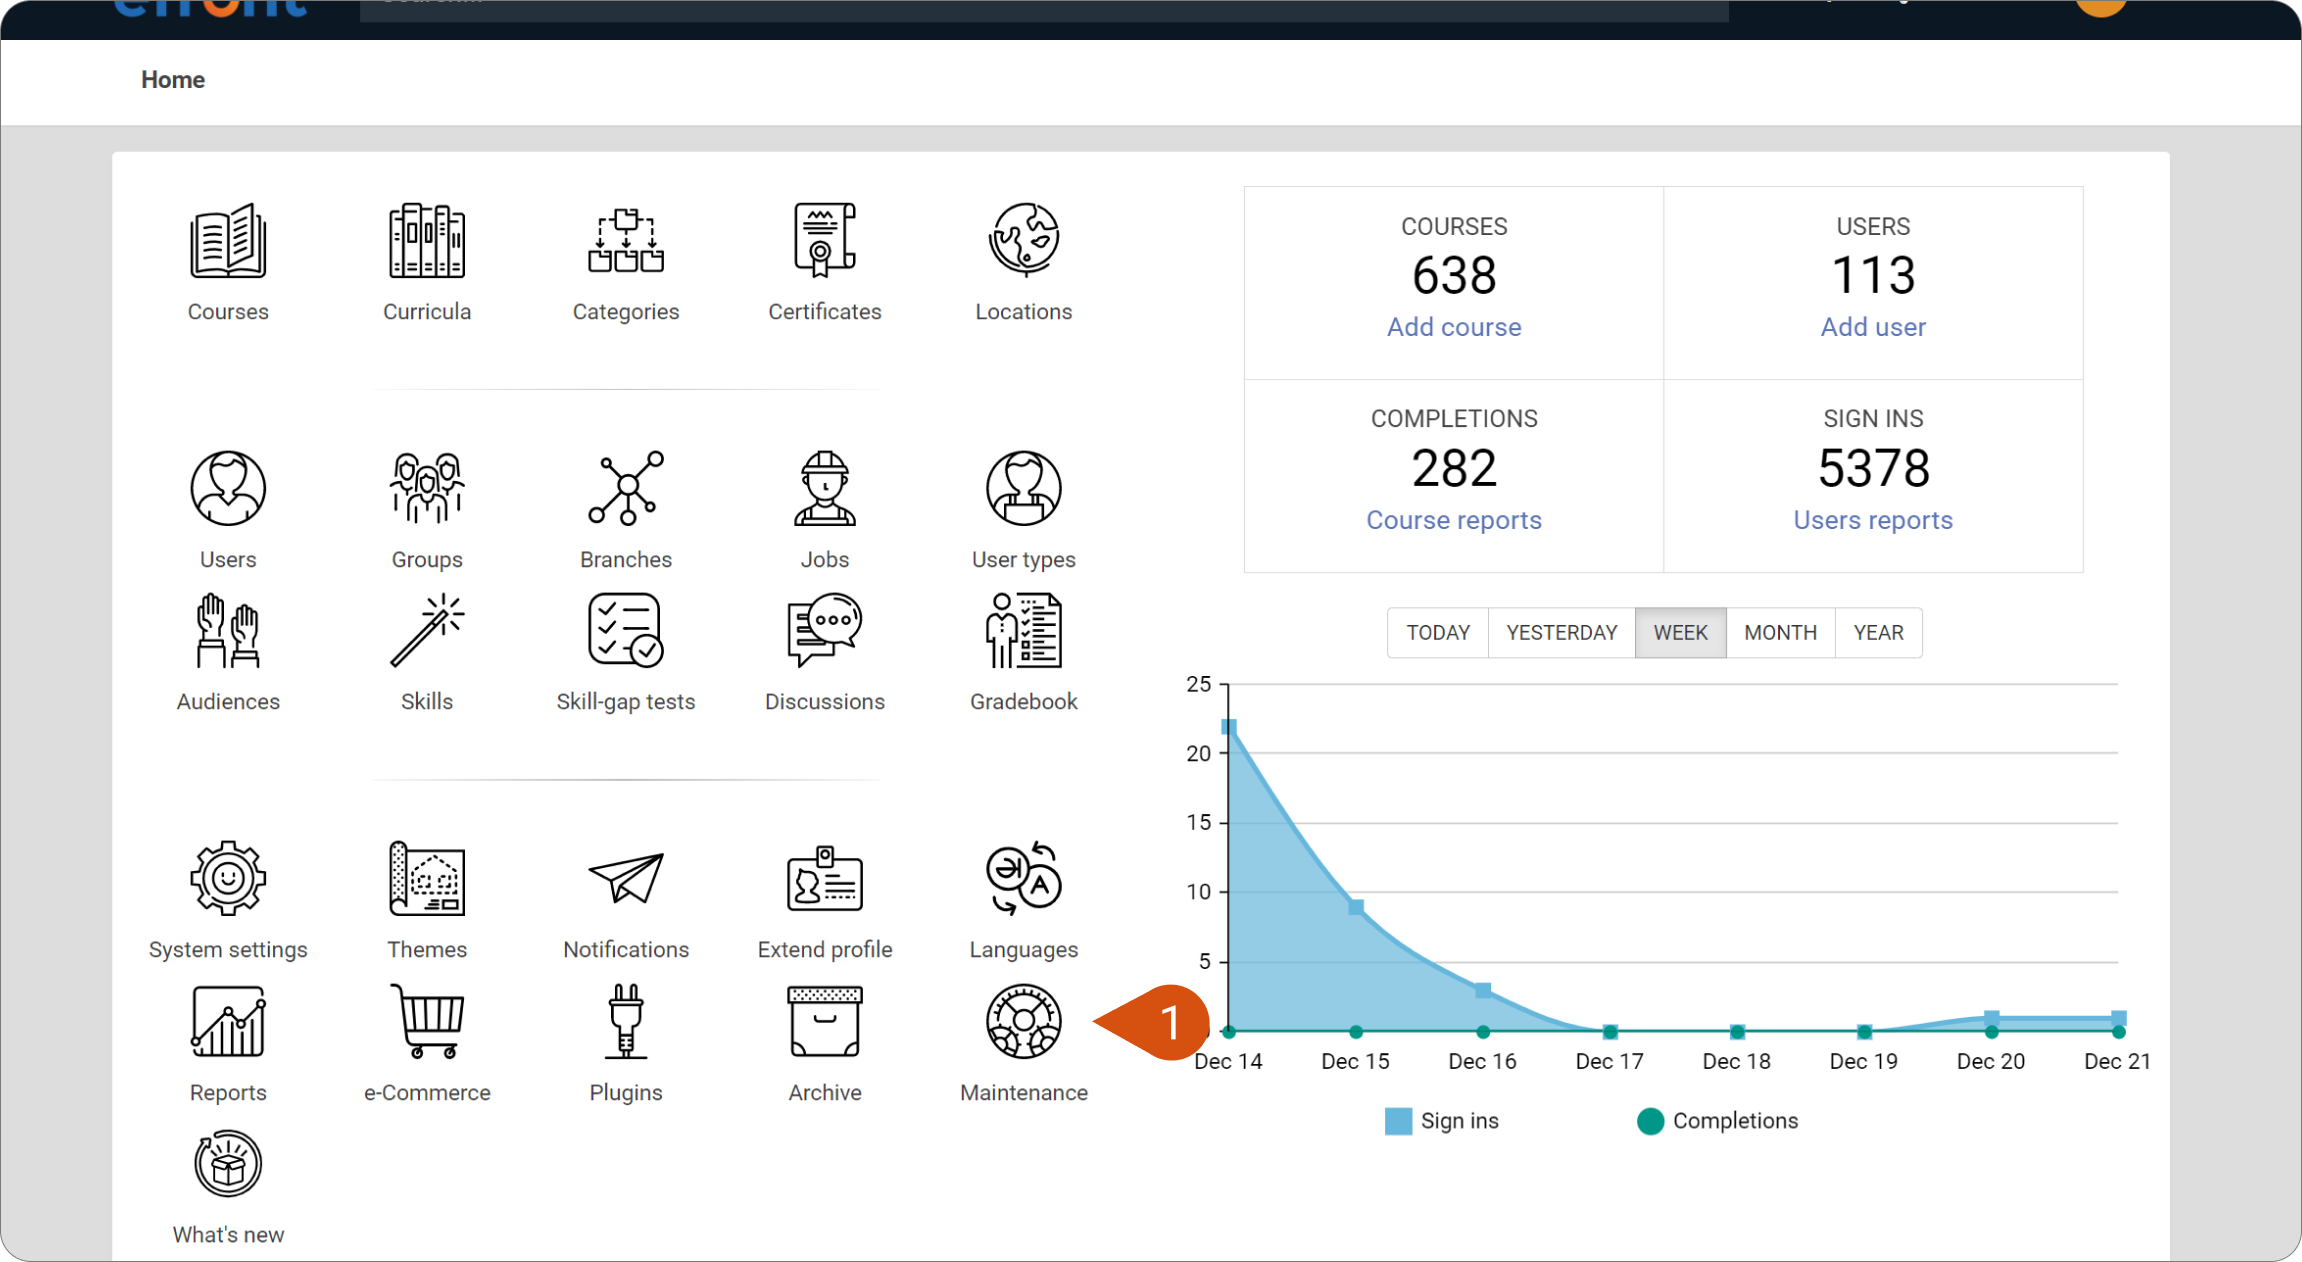
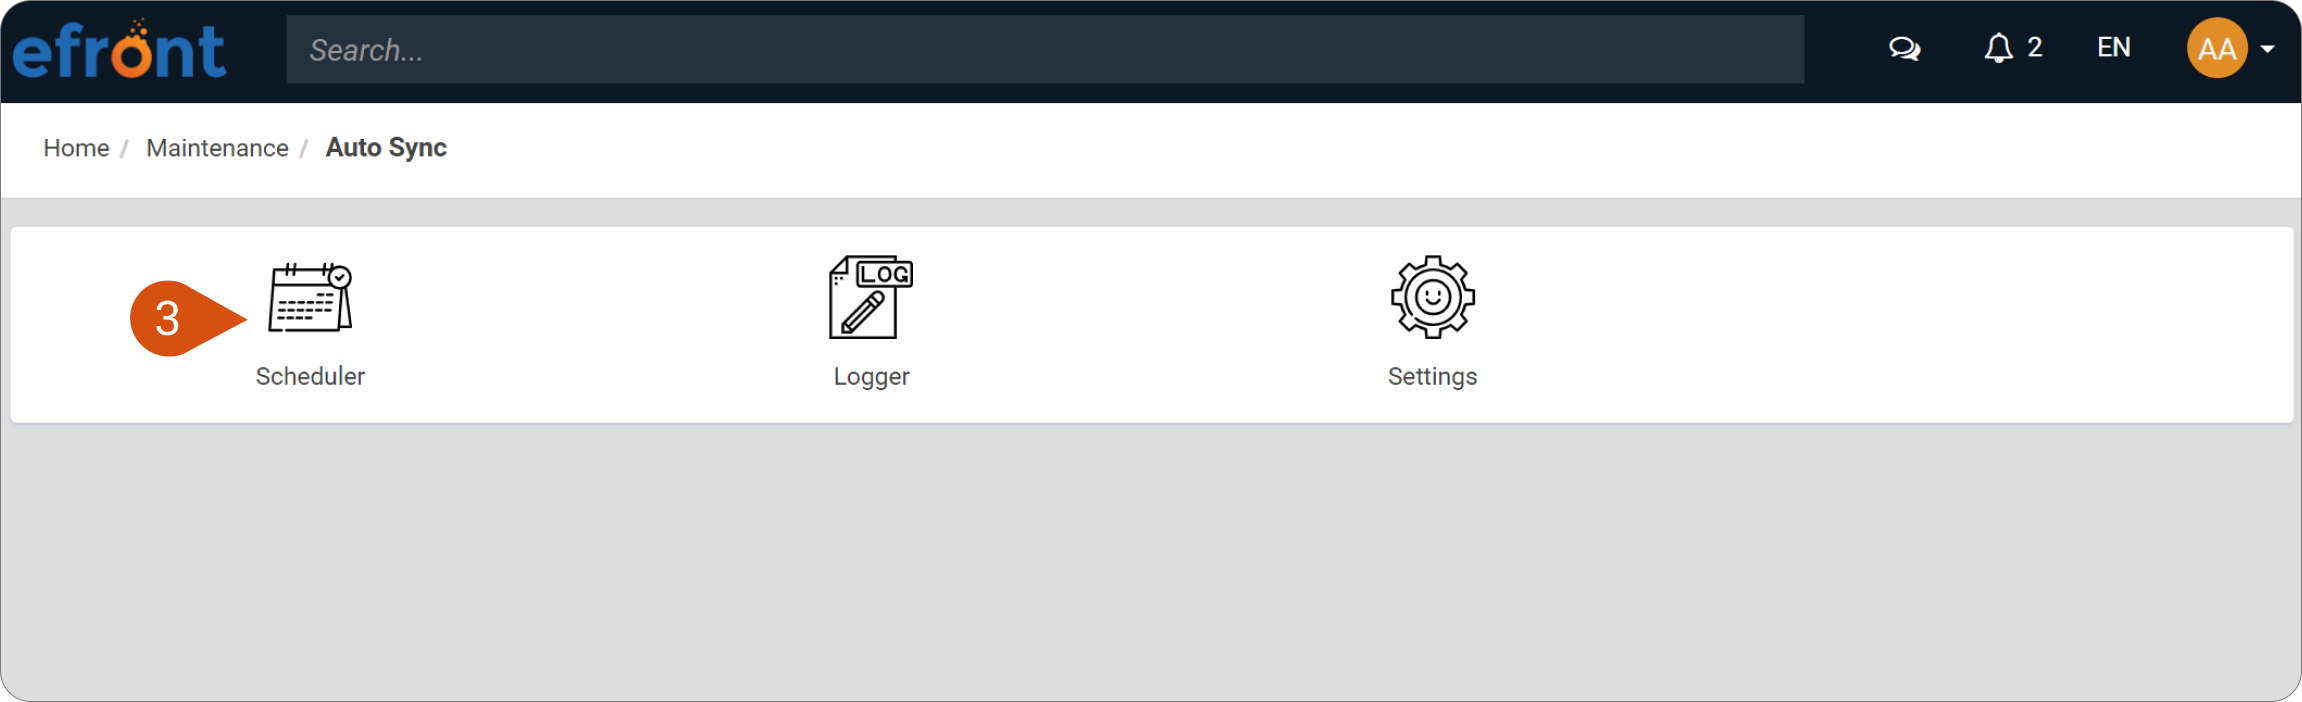
Step 1: Basic configuration
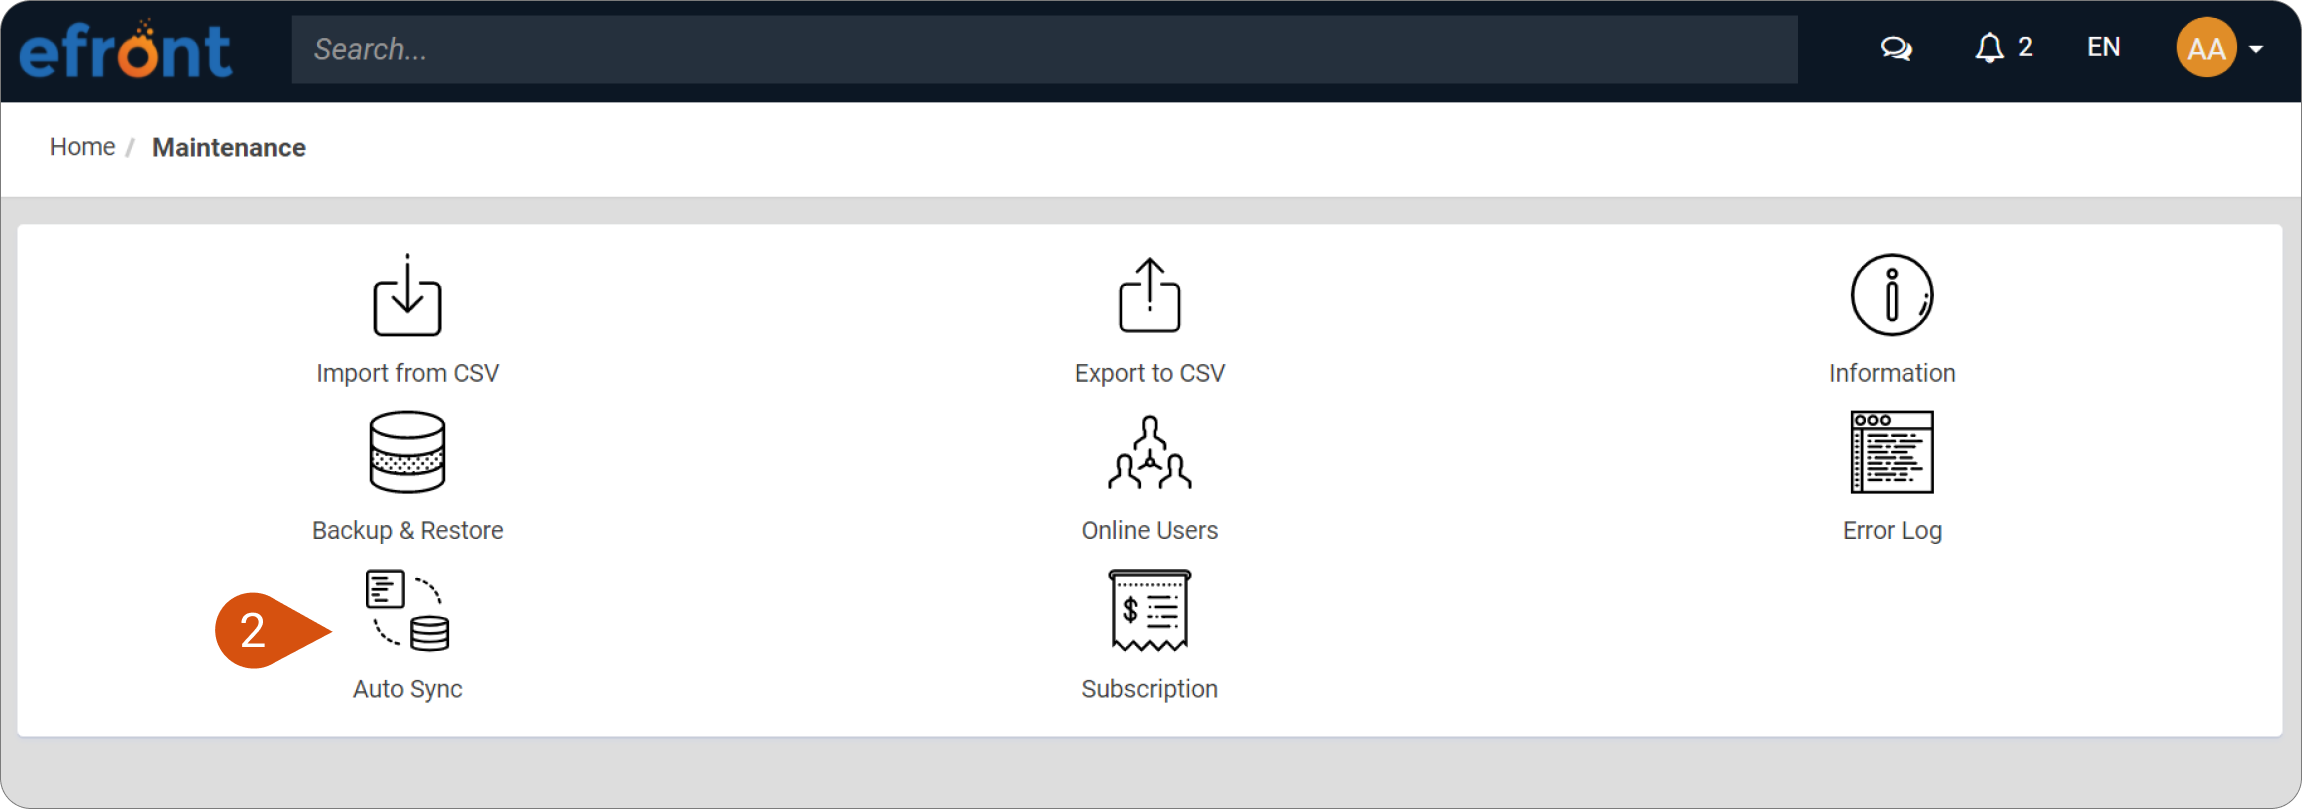
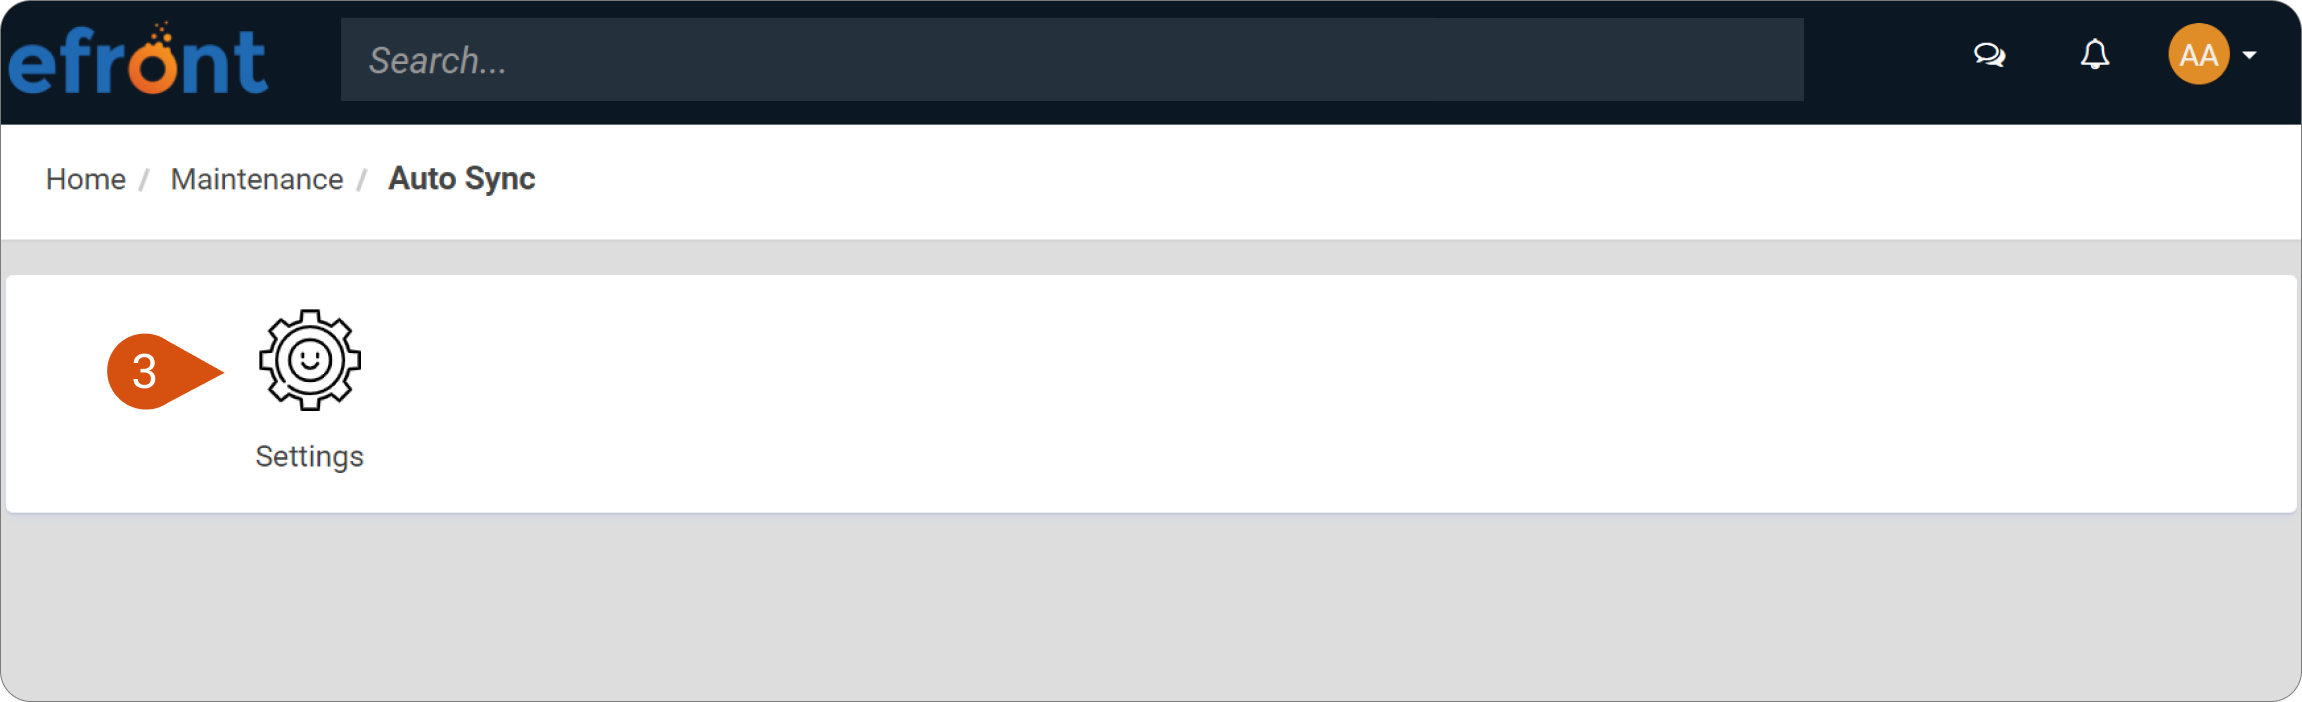
The feature can be enabled by going to Maintenance (1) › Auto Sync (2) › Settings (3).
You can then set the following:
- Data-Set Base Path (4) is the path of the working data folder. Make sure it has the appropriate read/write access permissions.
- Delete logs checkbox (5) allows you to delete any Auto Sync logs which are older than 30 days.
- Use SFTP (6) to synchronize your data.
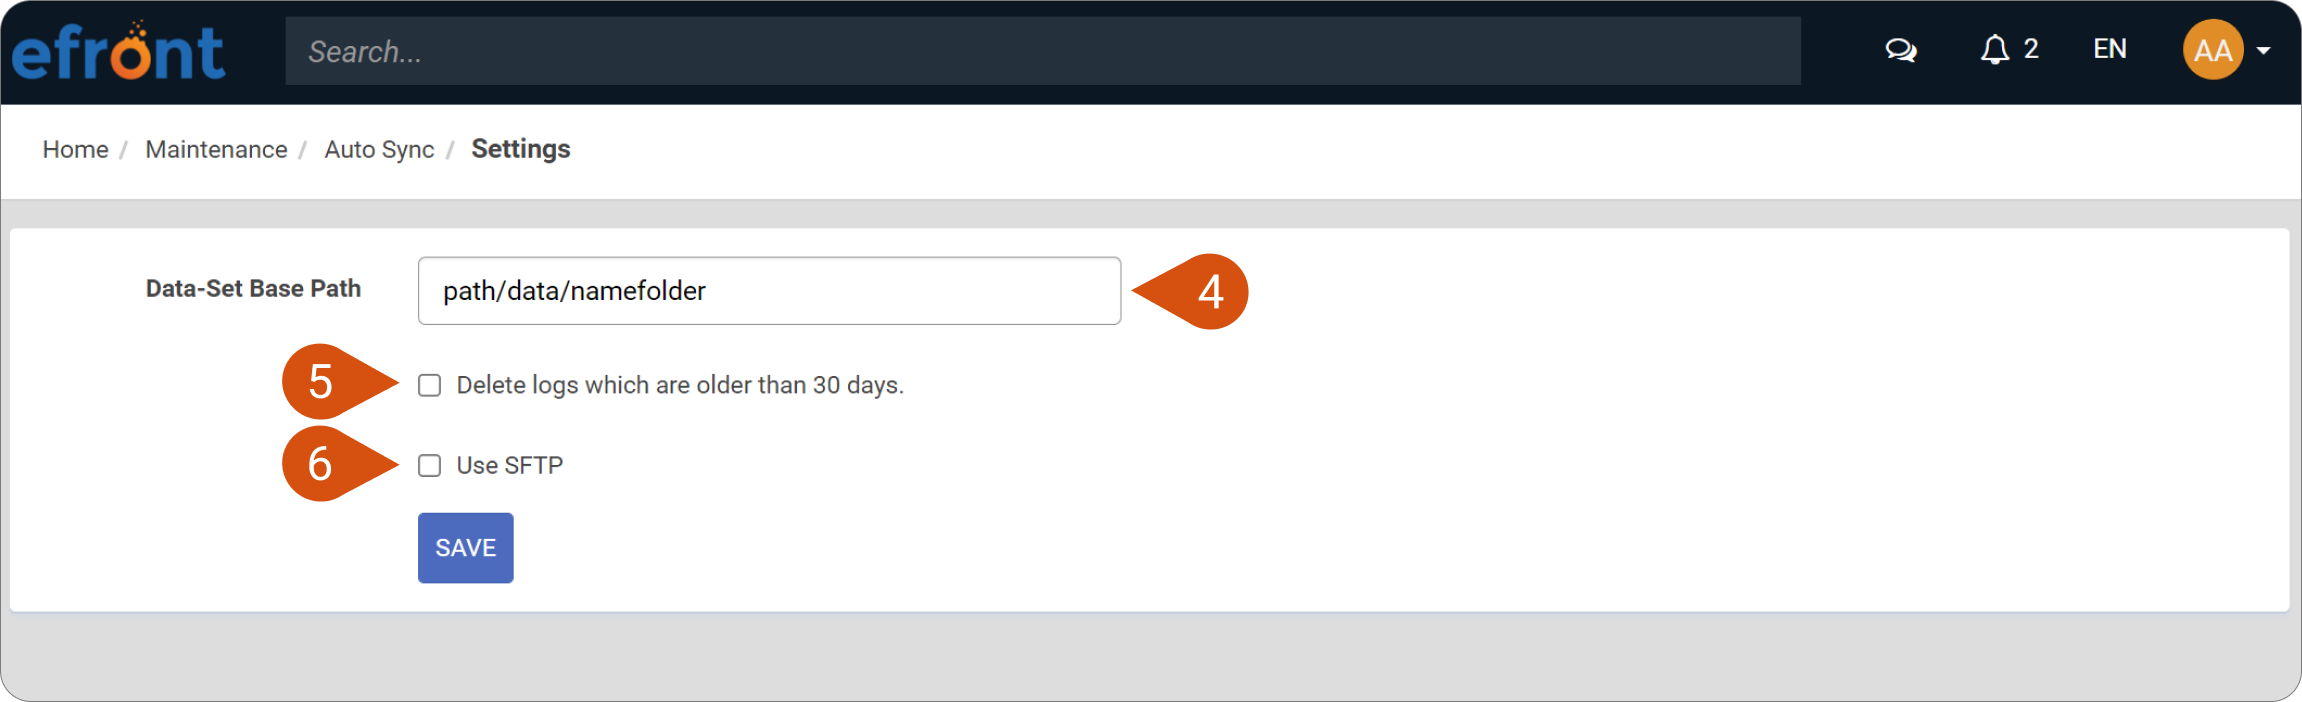
| Note: If Data-Set Base Path is not properly set, you won't be able to proceed with the rest of the configuration. |
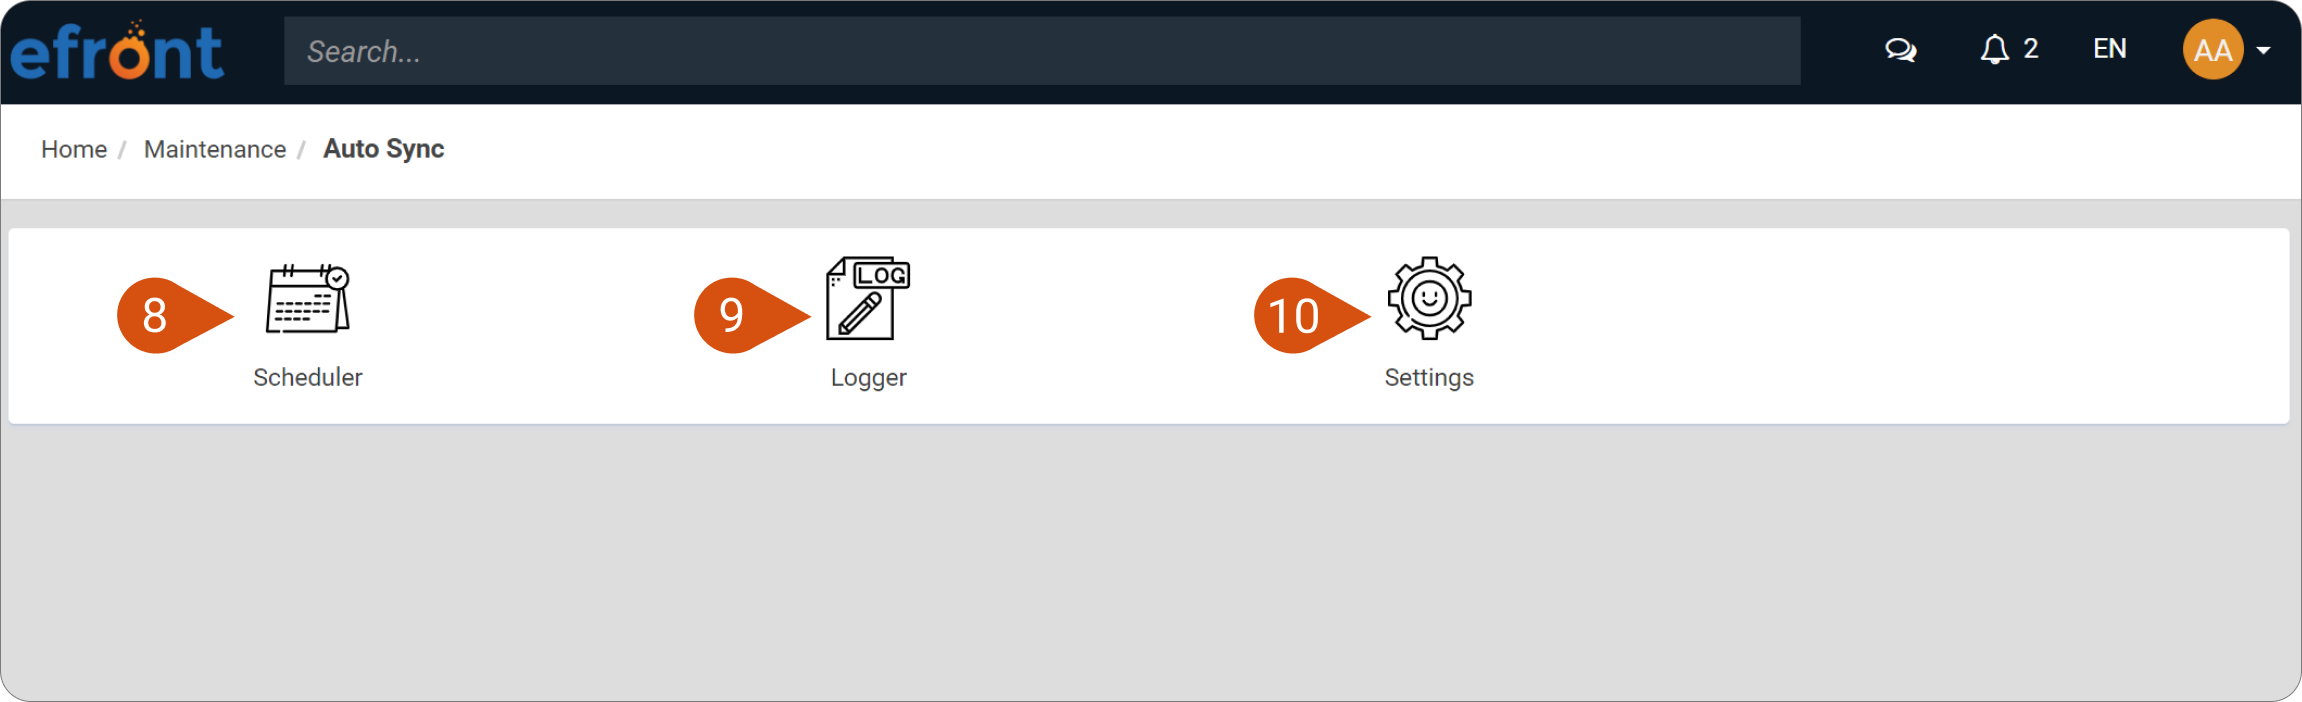
Once you’re done, return to the Auto Sync menu where you’ll now find two new options:
- Scheduler (8): Enables automatic creation and management of the sync tasks.
- Logger (9): Offers administrative functionality over any logs created on sync task completion.
- Settings (10): Goes back to Auto Sync settings where you can change the Data-Set Base Path or the SFTP connection settings.
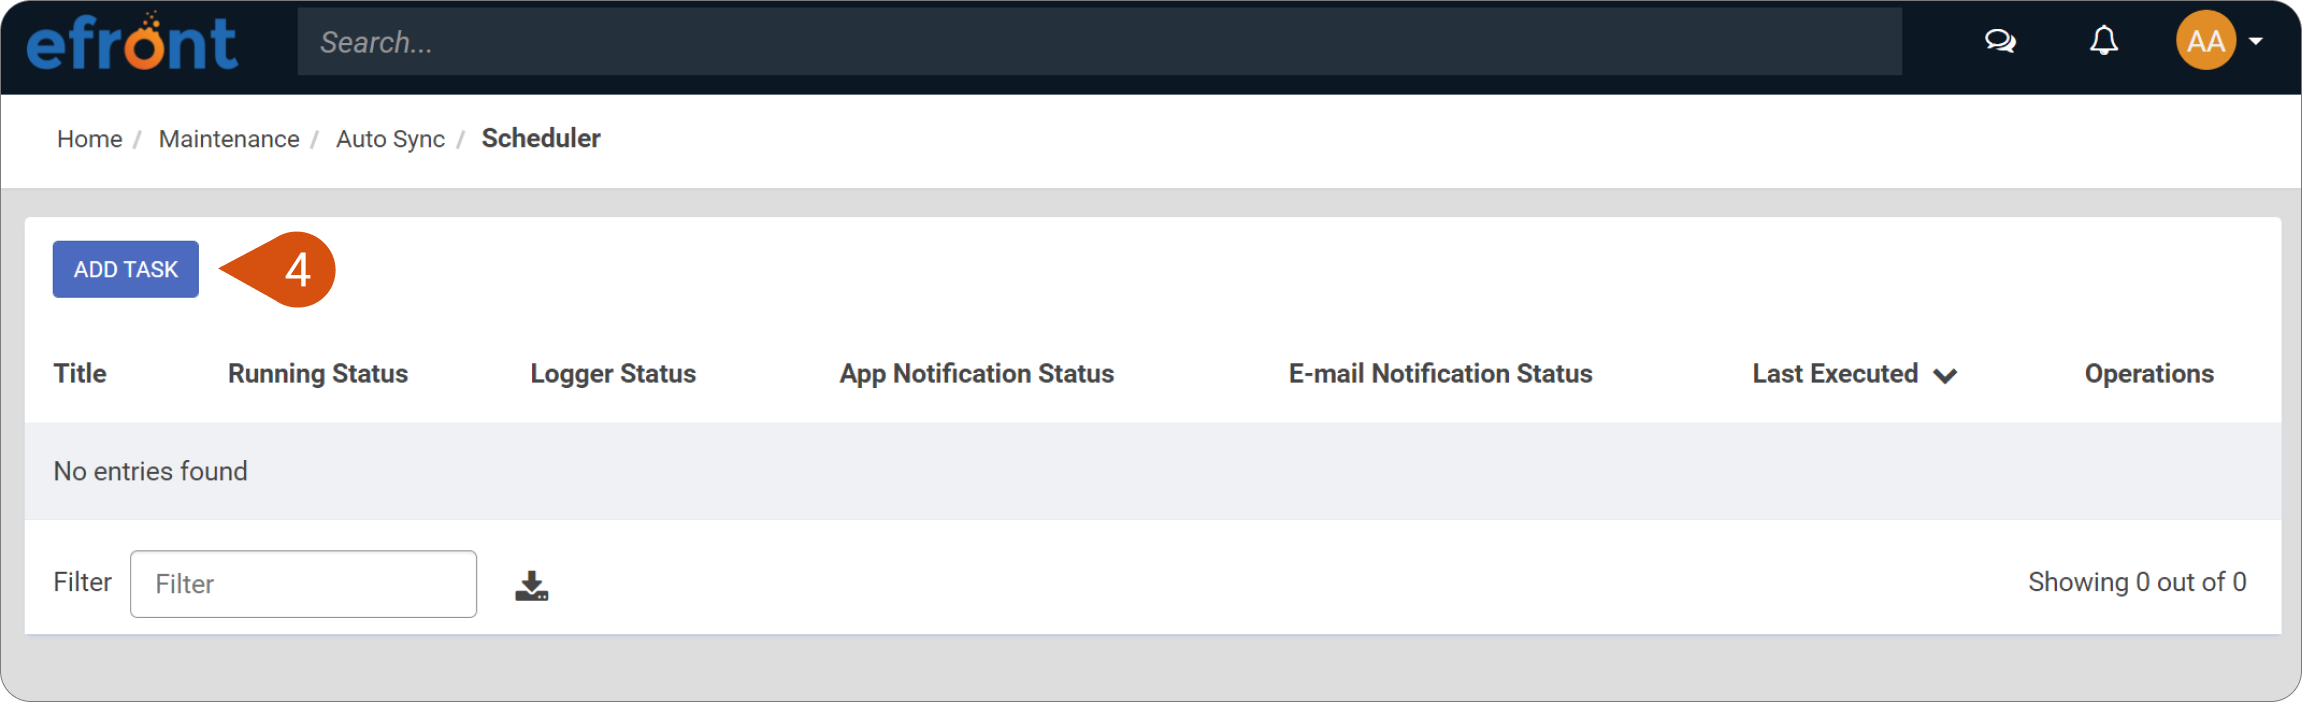
Step 2: Task creation
What is a task and why do you need to create it? In short, a task is a set of choices on what to sync, when to do it, and how.
You can create a new task by going to Maintenance (1) › Auto Sync (2) › Scheduler (3) › Add Task (4).
On the Task Creation page you'll find a plethora of options for configuring your sync actions which are split into the following sections:
Primary Data
This section is required. You have to fill in a Title (5) and Description (6) of your task.
Execution Plan
- Set the Initial Execution (7) time. This is the first time ever that your task will be executed.
- Set the repetition time (8). Meaning how often do you need the task to run.
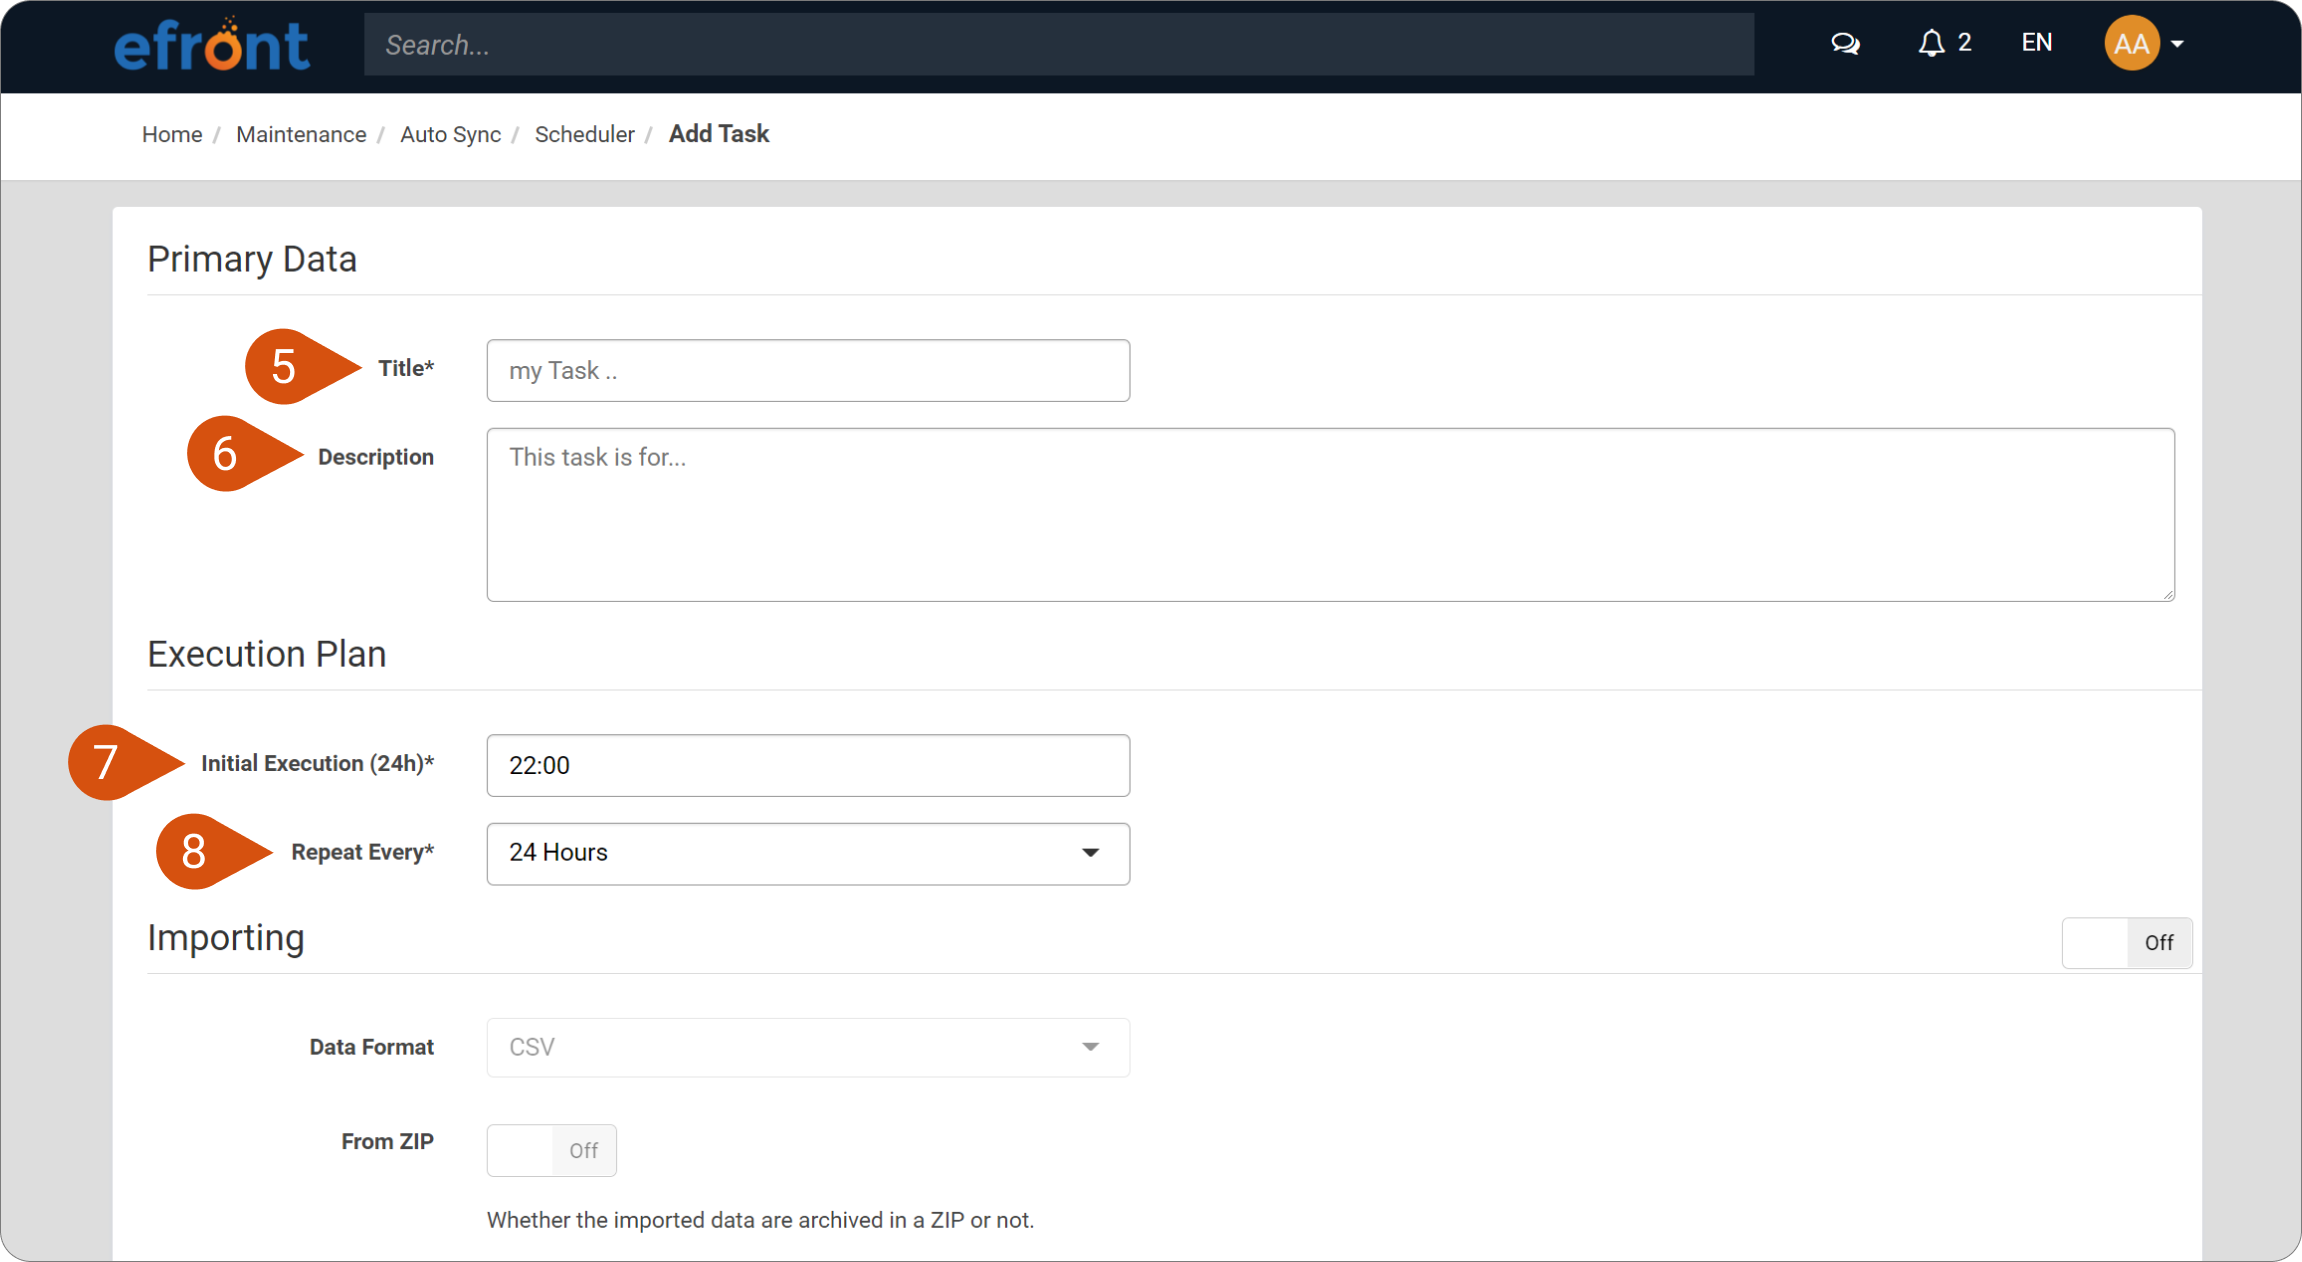
Importing
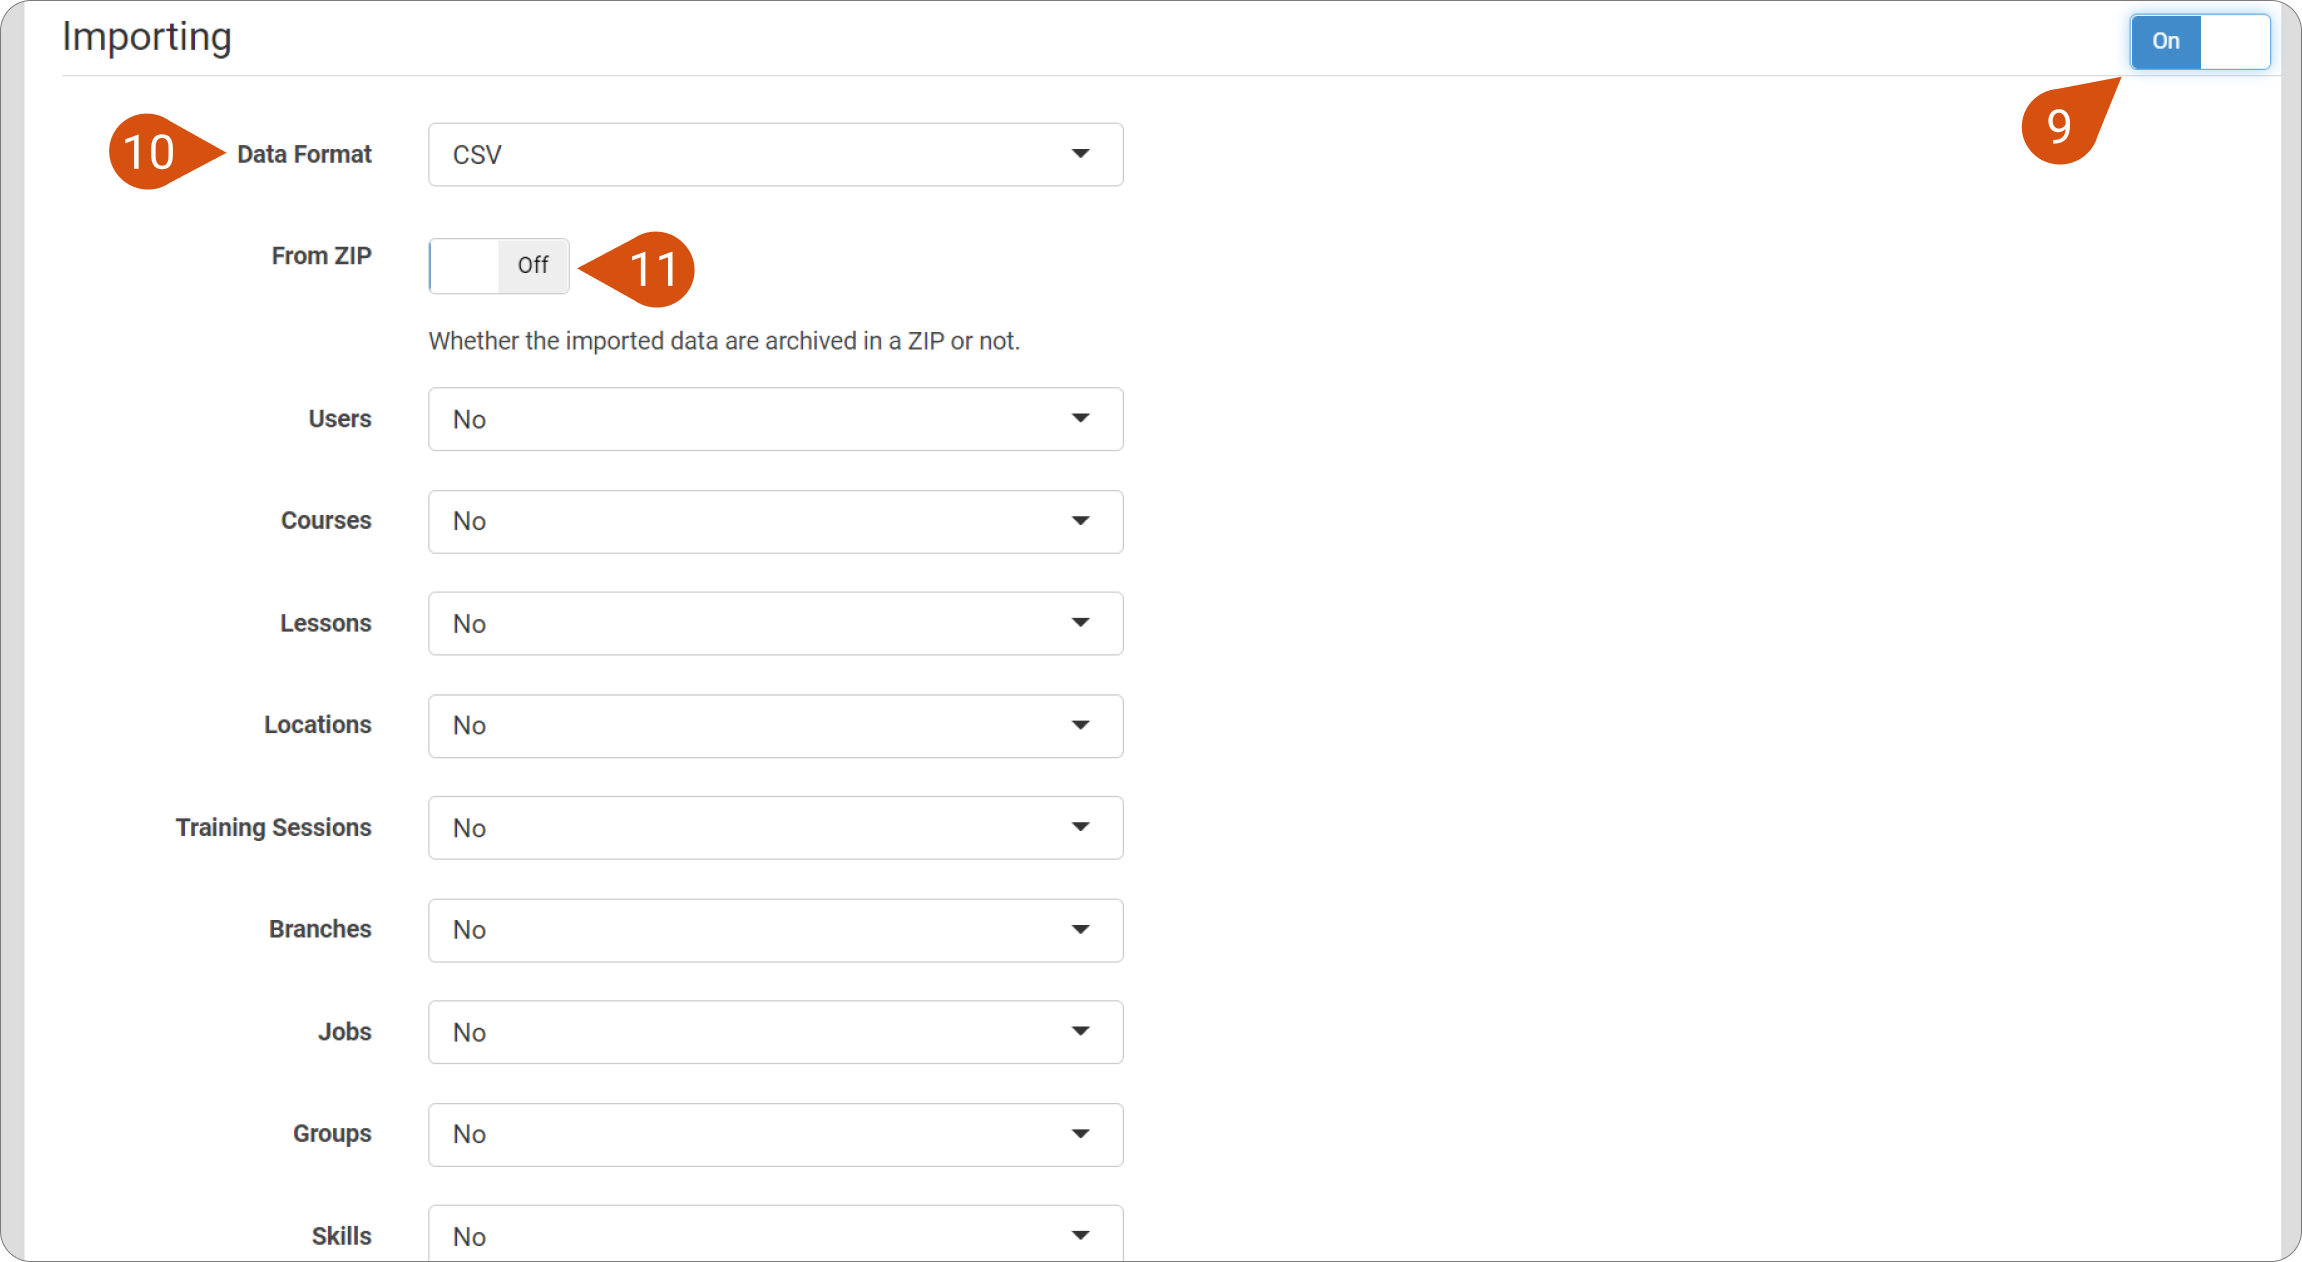
Enable this option by moving the slider to On (9). You can then specify the following:
- Data Format (10): The format which will be used as the source for the data import.
- From ZIP (11): Whether your data are packaged in a compressed .zip file.
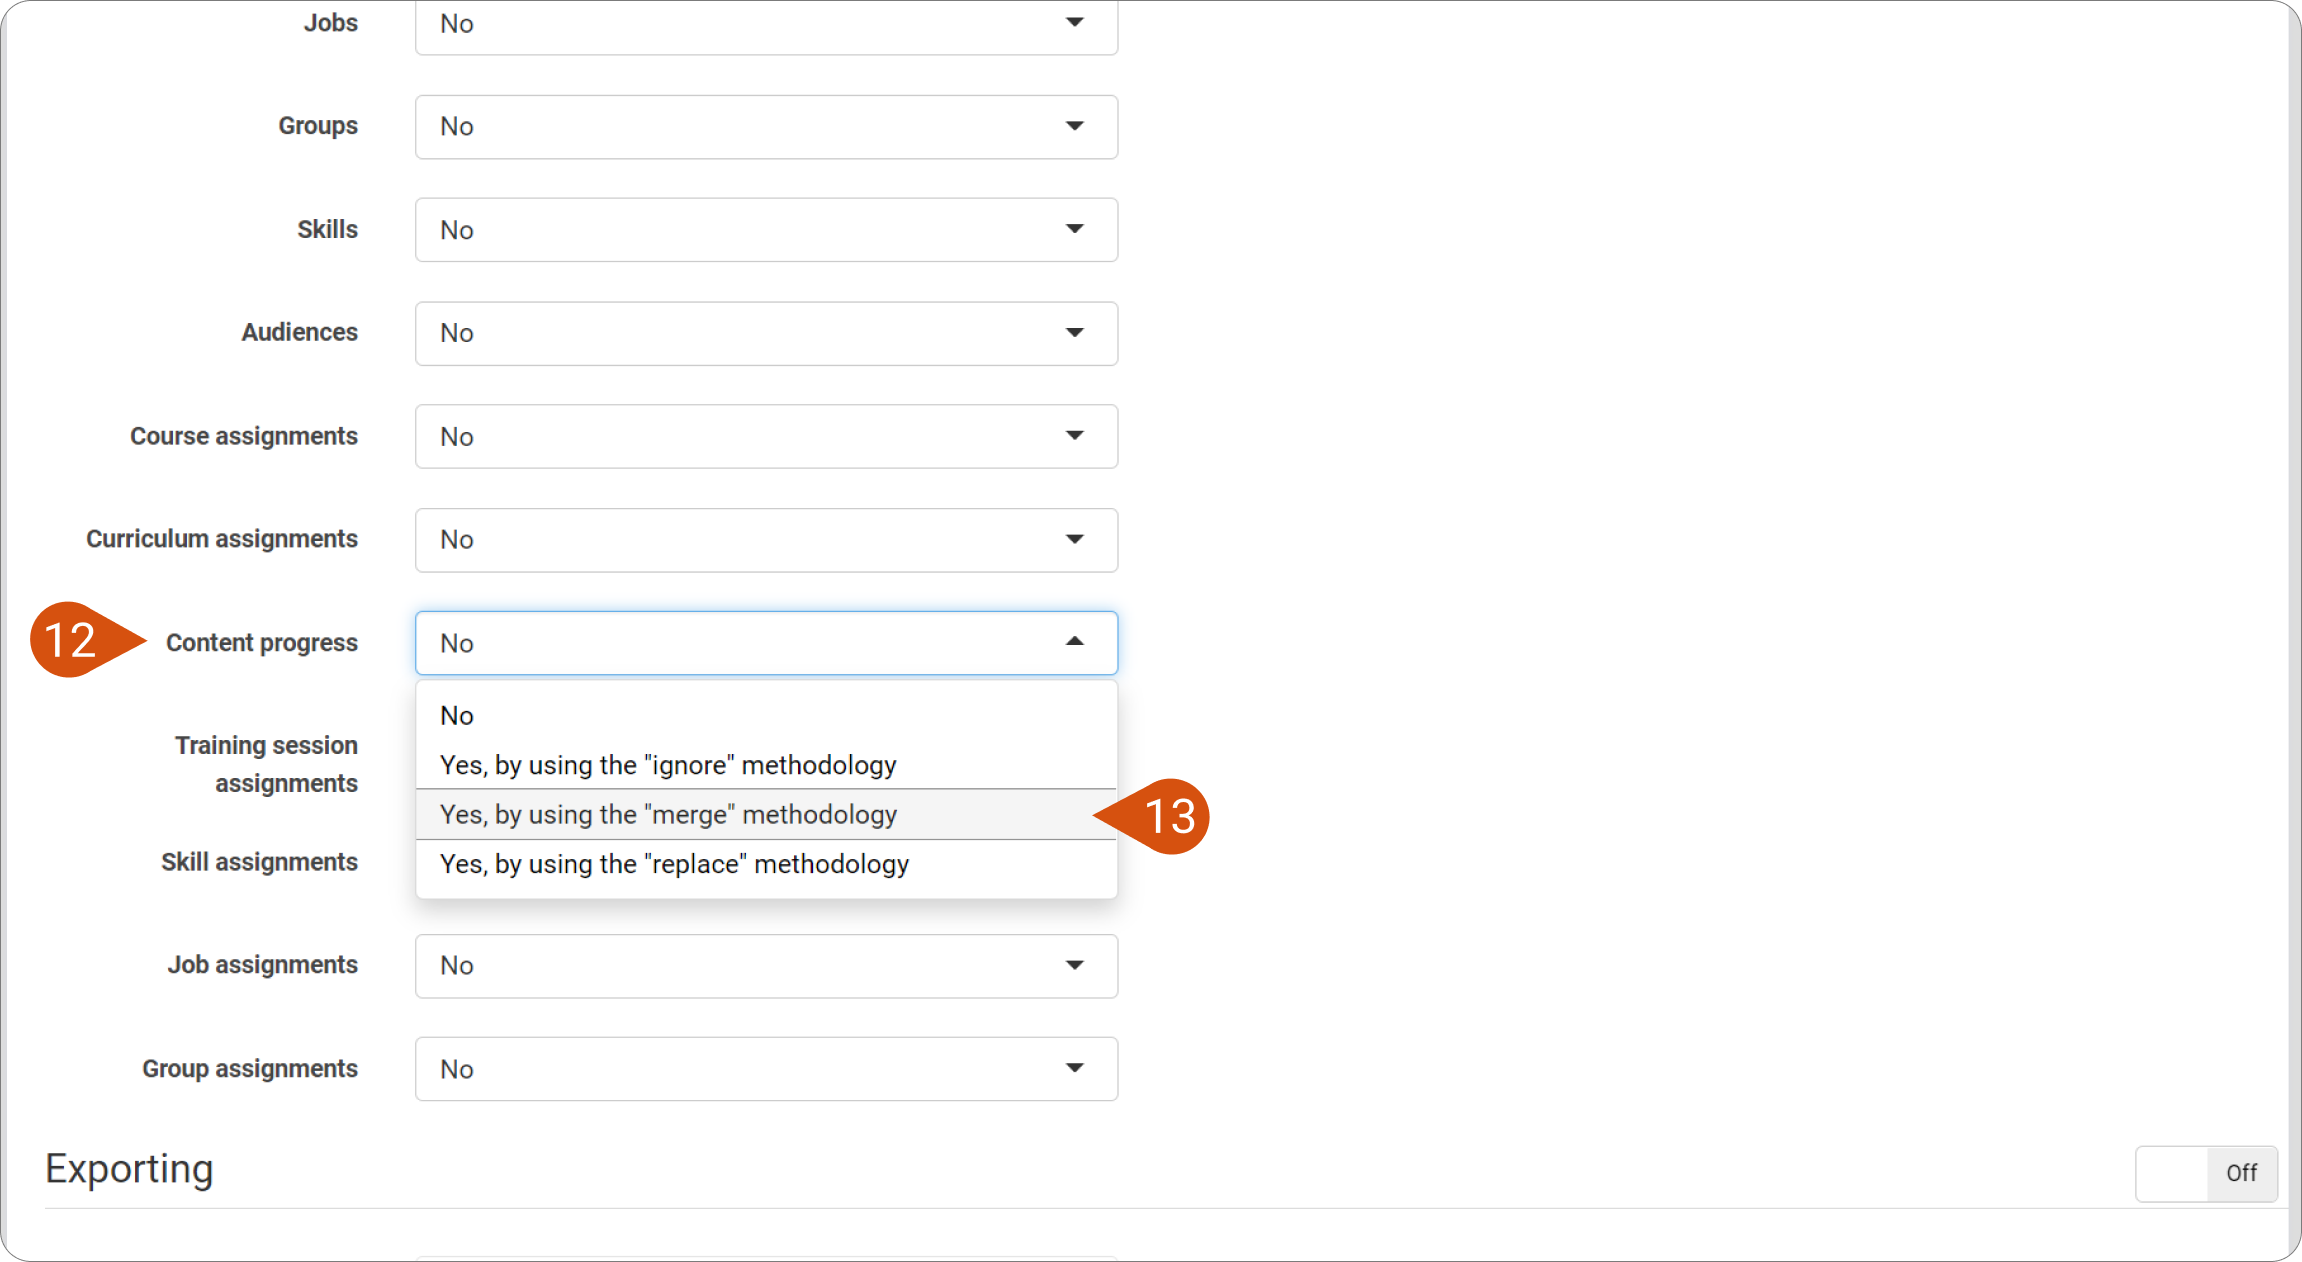
Afterward, you need to select the entity that you want to import (sync); for example, Content progress (12). For each entity, you can select one of the following actions depending on the entity (13):
- Ignore: Ignore duplicate entries from input.
- Merge: Merge duplicate entries with existing entries.
- Replace: Replace duplicate entries.
Exporting
Enable the option by moving its slider to On (14) just like you did with importing. You can then specify the following
- Data Format (15): Determines the type of the output format (.csv or JSON).
- To ZIP (16): Determines whether the output file (regardless of type) will be compressed or not.
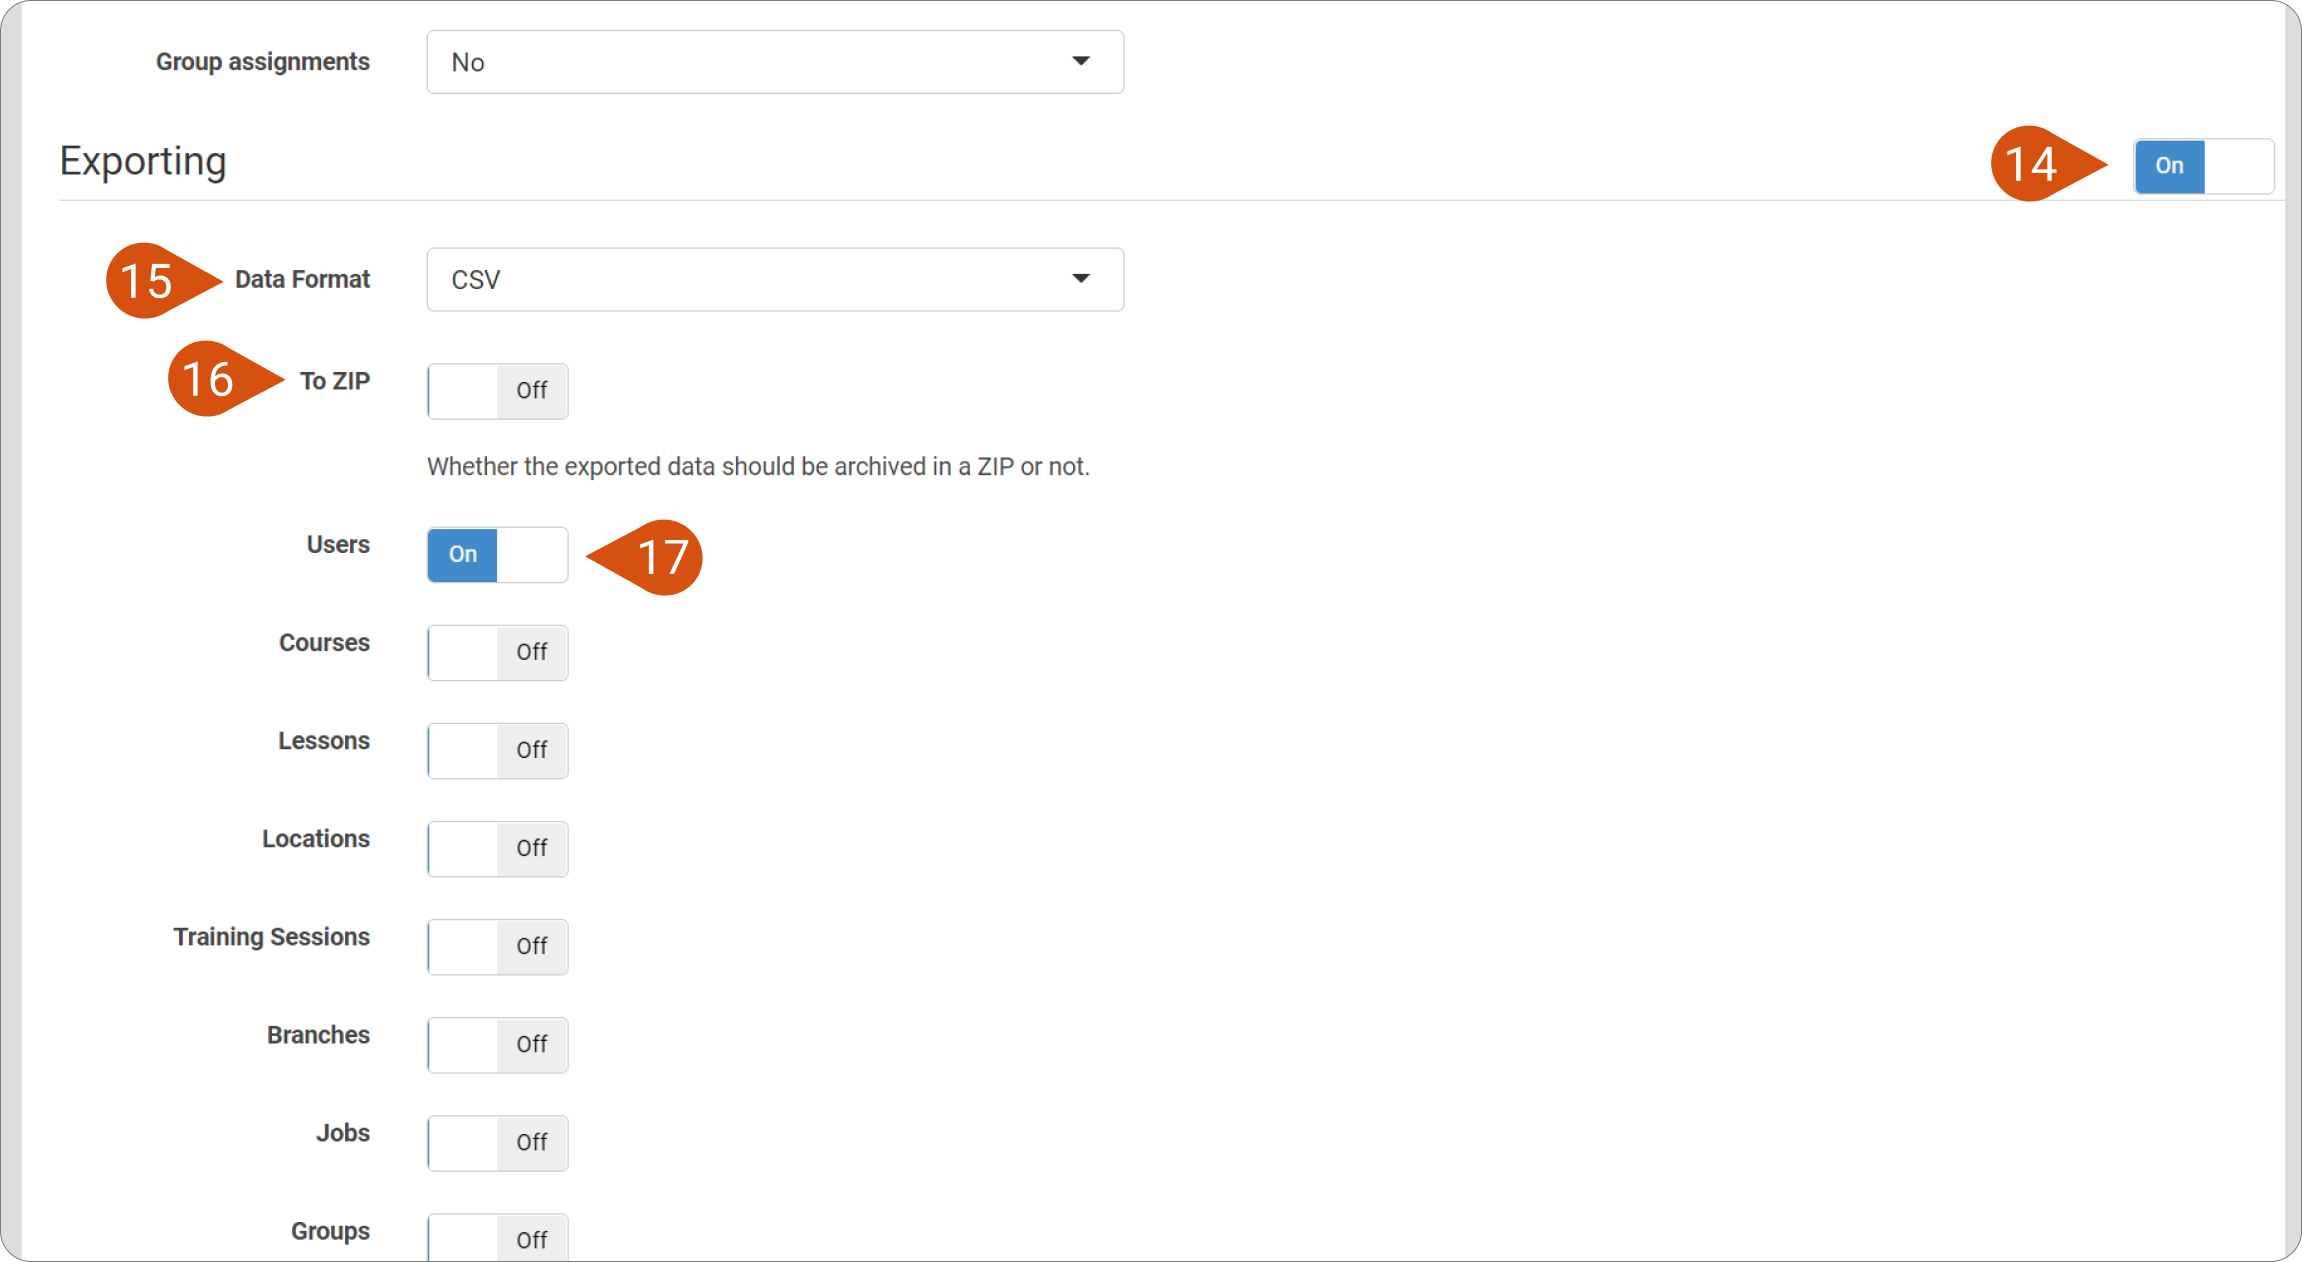
You can then choose the entity to be exported. To specify an entity, move the slider to On (17).
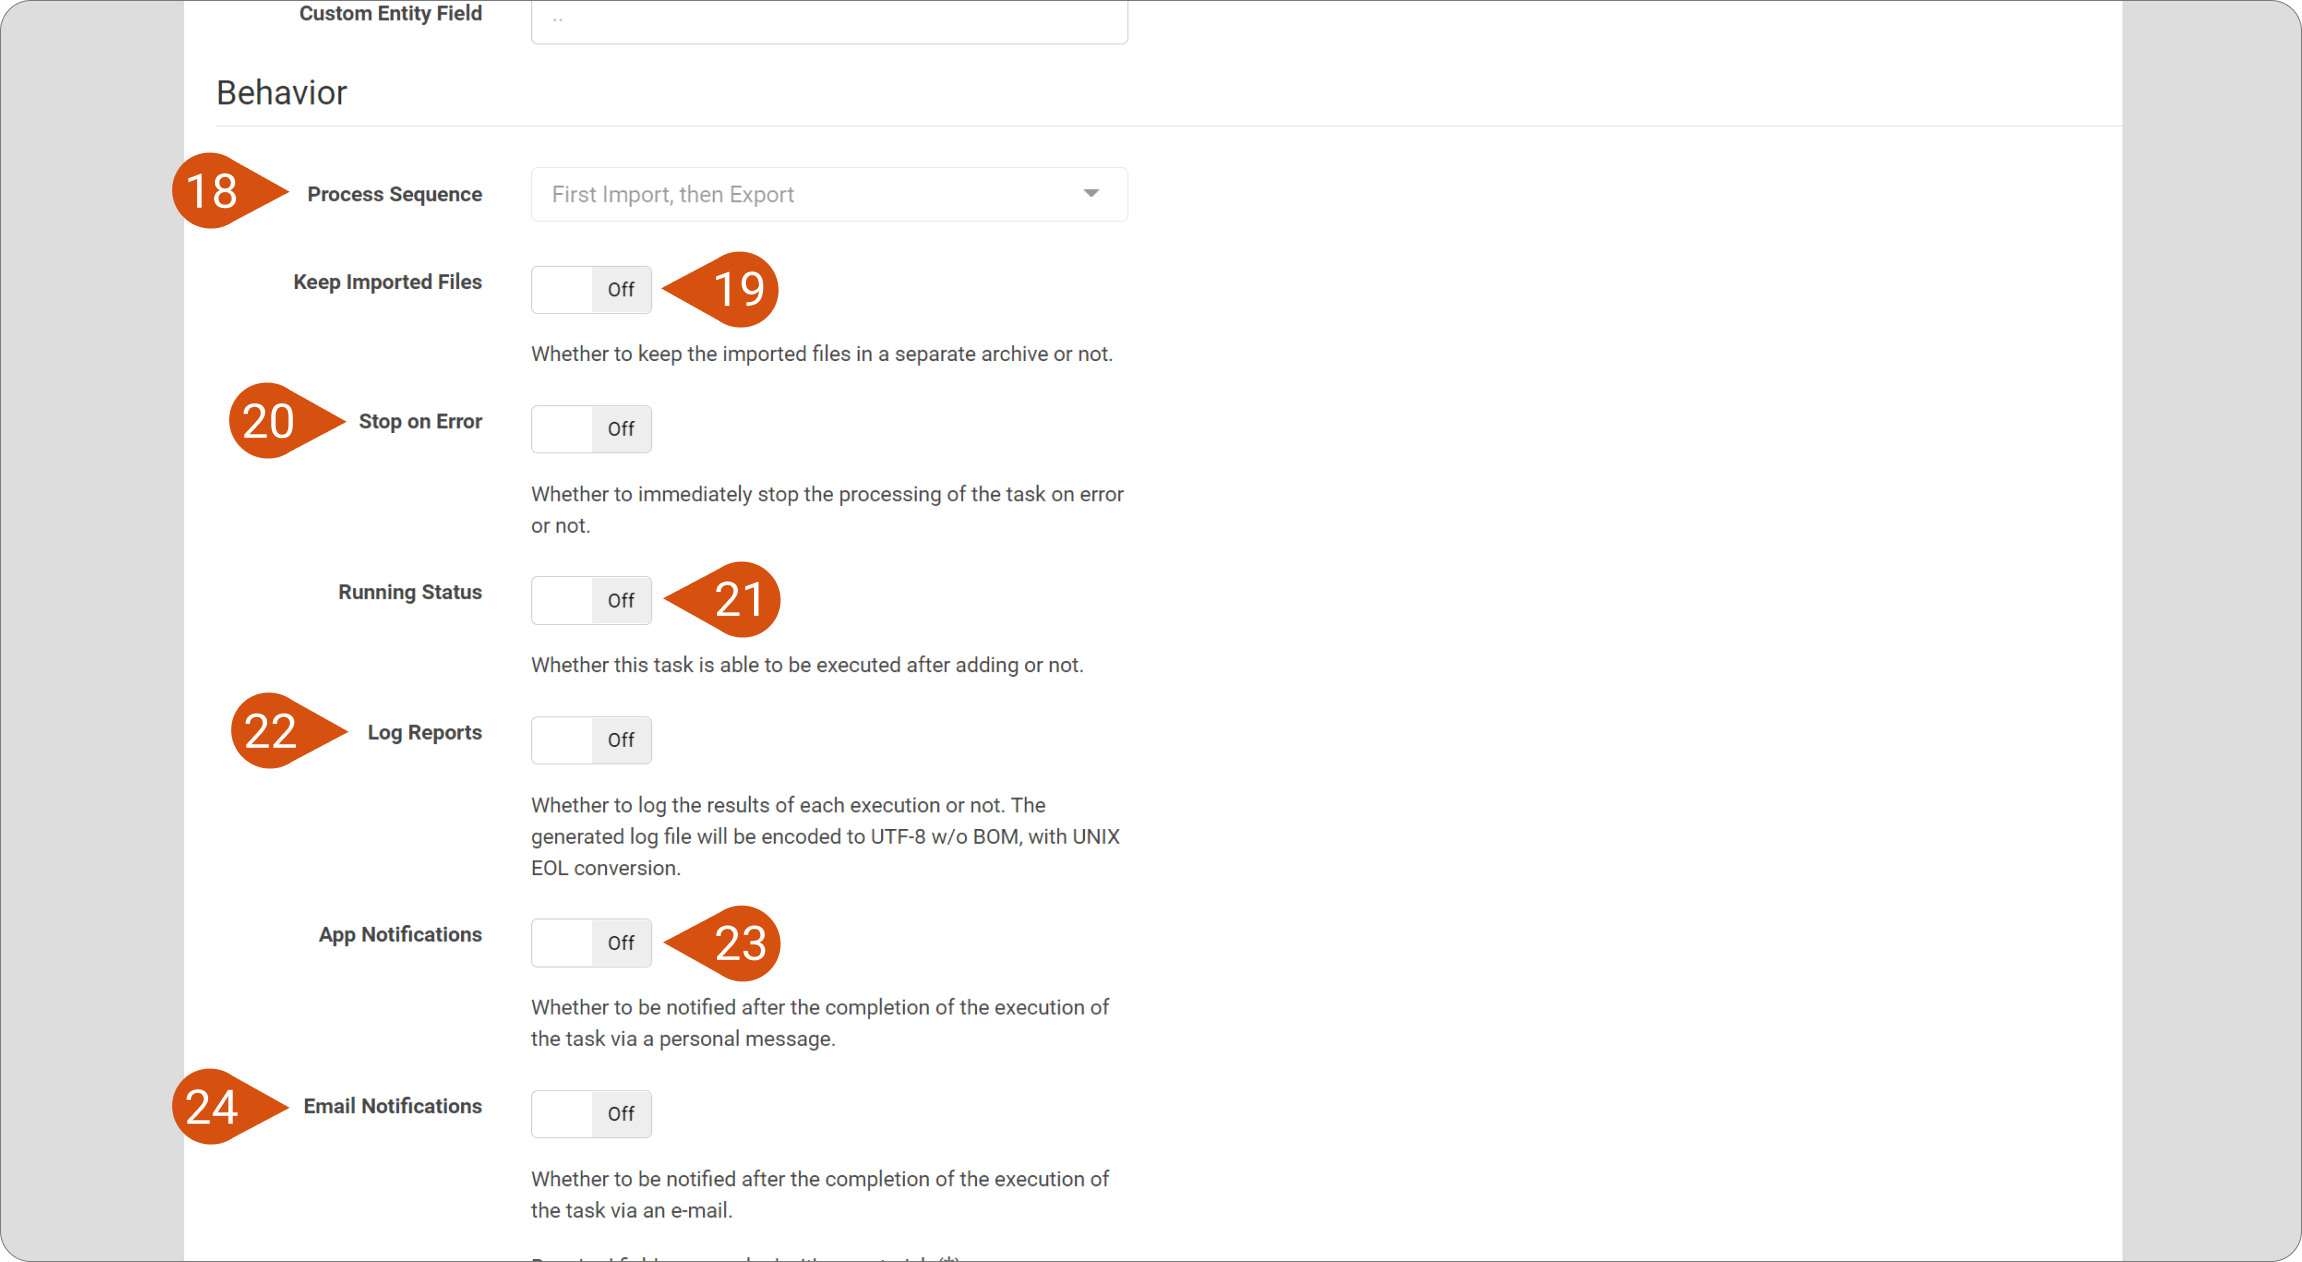
Behavior
This section allows an Administrator to control the syncing process. The following actions are available:
- Process Sequence (18): Allows you to specify the sequence of the sync actions.
- Keep imported Files (19): Keeps or discards the data files after importing them to the database.
- Stop on Error (20): Set whether you'd like syncing to stop if an error occurs, or continue using the selected sync strategy.
- Running Status (21): Specify whether a task is currently active or not.
- Log reports (22): Enable/Disable the logging functionality
- App Notifications (23): Allow eFront to send you notifications after a task has finished executing.
- Email Notifications (24): Allow eFront to send you email notifications after a task has finished executing.
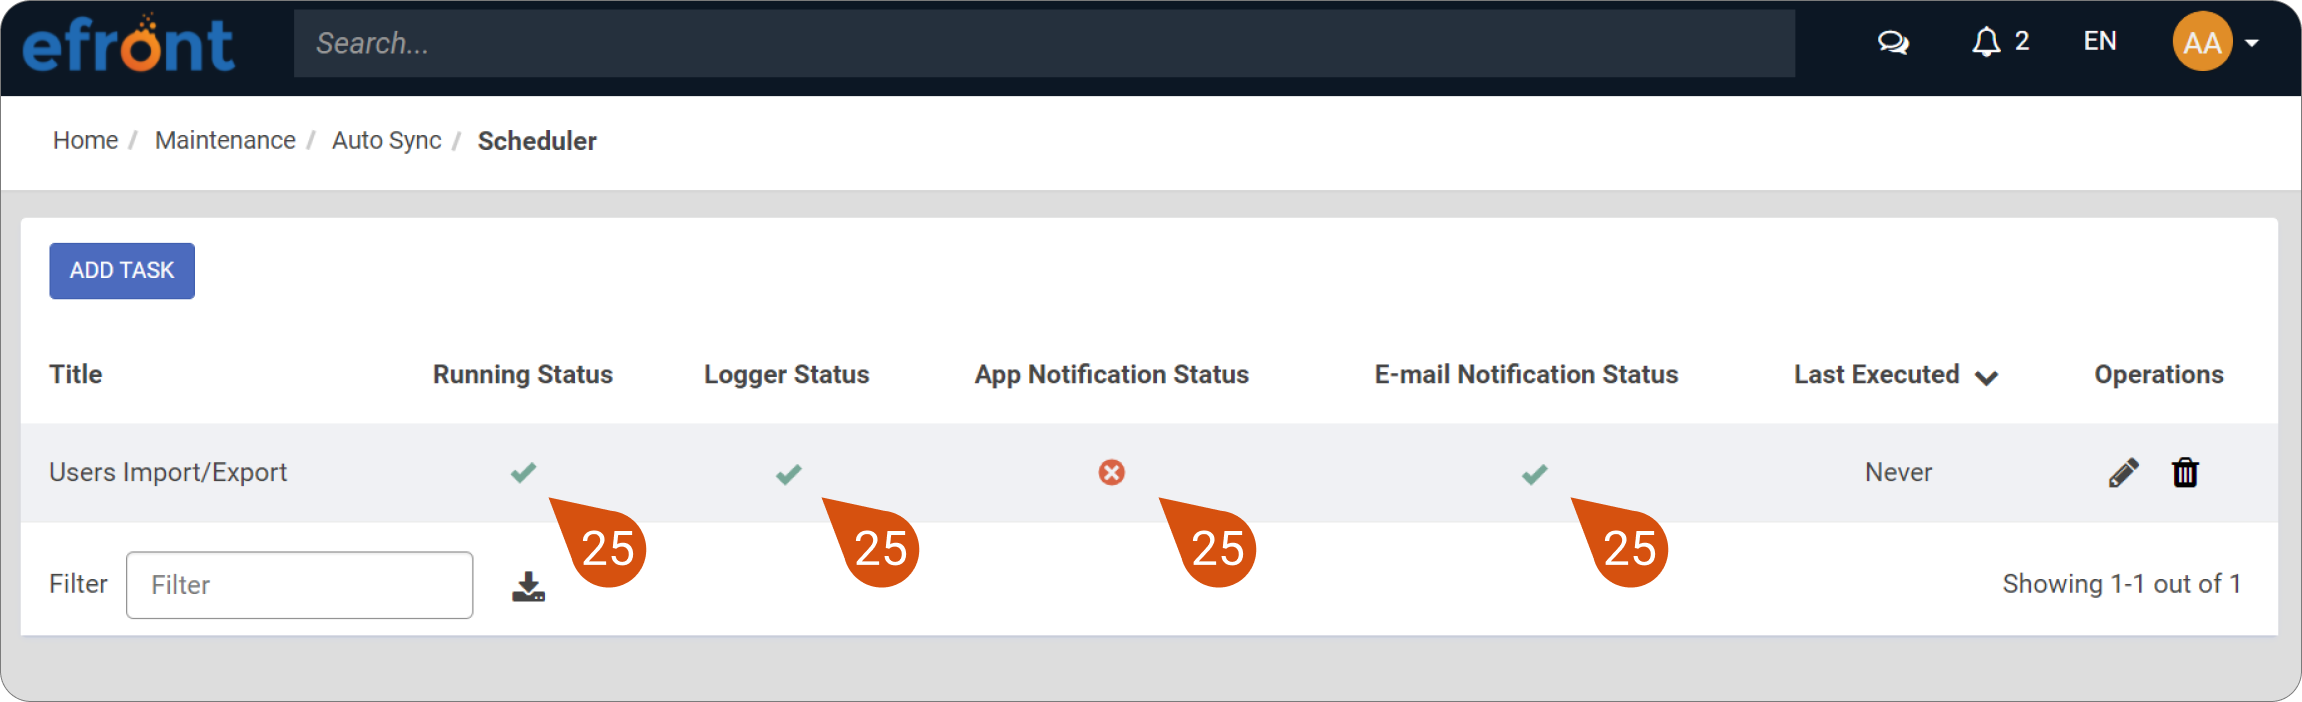
Upon successfully creating a new task, you will find it on the Scheduler page. Once there, you can quickly toggle a few configuration options by clicking the corresponding icon (25).
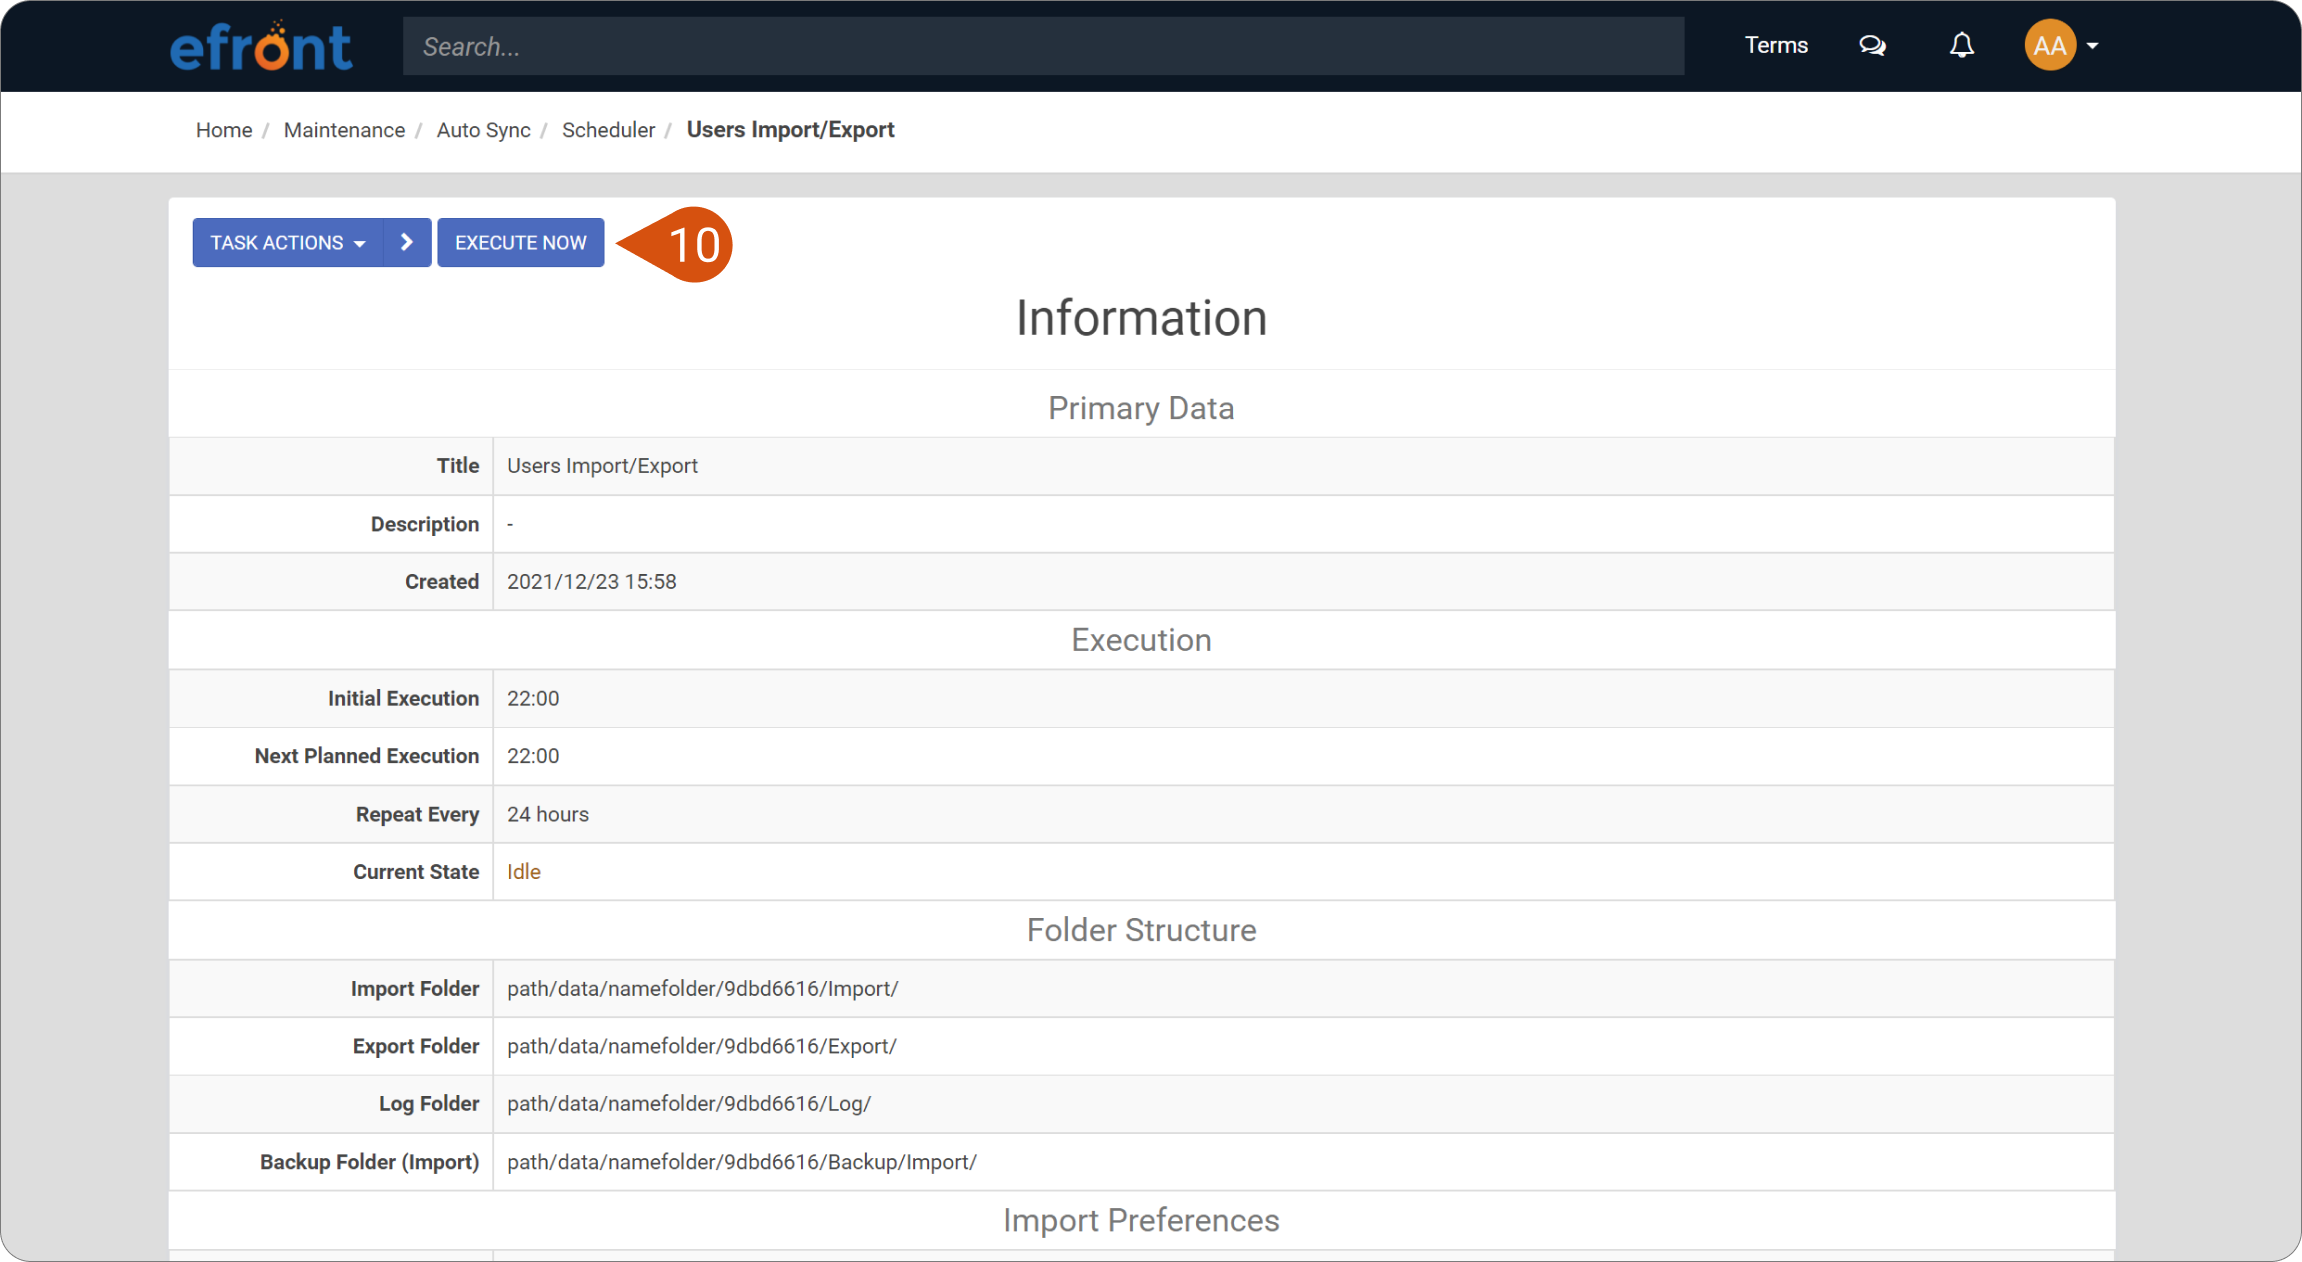
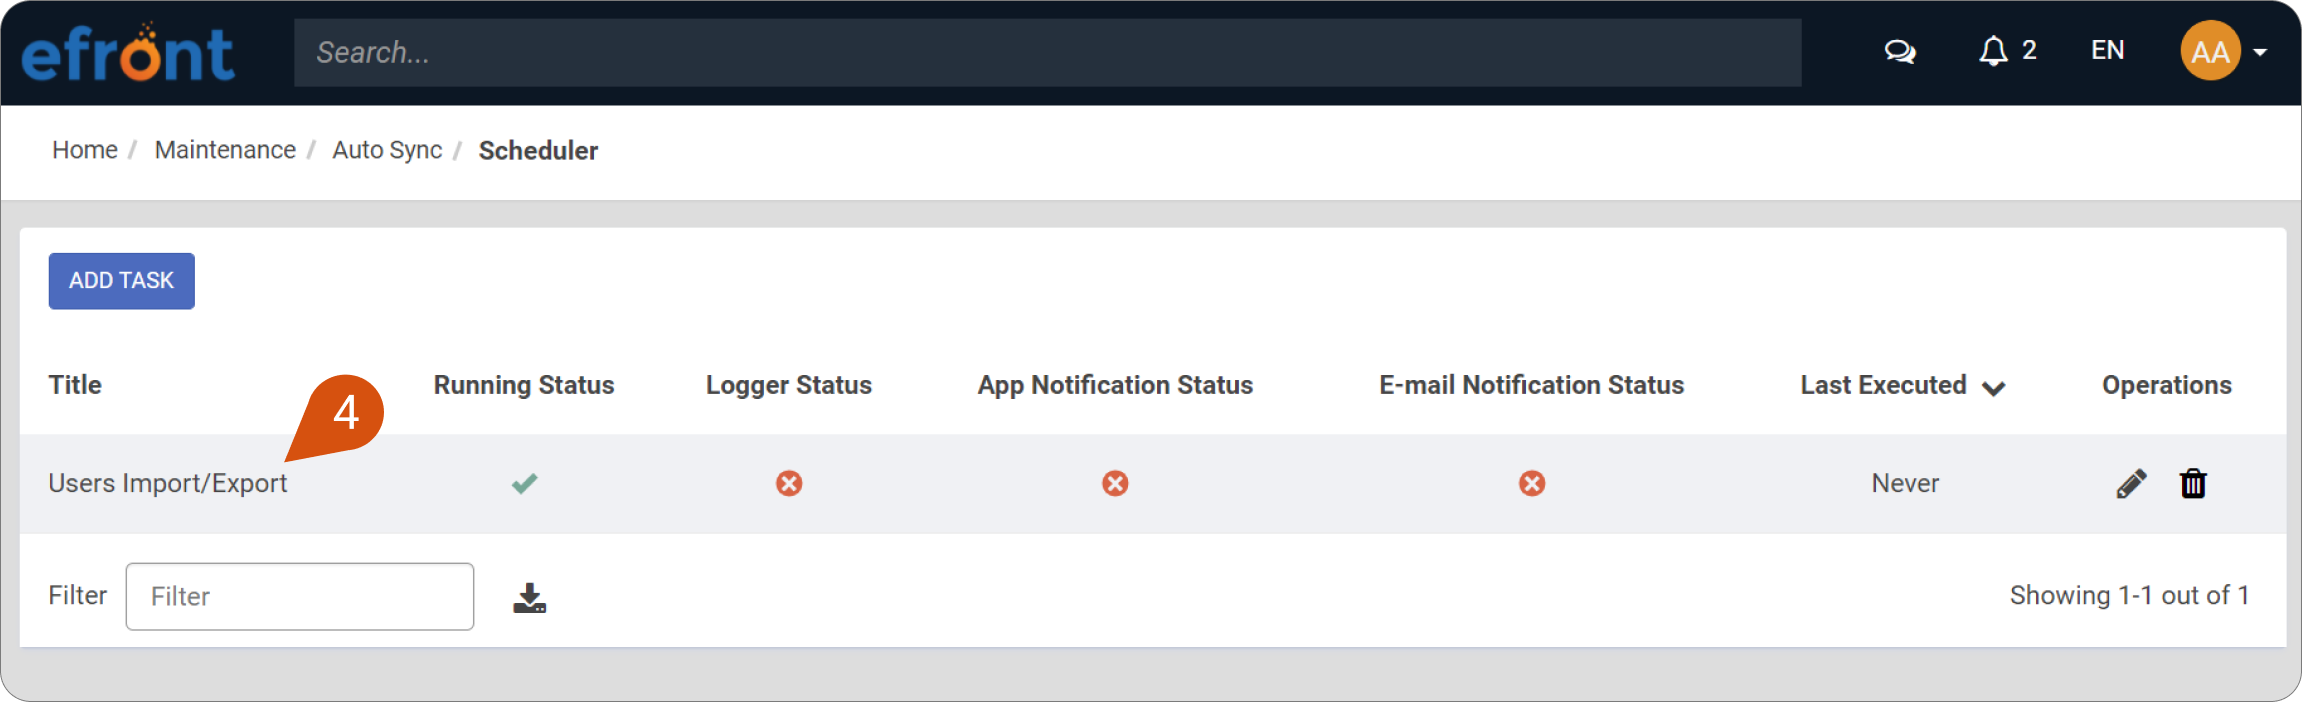
Step 3: Task Details
To check already existing task details, go to Maintenance (1) › Auto Sync (2) › Scheduler (3) and click the task’s name (4). You’ll be presented with a detailed overview of your task’s configuration.
You can inspect the full file system path to your data (5) and log folders (6), which are placed under the task's ID parent folder.

| Note:You can't entirely configure the data files path. Once you create a new task, a folder with the name of the the task ID (non-configurable - automatically assigned) will be created in the specified Data-Set Base Path location which will include Export, Log, and Backup subfolders for the data and log files. The Import folder needs to be manually created under the task ID folder. |
On the same page, you can switch between your tasks (7), edit, and delete them (8) by using the Task Actions (9) drop-down menu.
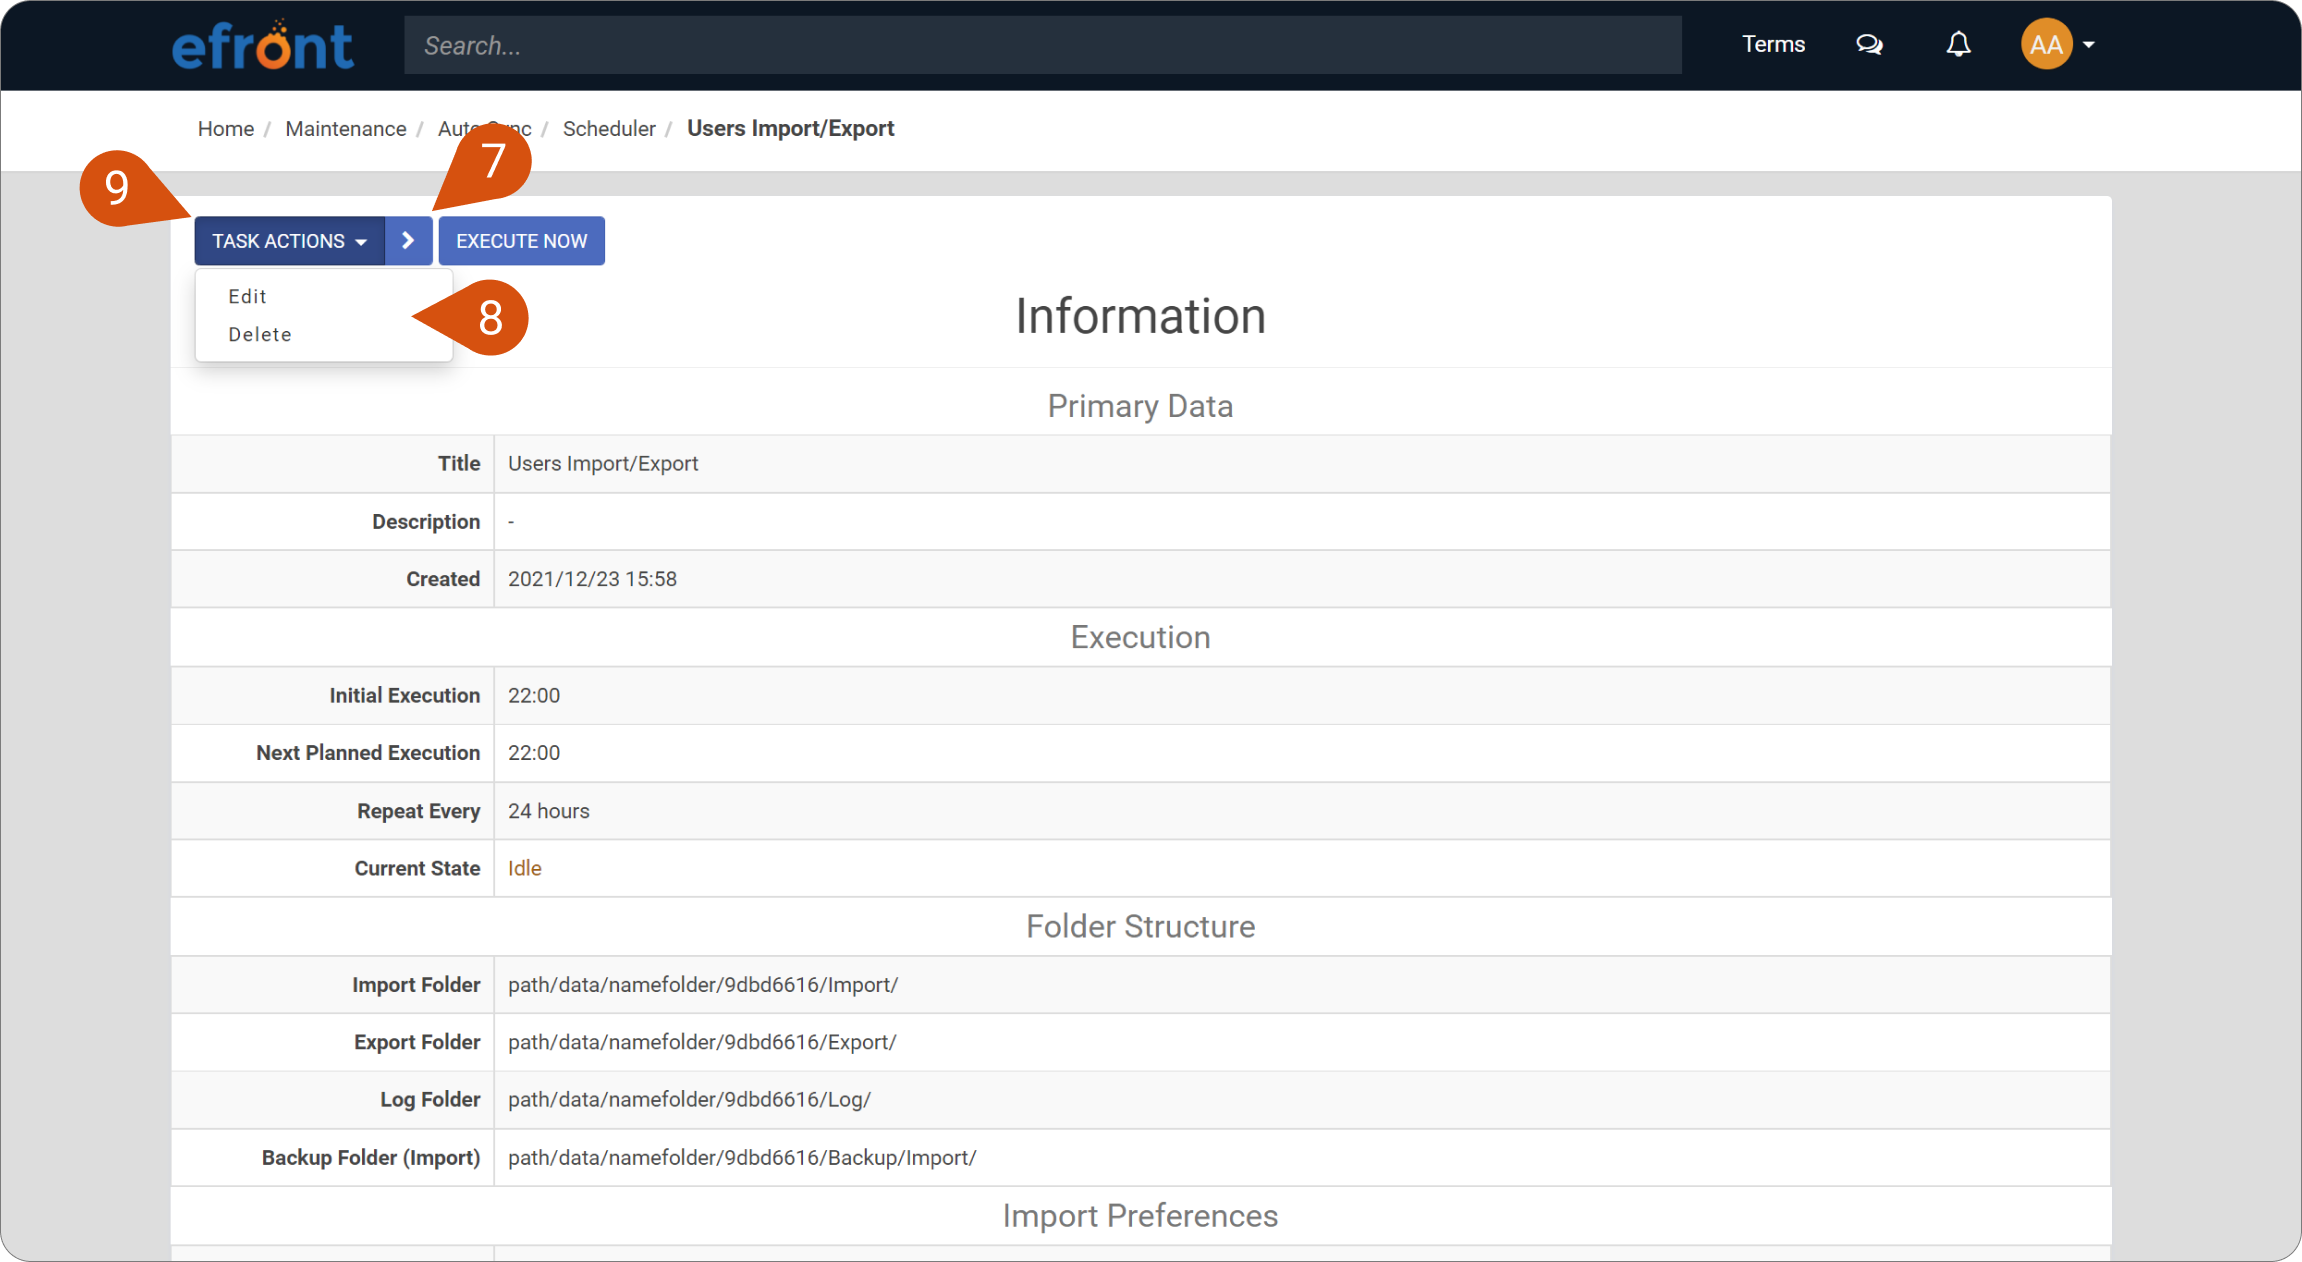
Lastly, if a task is currently active and sitting idle, you can execute it directly regardless of its normal scheduling setting by pressing the Execute Now button (10).