The Certificates section shows a listing of the certificates available that can be awarded upon the completion of a course.
You can edit, delete or preview existing certificates (1) and add new ones (2).
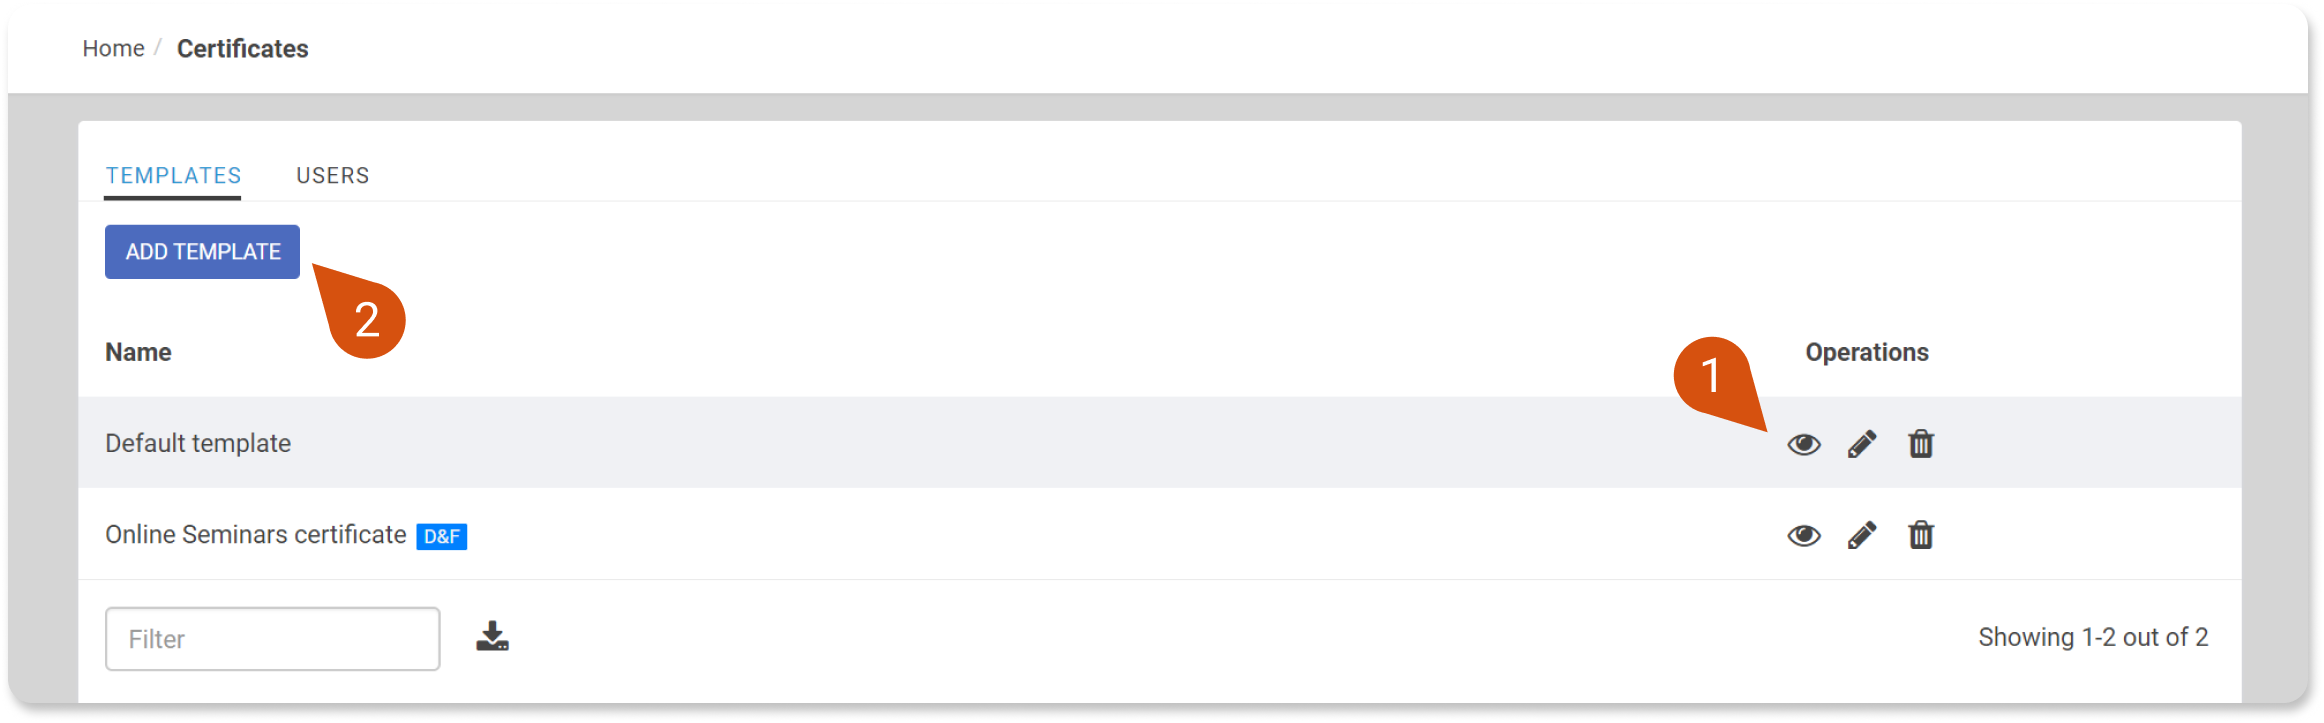
To add a new certificate, click “Certificates” on your administration dashboard, and then click “Add Template.”
Give your certificate template a name and a definition. The definition is in XML format, so you can customize how the certificate will look like by using simple pre-defined tags like <grade>, <username>, and <logo>.
Click “Add” when you’re ready.
You can also assign certificates to specific branches, and only learners in those branches will be able to receive them.
To see all the users that have been awarded a certificate, go to the Users tab (3), where you can find the course they’ve received a certificate for, as well as:
- The award date to see when they received it (4)
- The expiration date in case that the certificate expires (5)
- And the re-assignment date if the course is re-assigned when (or before) the certificate expires (6)
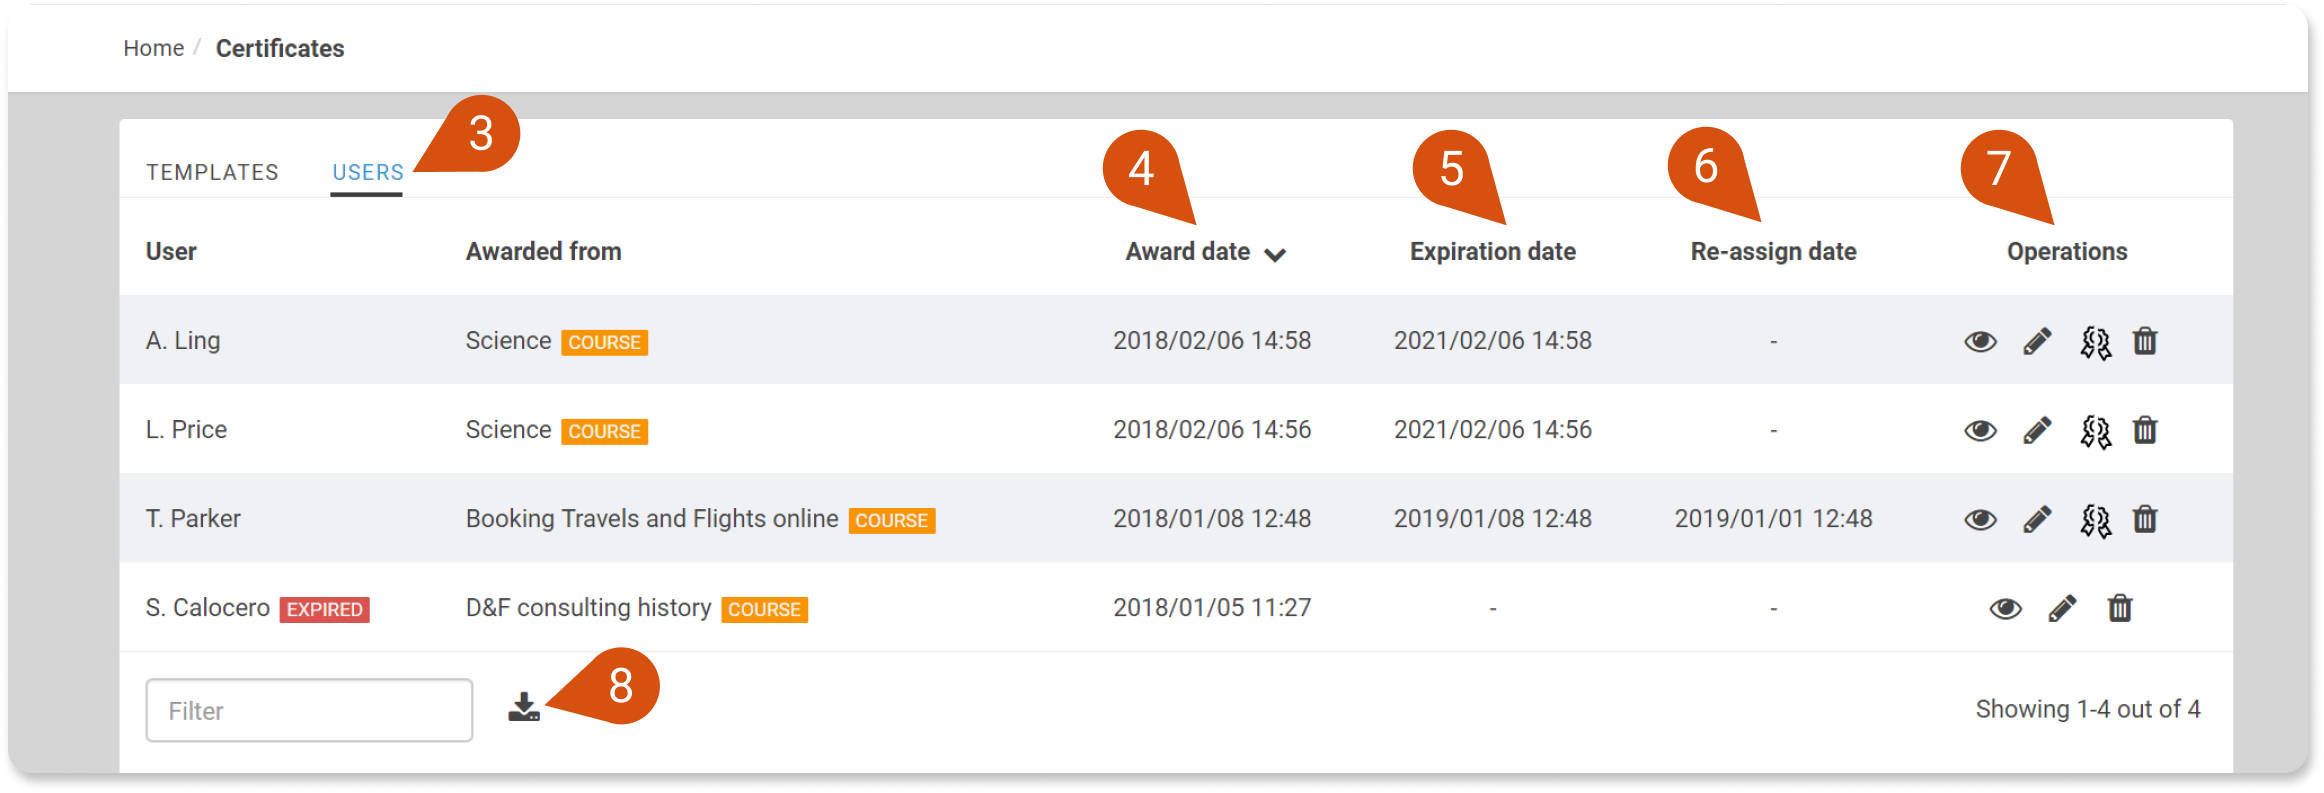
On the Operations column (7), you can preview, edit, revoke, or delete a certificate from a user’s profile.
You can also export the list of users to a CSV file by clicking the export button (8).
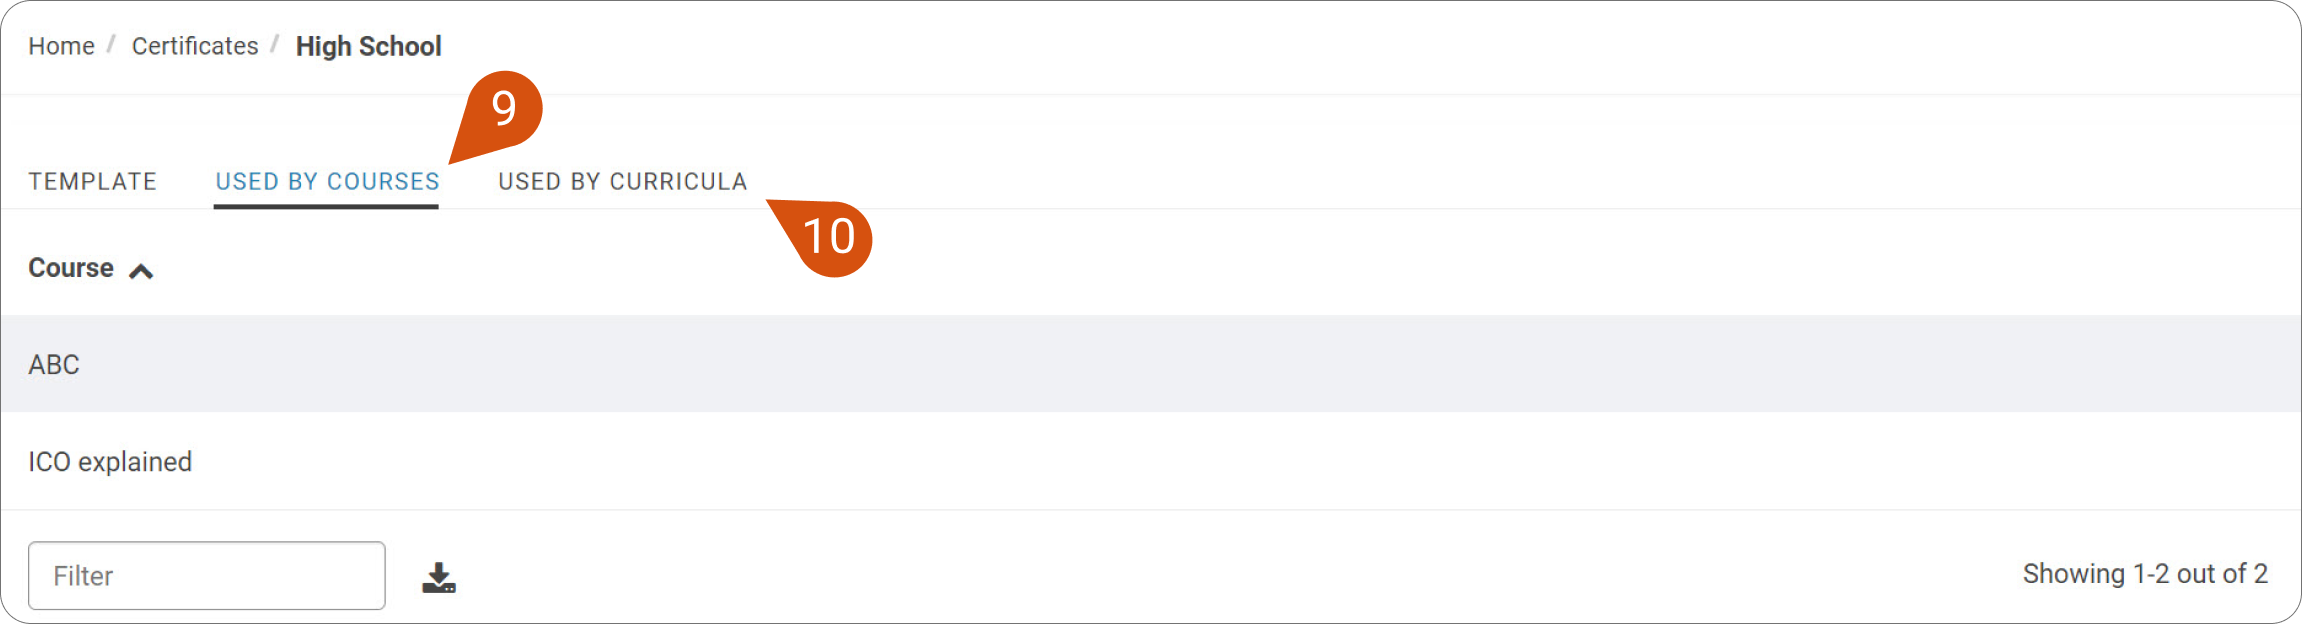
Keep in mind that when editing a specific certificate template and is used by courses (9) and/or curricula (10), the respective tabs will appear. Click on each tab to see a list of all the courses and/or curricula that offer the specific certificate template.
To learn how you can create your own certificate or customize an existing one, read: How to customize Certifications article.