Auth0 is a cloud-based user authentication service that provides authentication and authorization.
To integrate eFront with Auth0:
Step 1
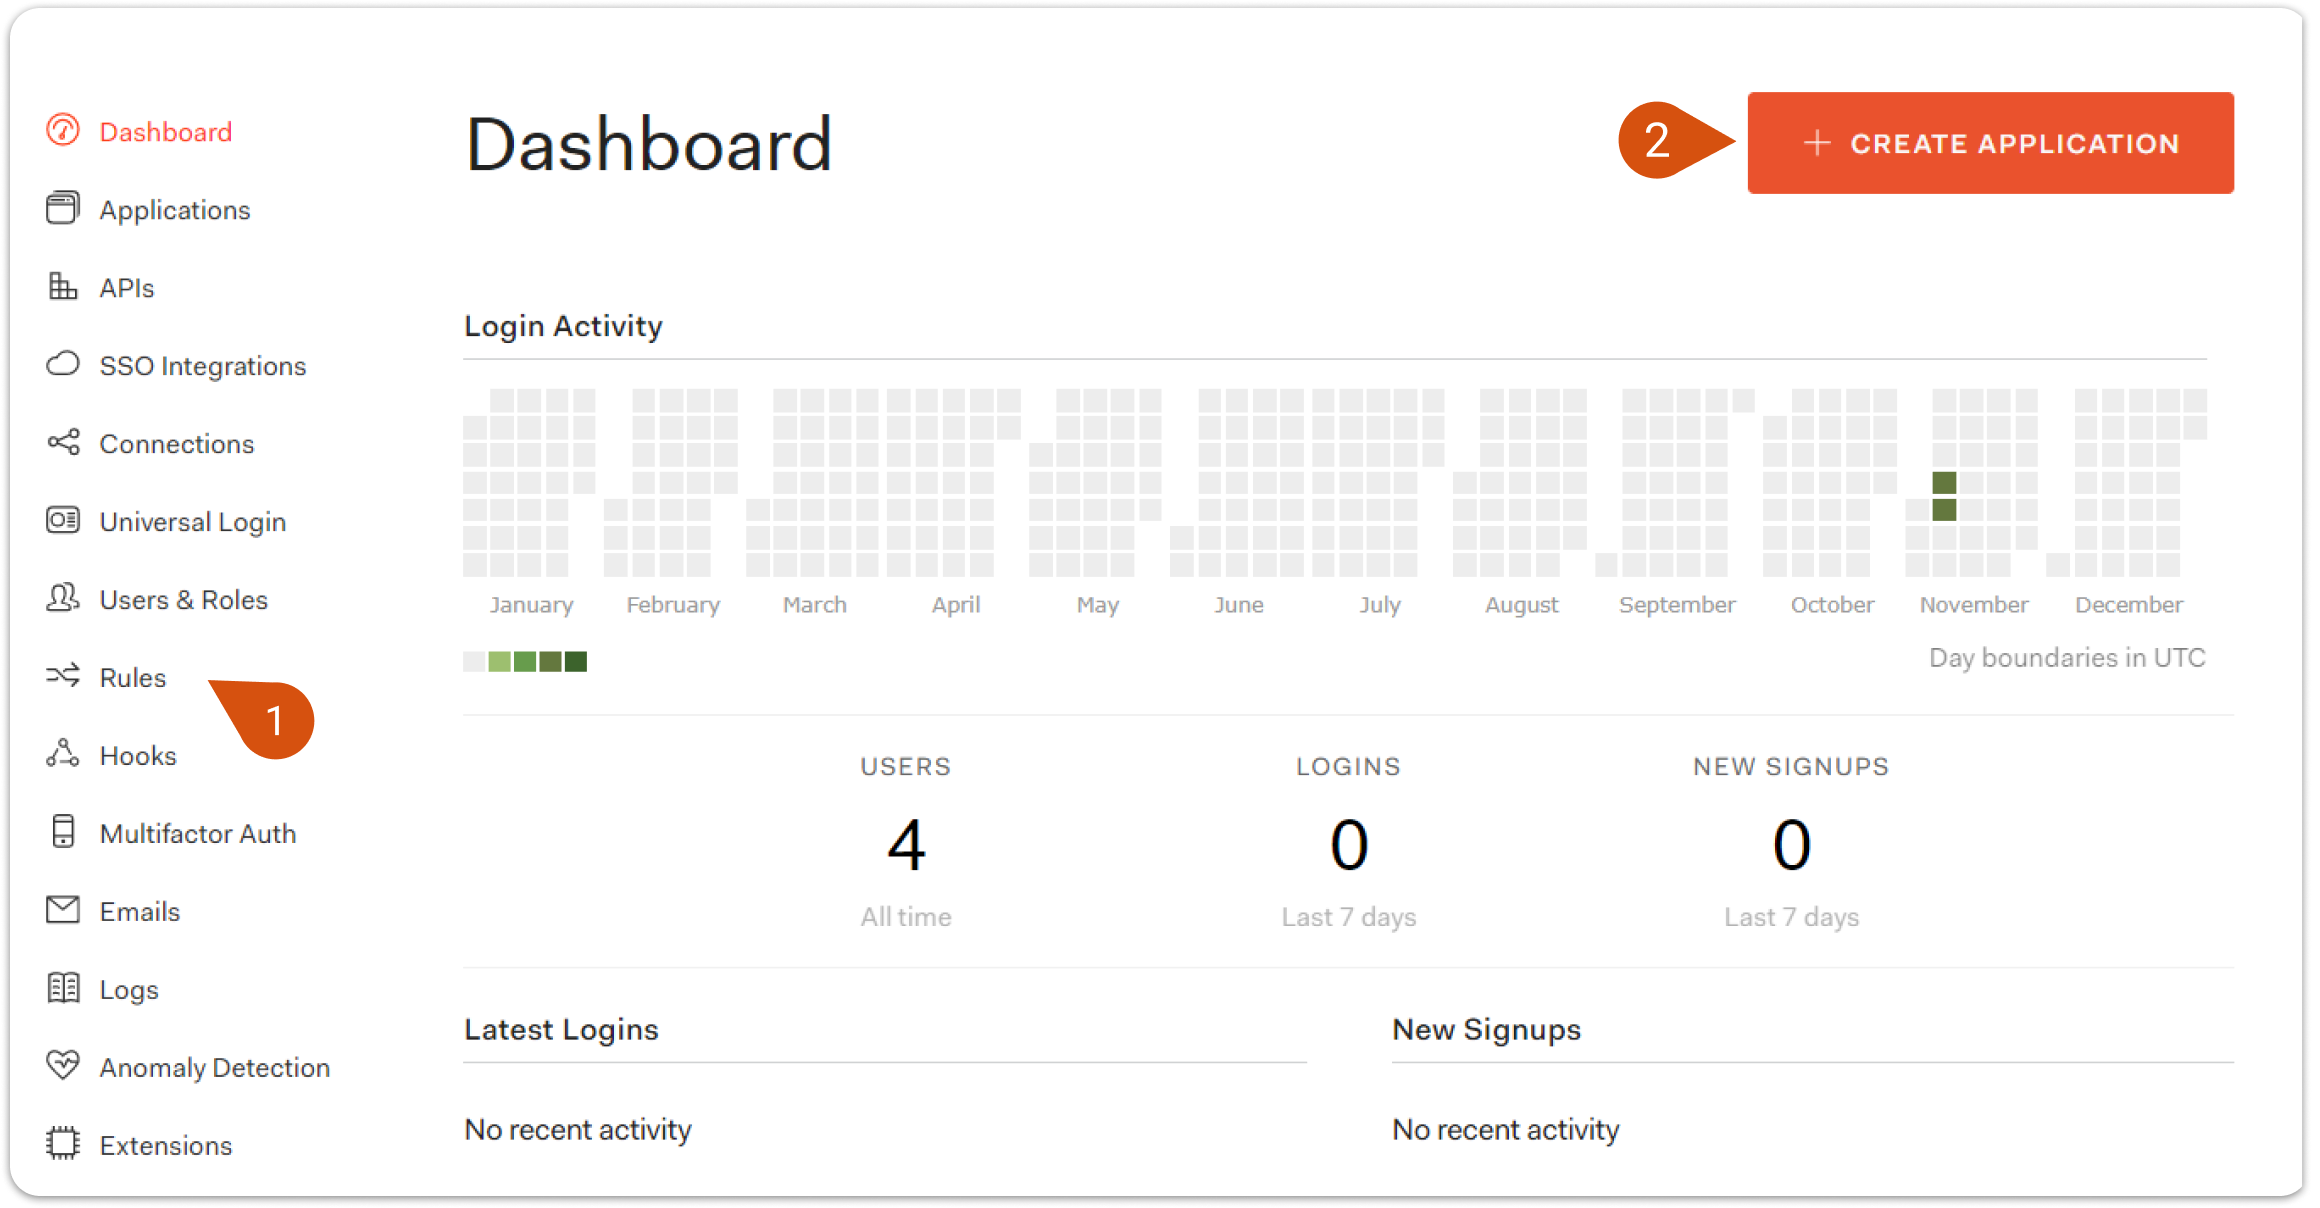
1. Connect to your Auth0 account here and go to the Dashboard.
2. Go to Rules (1) and click Create Rule (2).
 3. Click Empty rule (3).

4. Give the rule any name you like (for example, eFront claims) and enter the following code:
function (user, context, callback) {
  context.samlConfiguration.mappings = {
     "http://schemas.xmlsoap.org/ws/2005/05/identity/claims/emailaddress":   "email",
     "http://schemas.xmlsoap.org/ws/2005/05/identity/claims/name":           "given_name",
     "http://schemas.xmlsoap.org/ws/2005/05/identity/claims/surname":      "family_name"
  };
  callback(null, user, context);
}
5. Click Save Changes (4). You will need these URLs later on this guide (Step 2.8). The code should look like this:

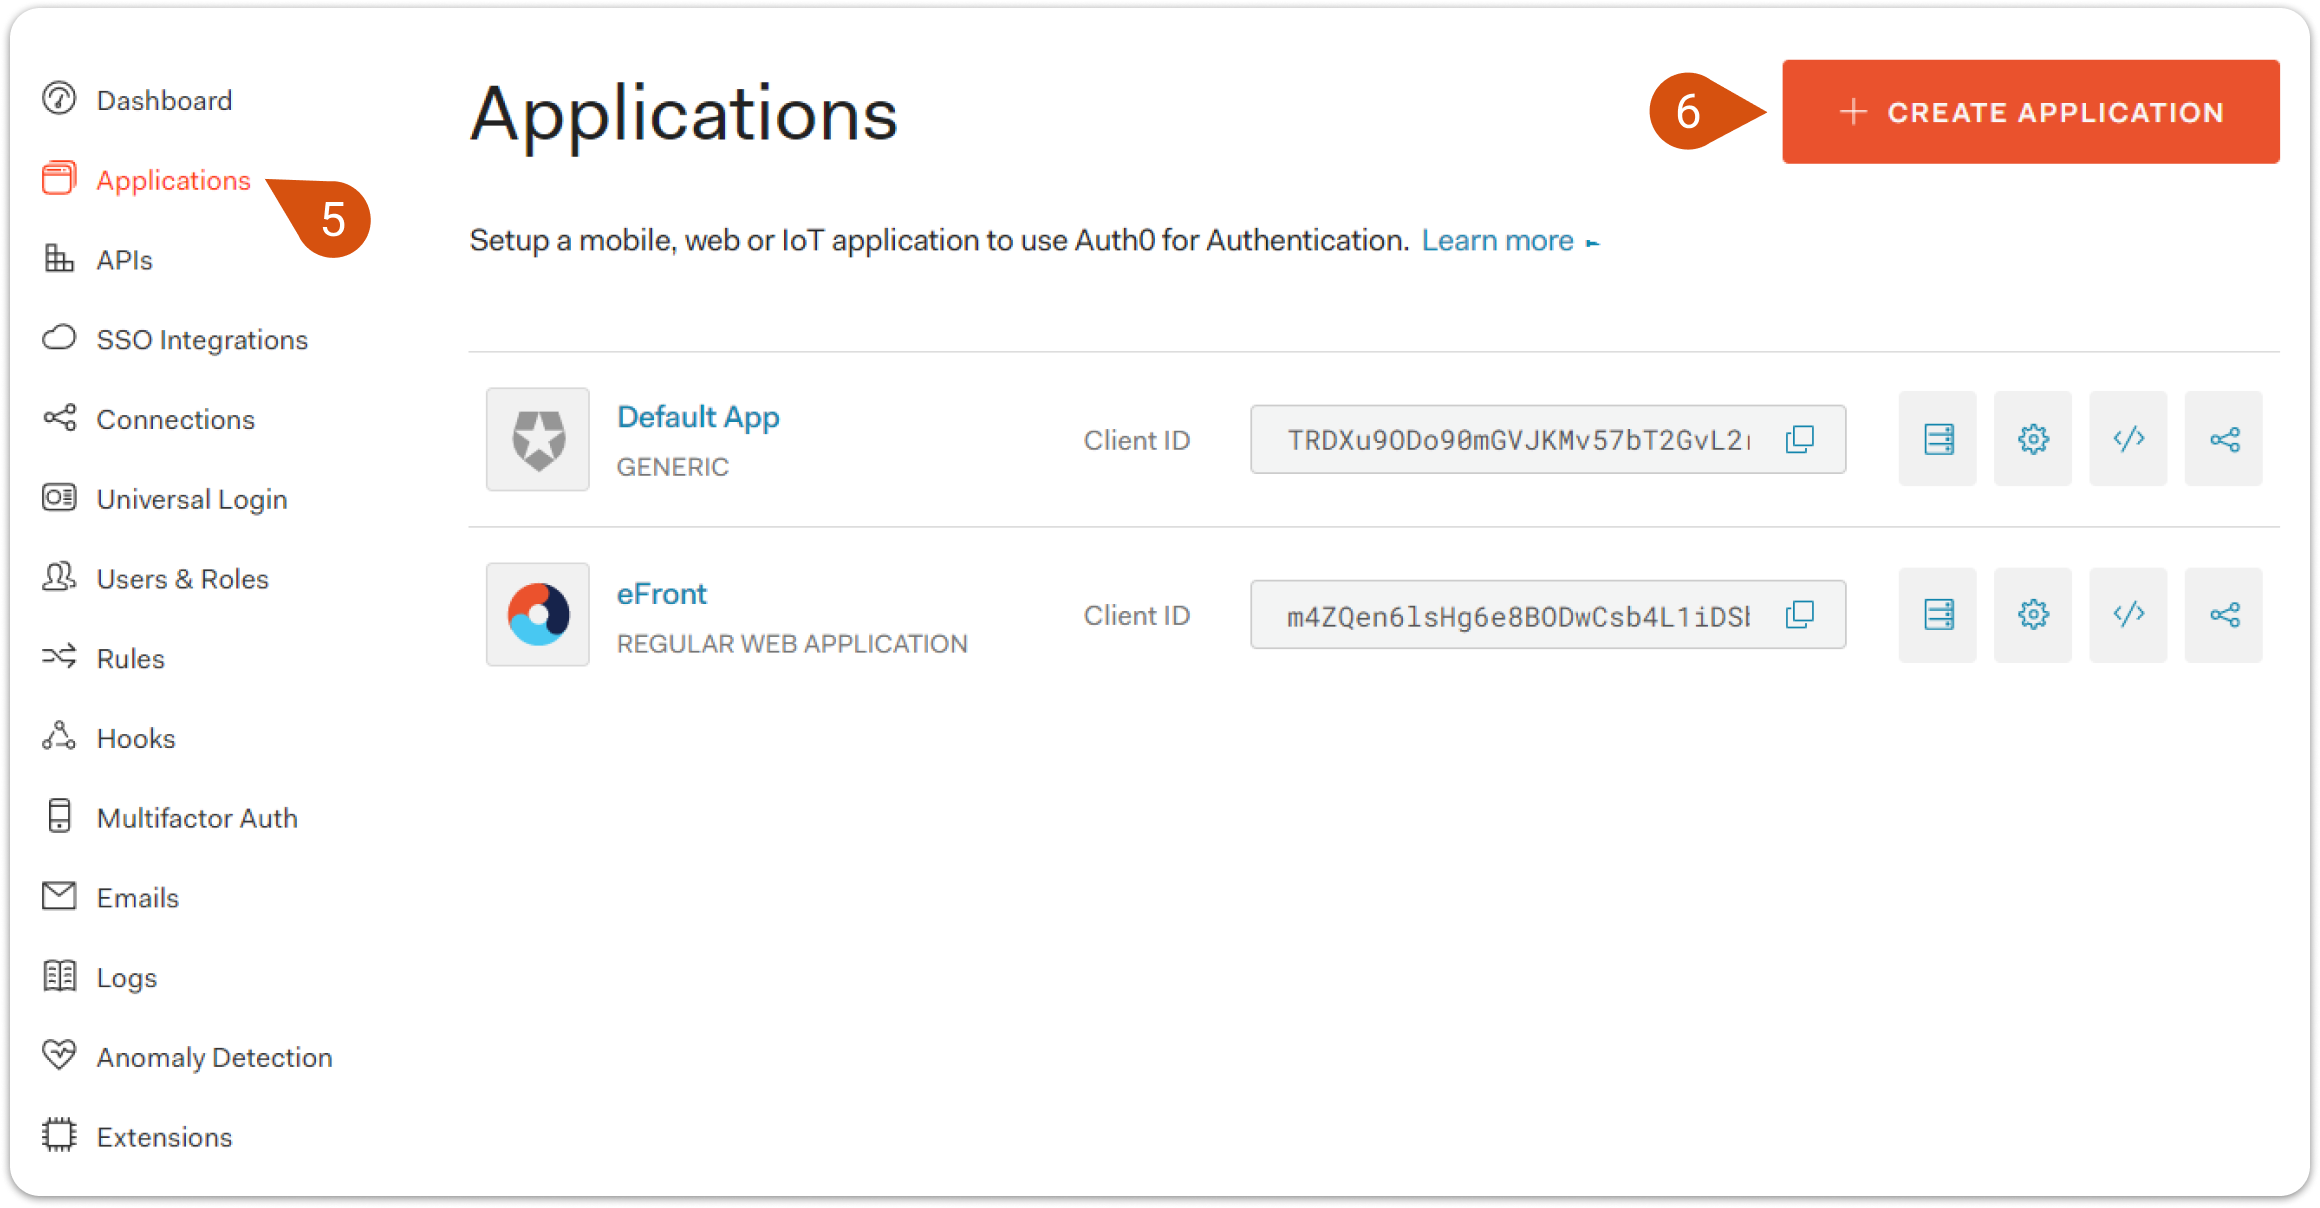
6. From the dashboard, go to Applications (5), and click Create Application (6).
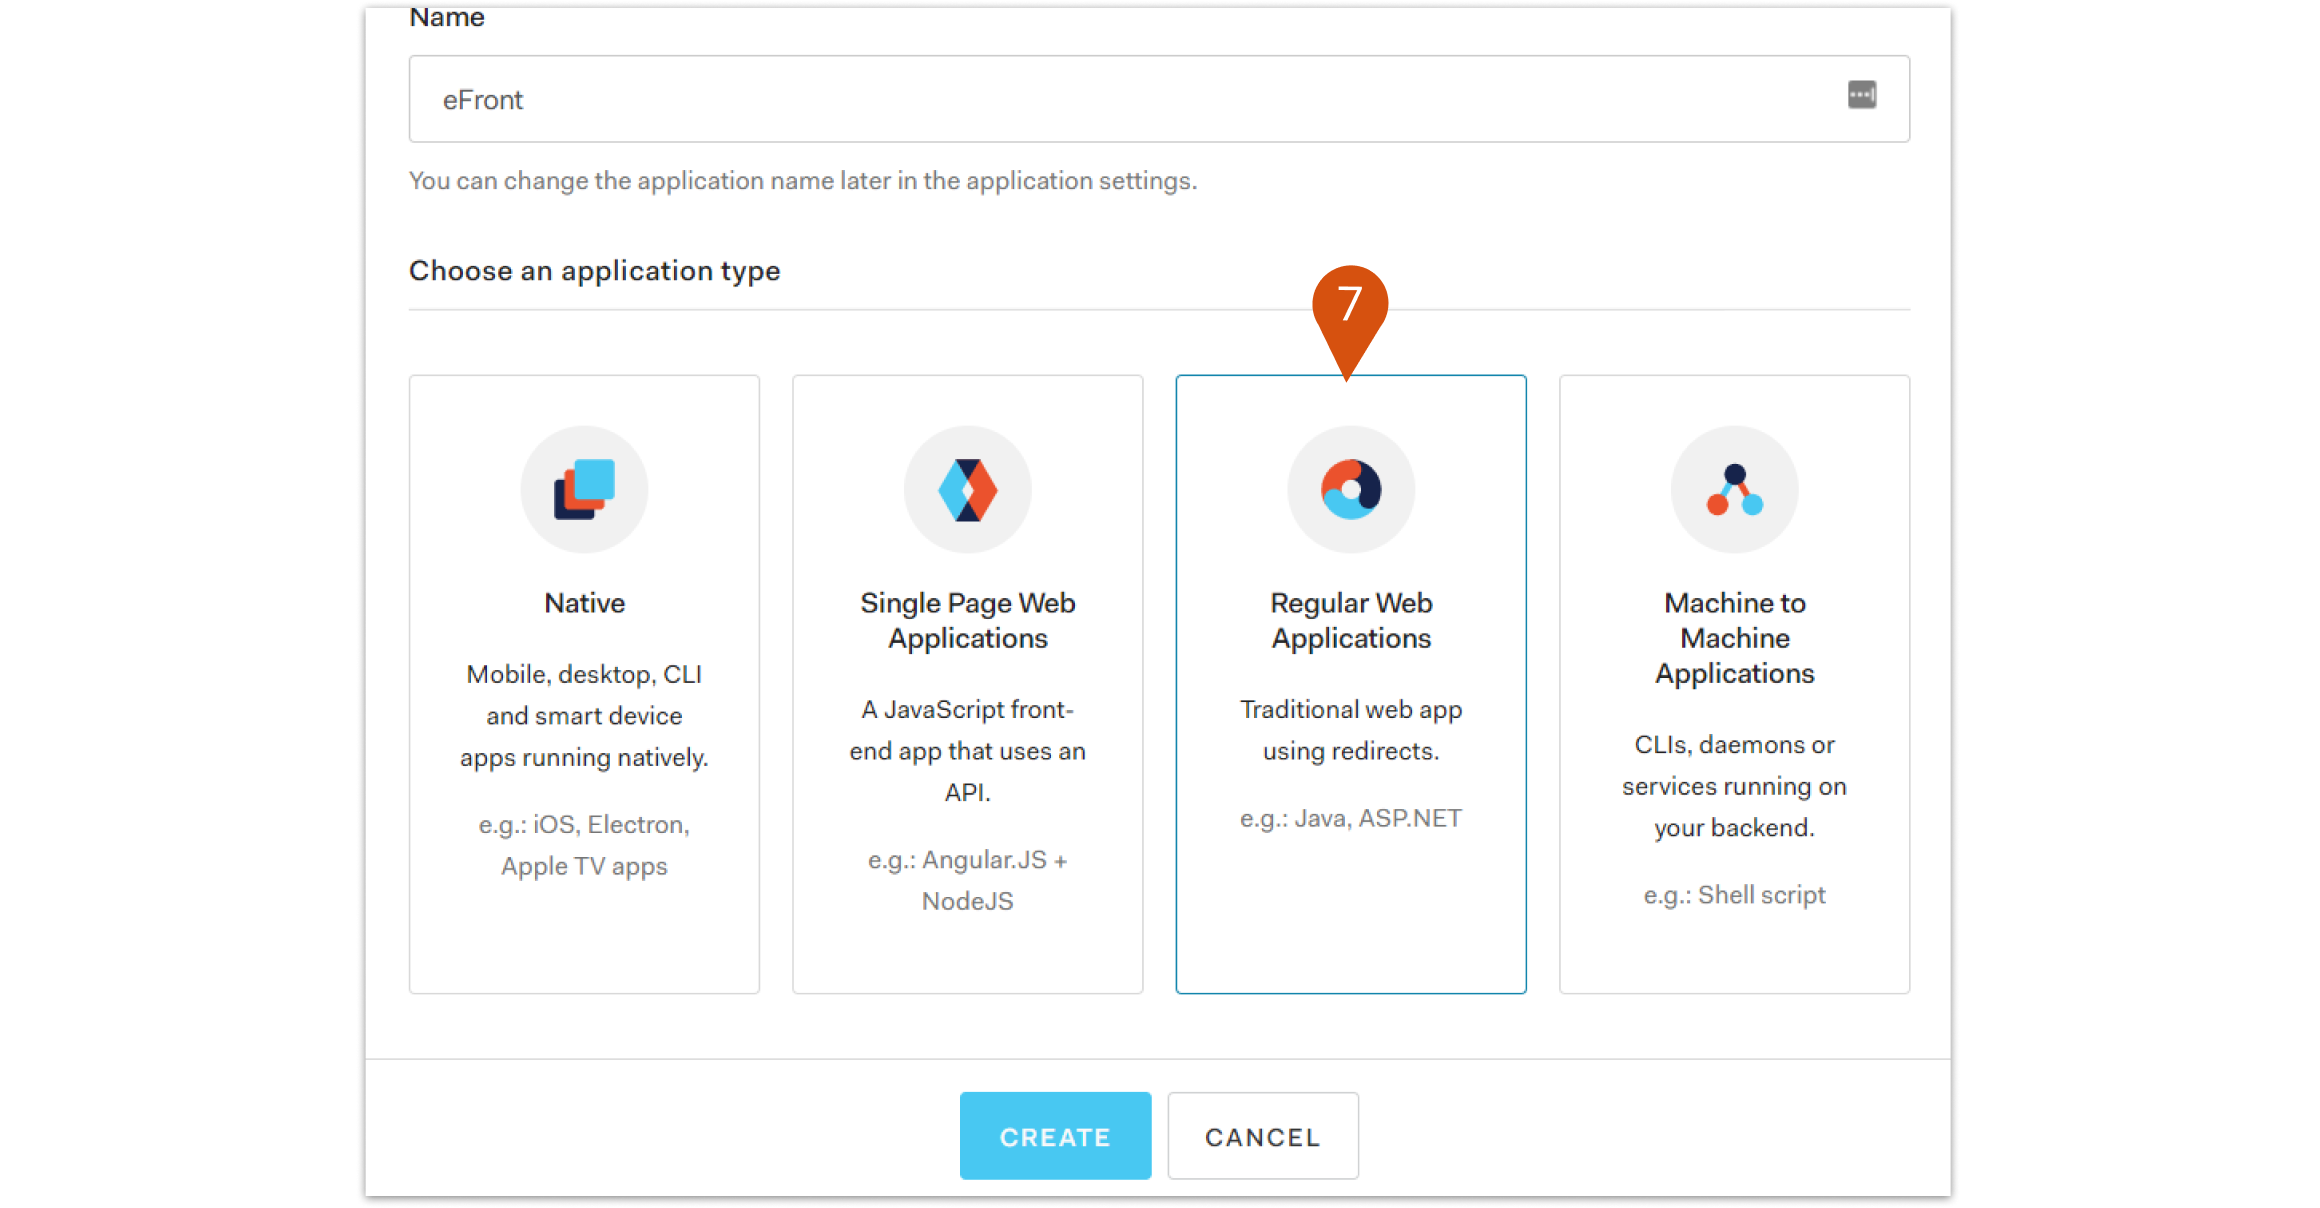
7. On the pop-up window give a name, and select Regular Web Applications (7).
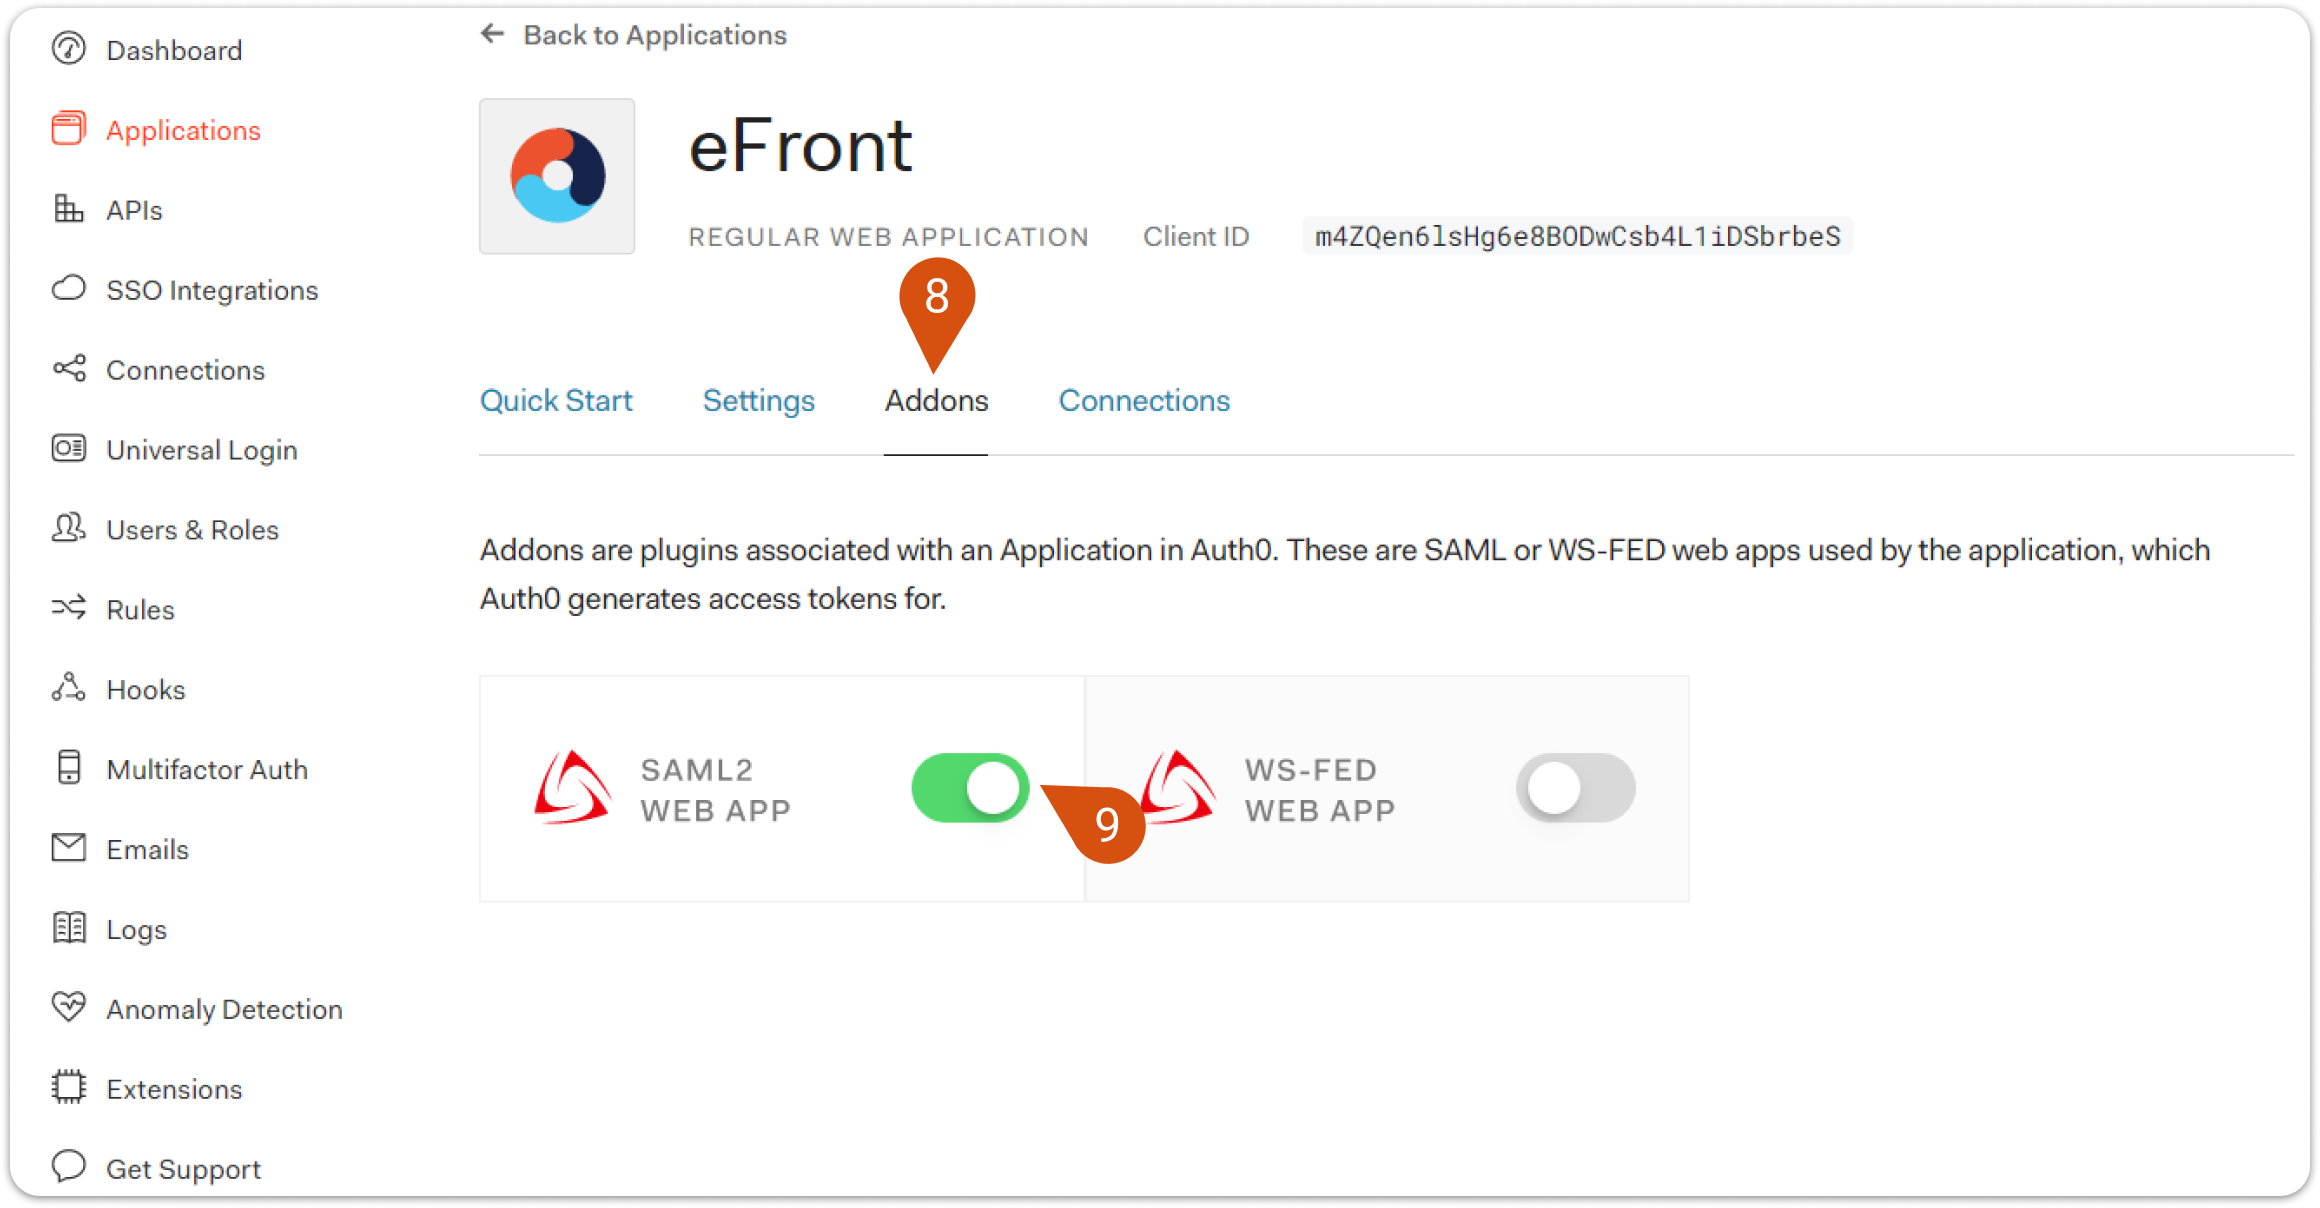
8. Select the Addons tab (8) and click on SAML2 WEB APP (9).
9. On the Application Callback URL (10) enter the Assertion Consumer Service (ACS) URL (10). You can find that from the eFront SAML settings under System Configuration -> SSO -> SAML.
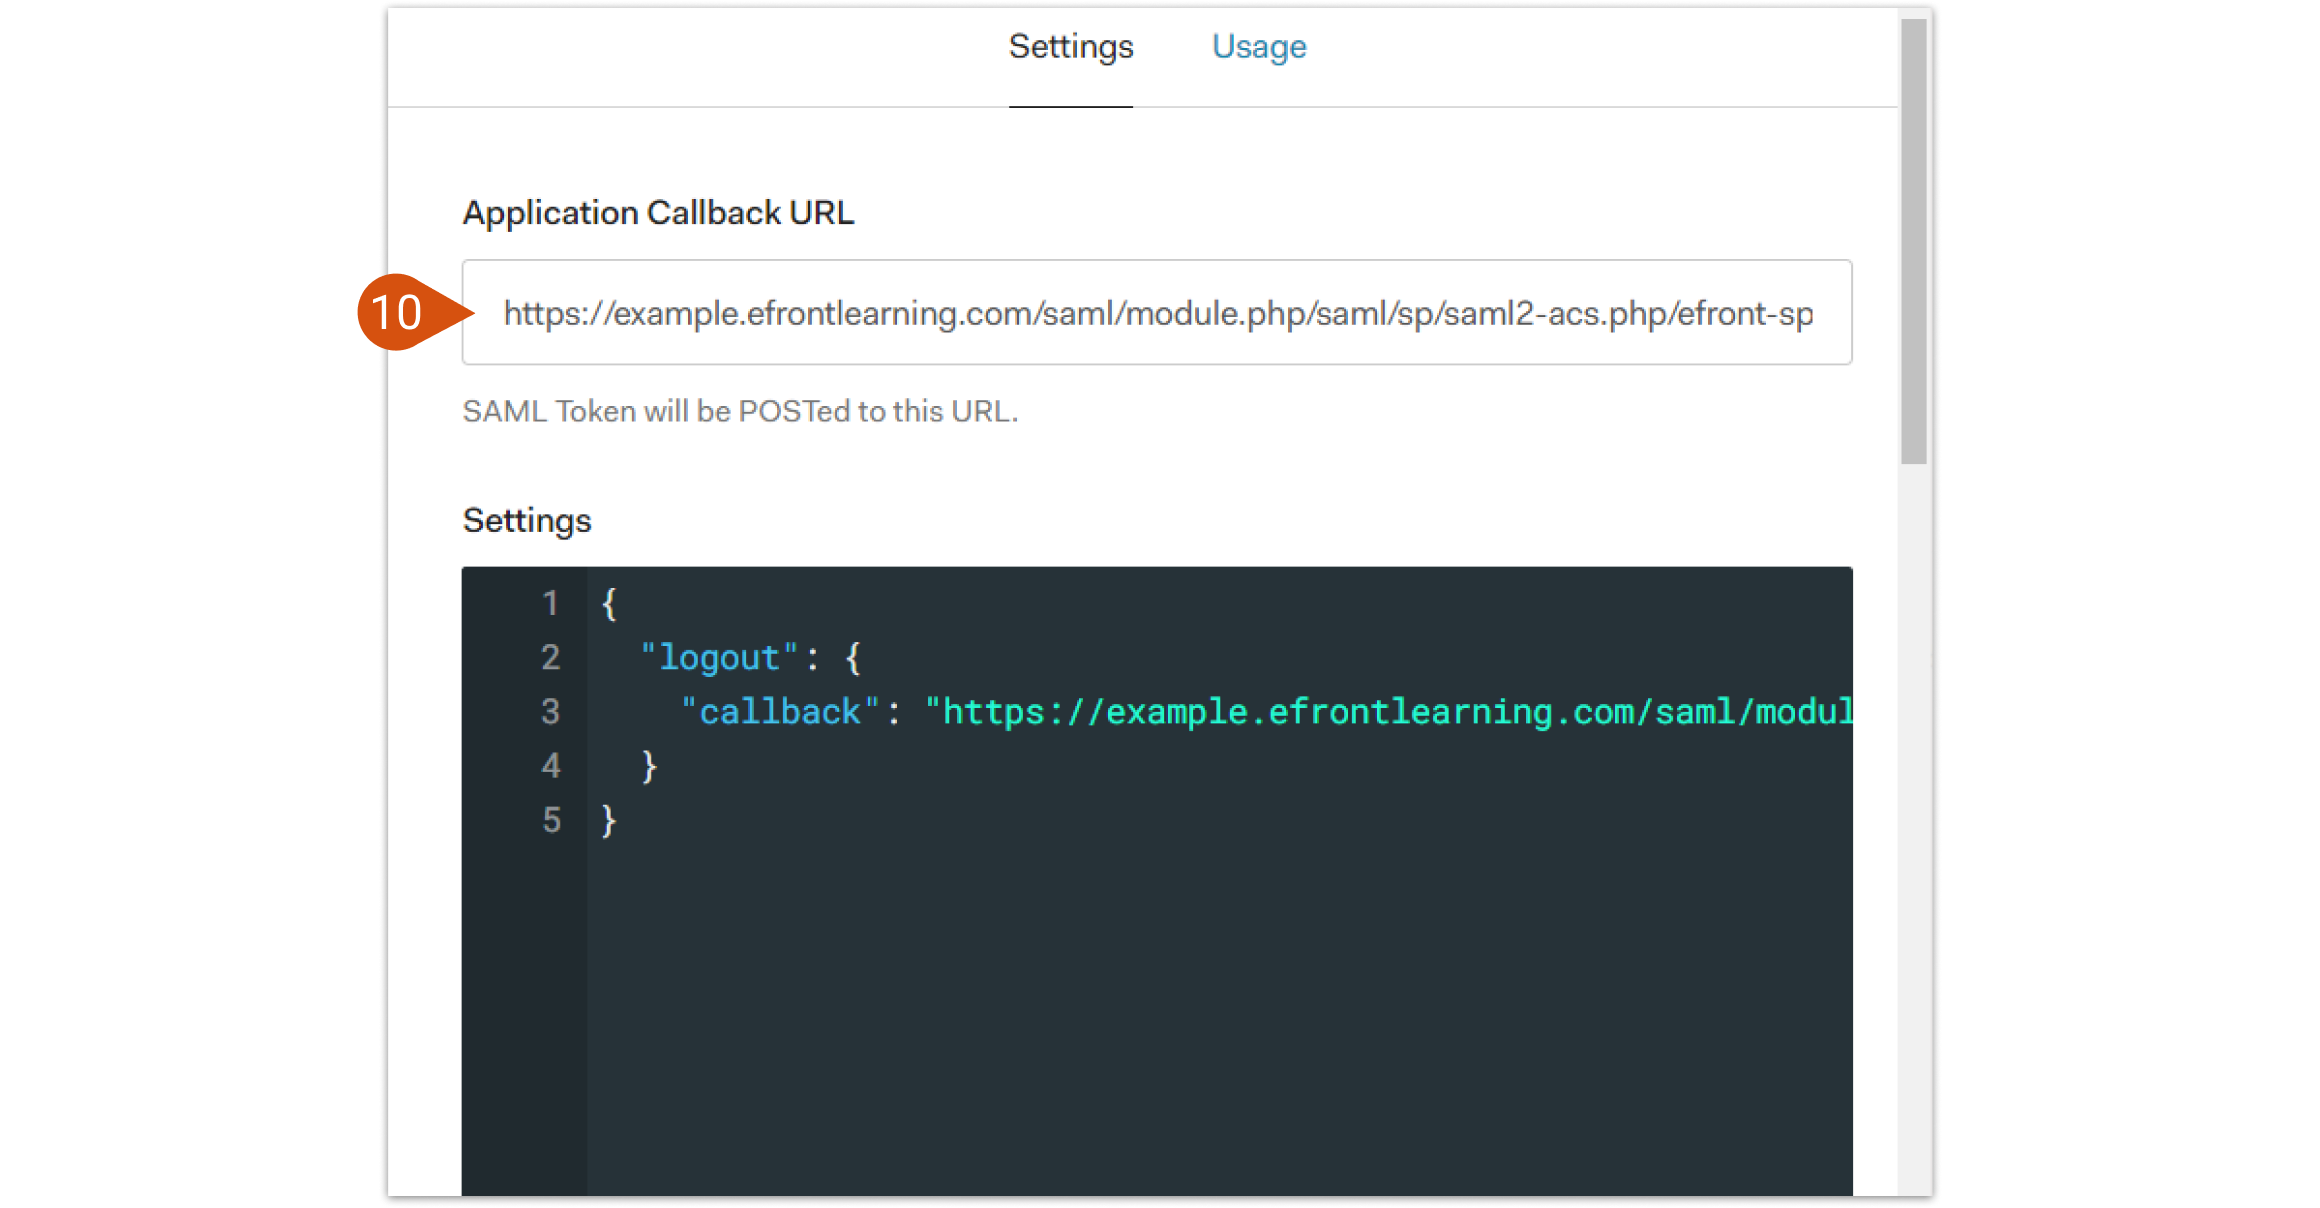
 10. On the Settings code window (in Auth0) enter the following code:
{
  "logout": {
    "callback": "https://example.efrontlearning.com/saml/module.php/saml/sp/saml2-logout.php/efront-sp"
  }
}
Note: The URL parameter is the “Single Logout Service URL” found in eFront SAML settings. You have to replace the ‘example.com’ with your eFront portal’s domain URL.
11. Click Enable at the bottom of the pop-up page.
Step 2:
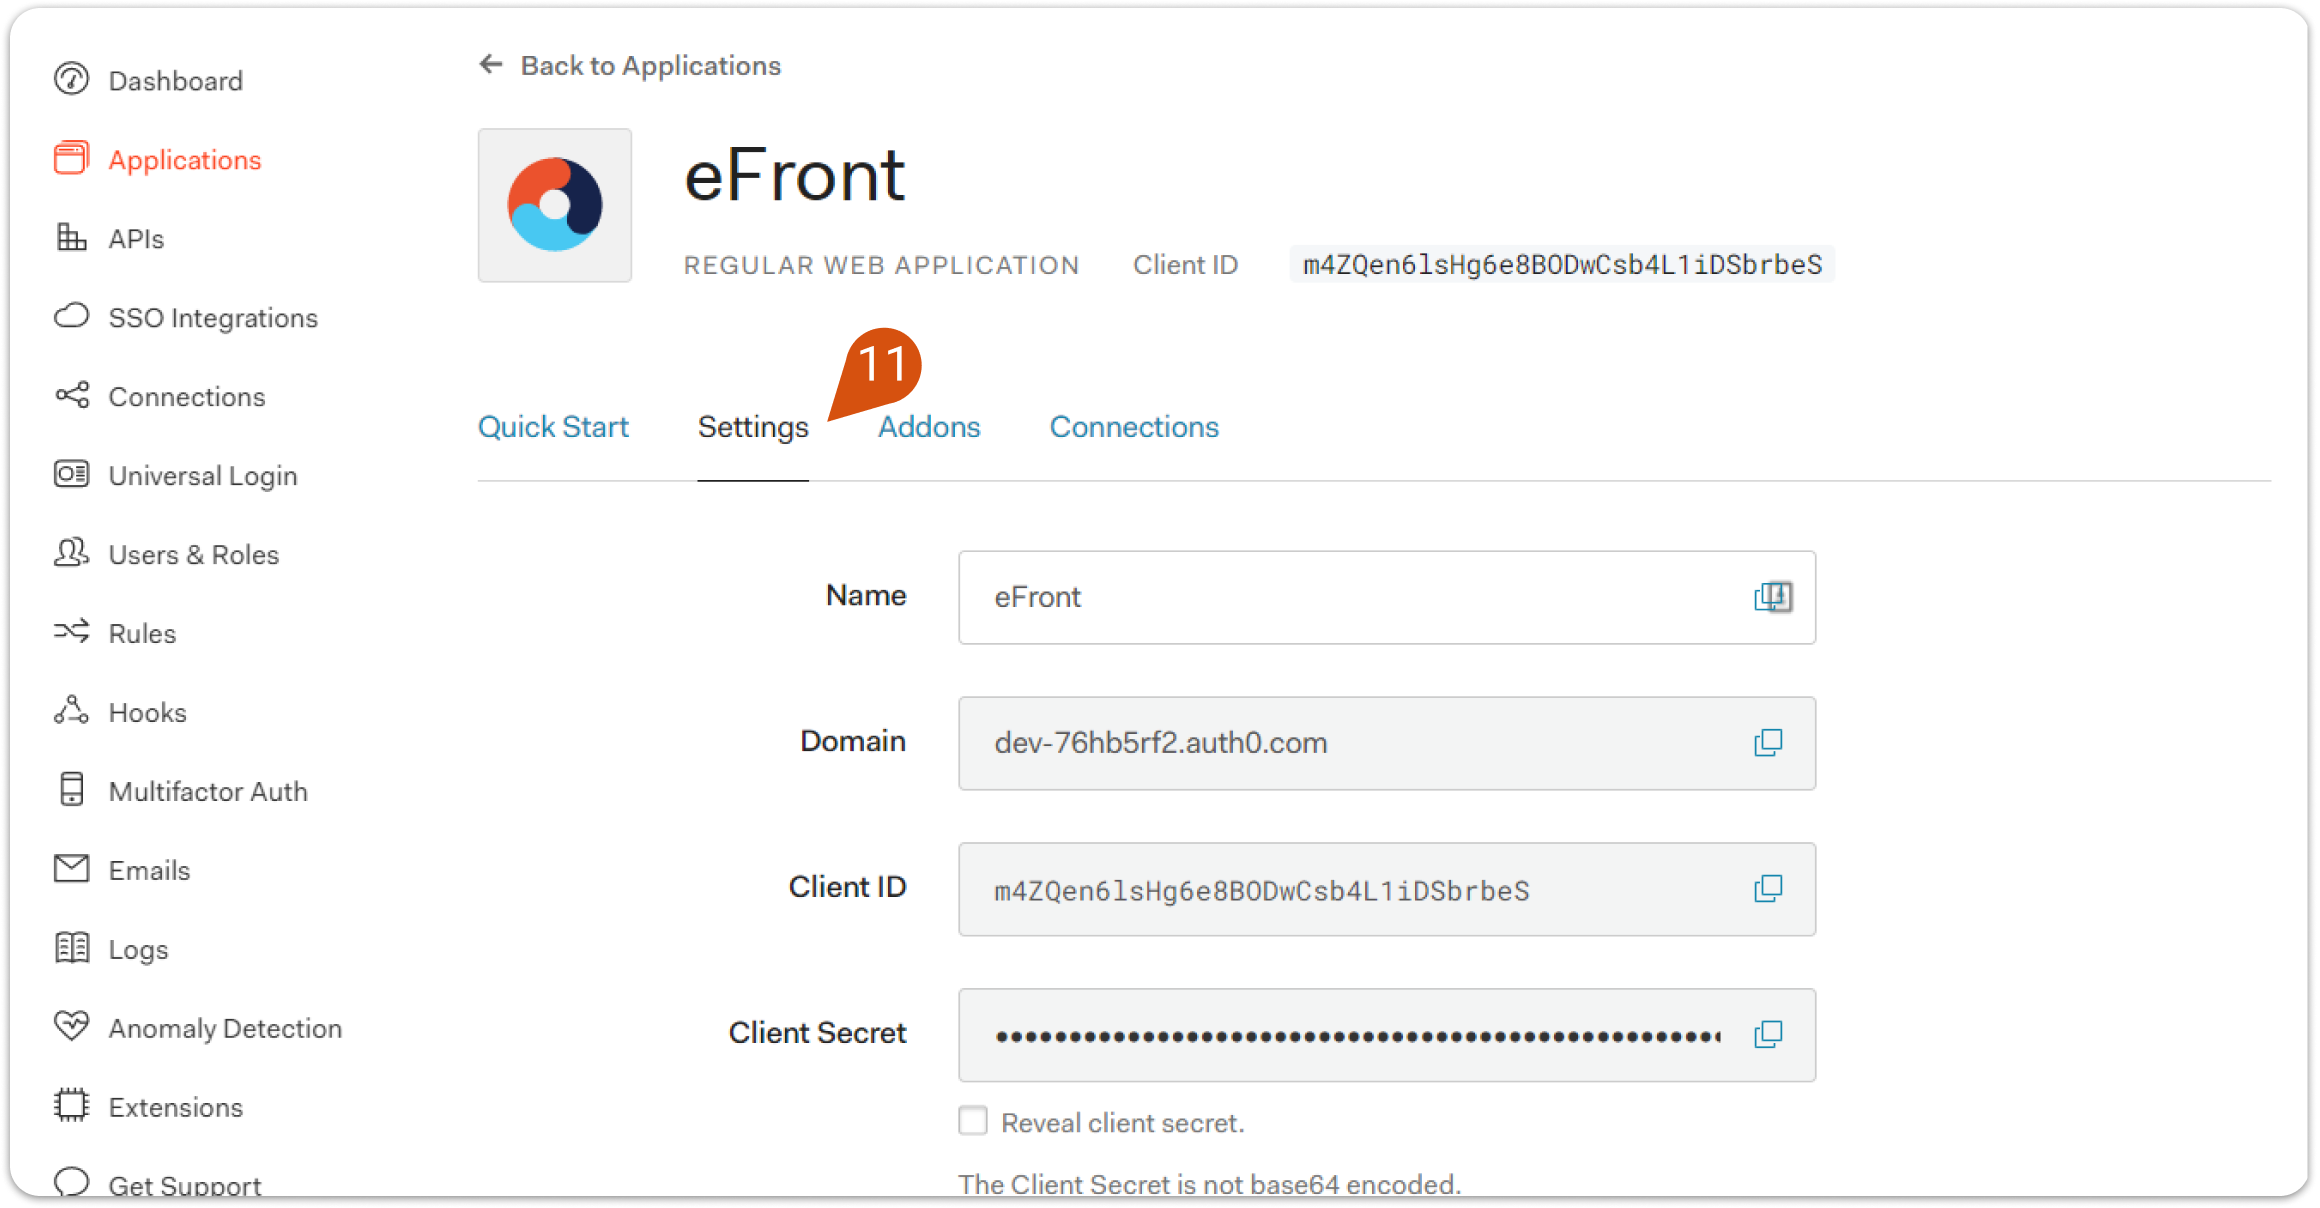
1. Go to the Auth0 dashboard -> Applications -> eFront -> Settings (11).
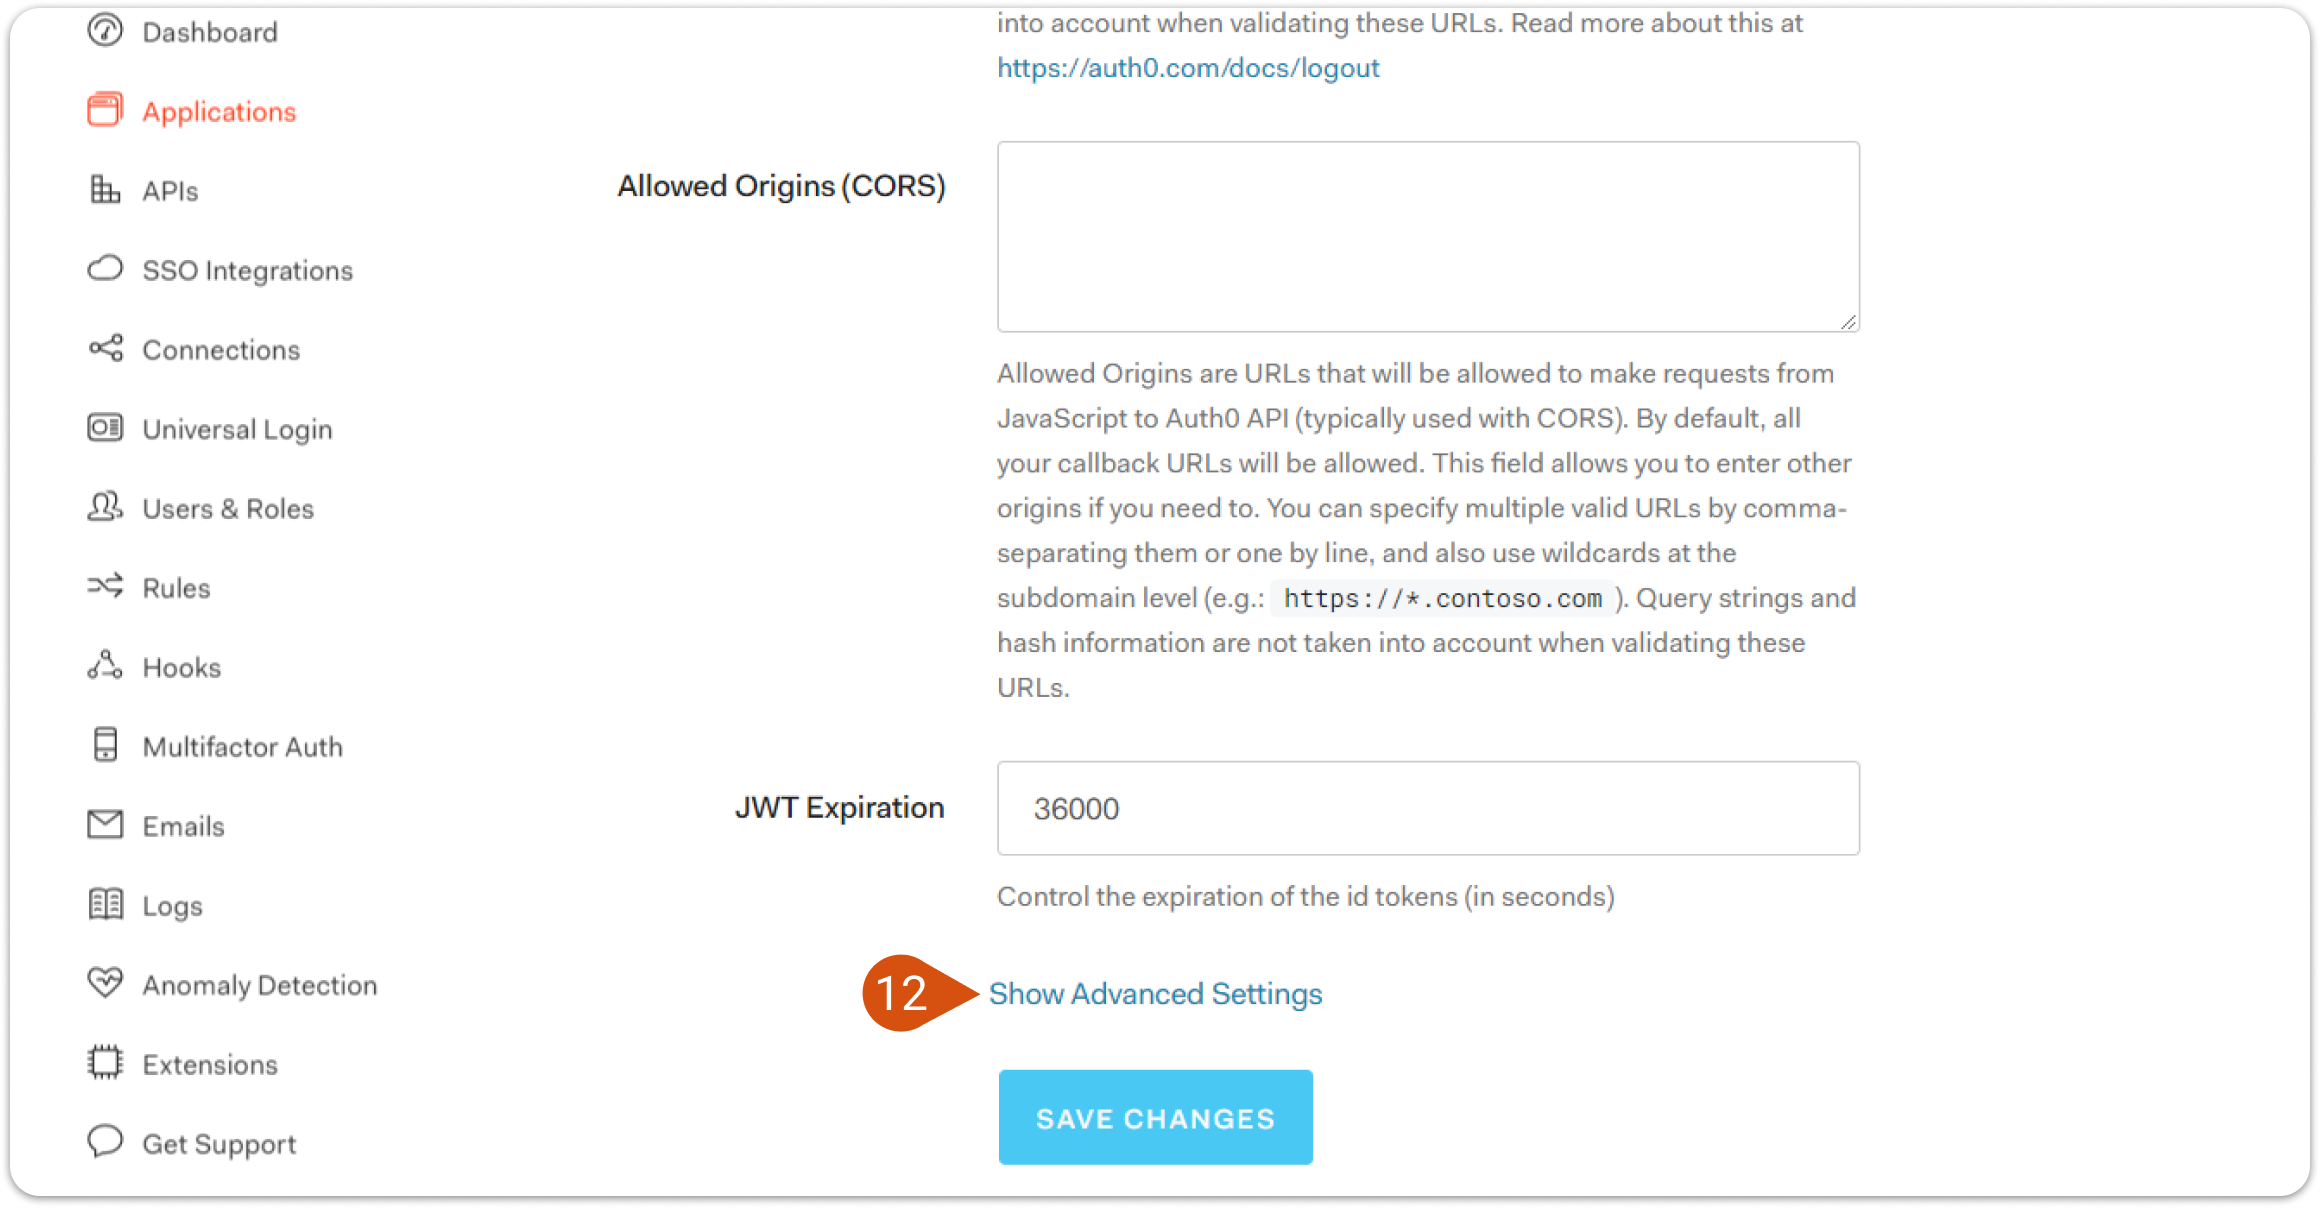
2. Scroll down and click Show Advanced Settings (12).
 3. Go to the Certificates tab (13) and copy the Signing Certificate Thumbprint (14).
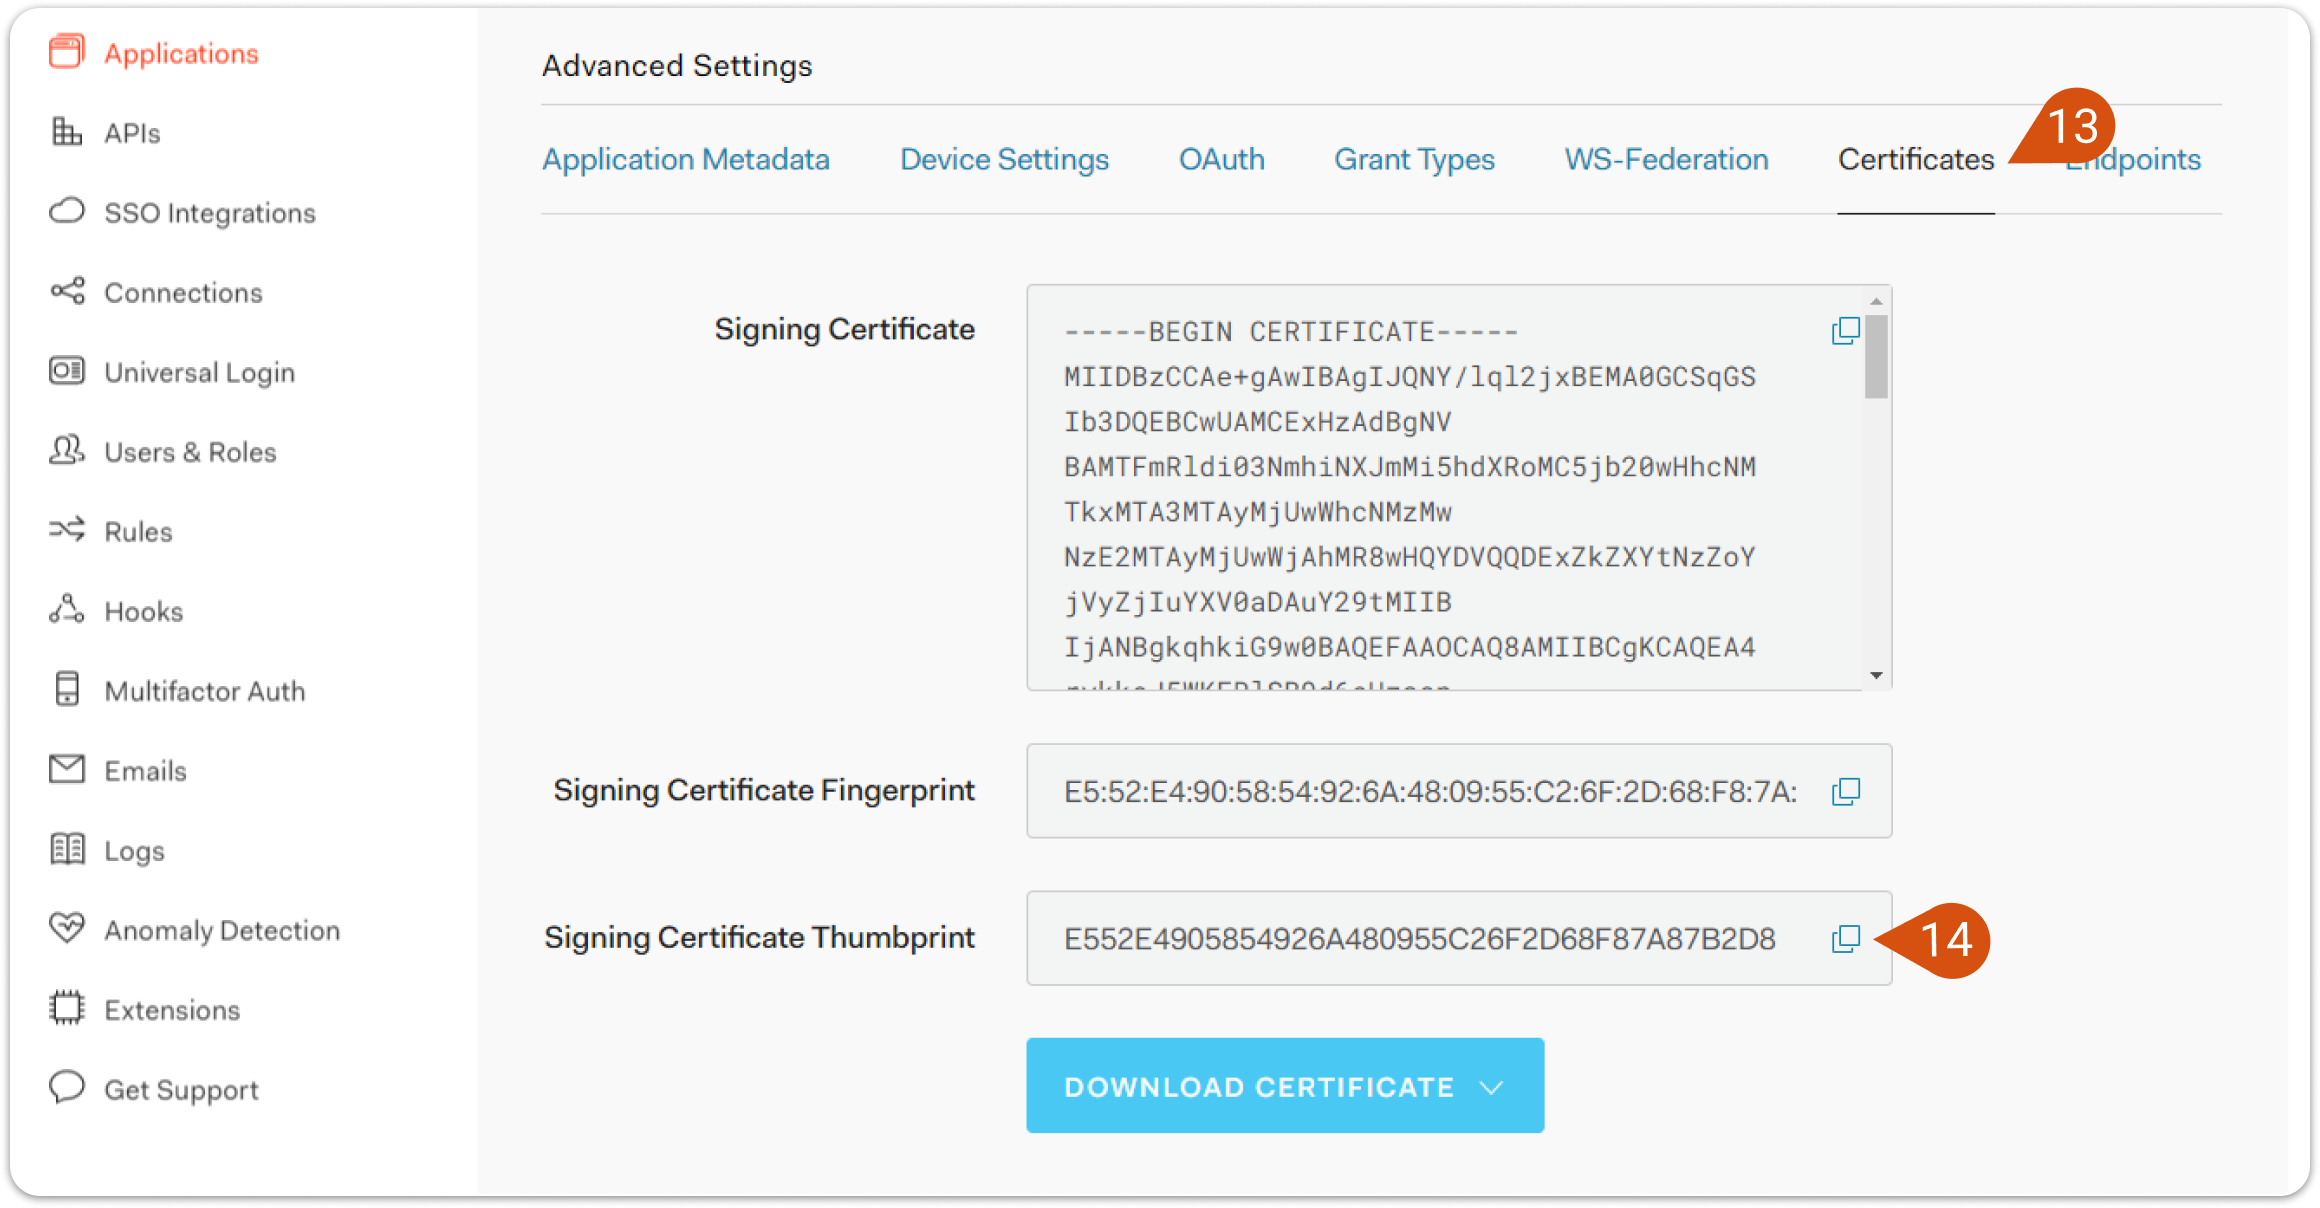
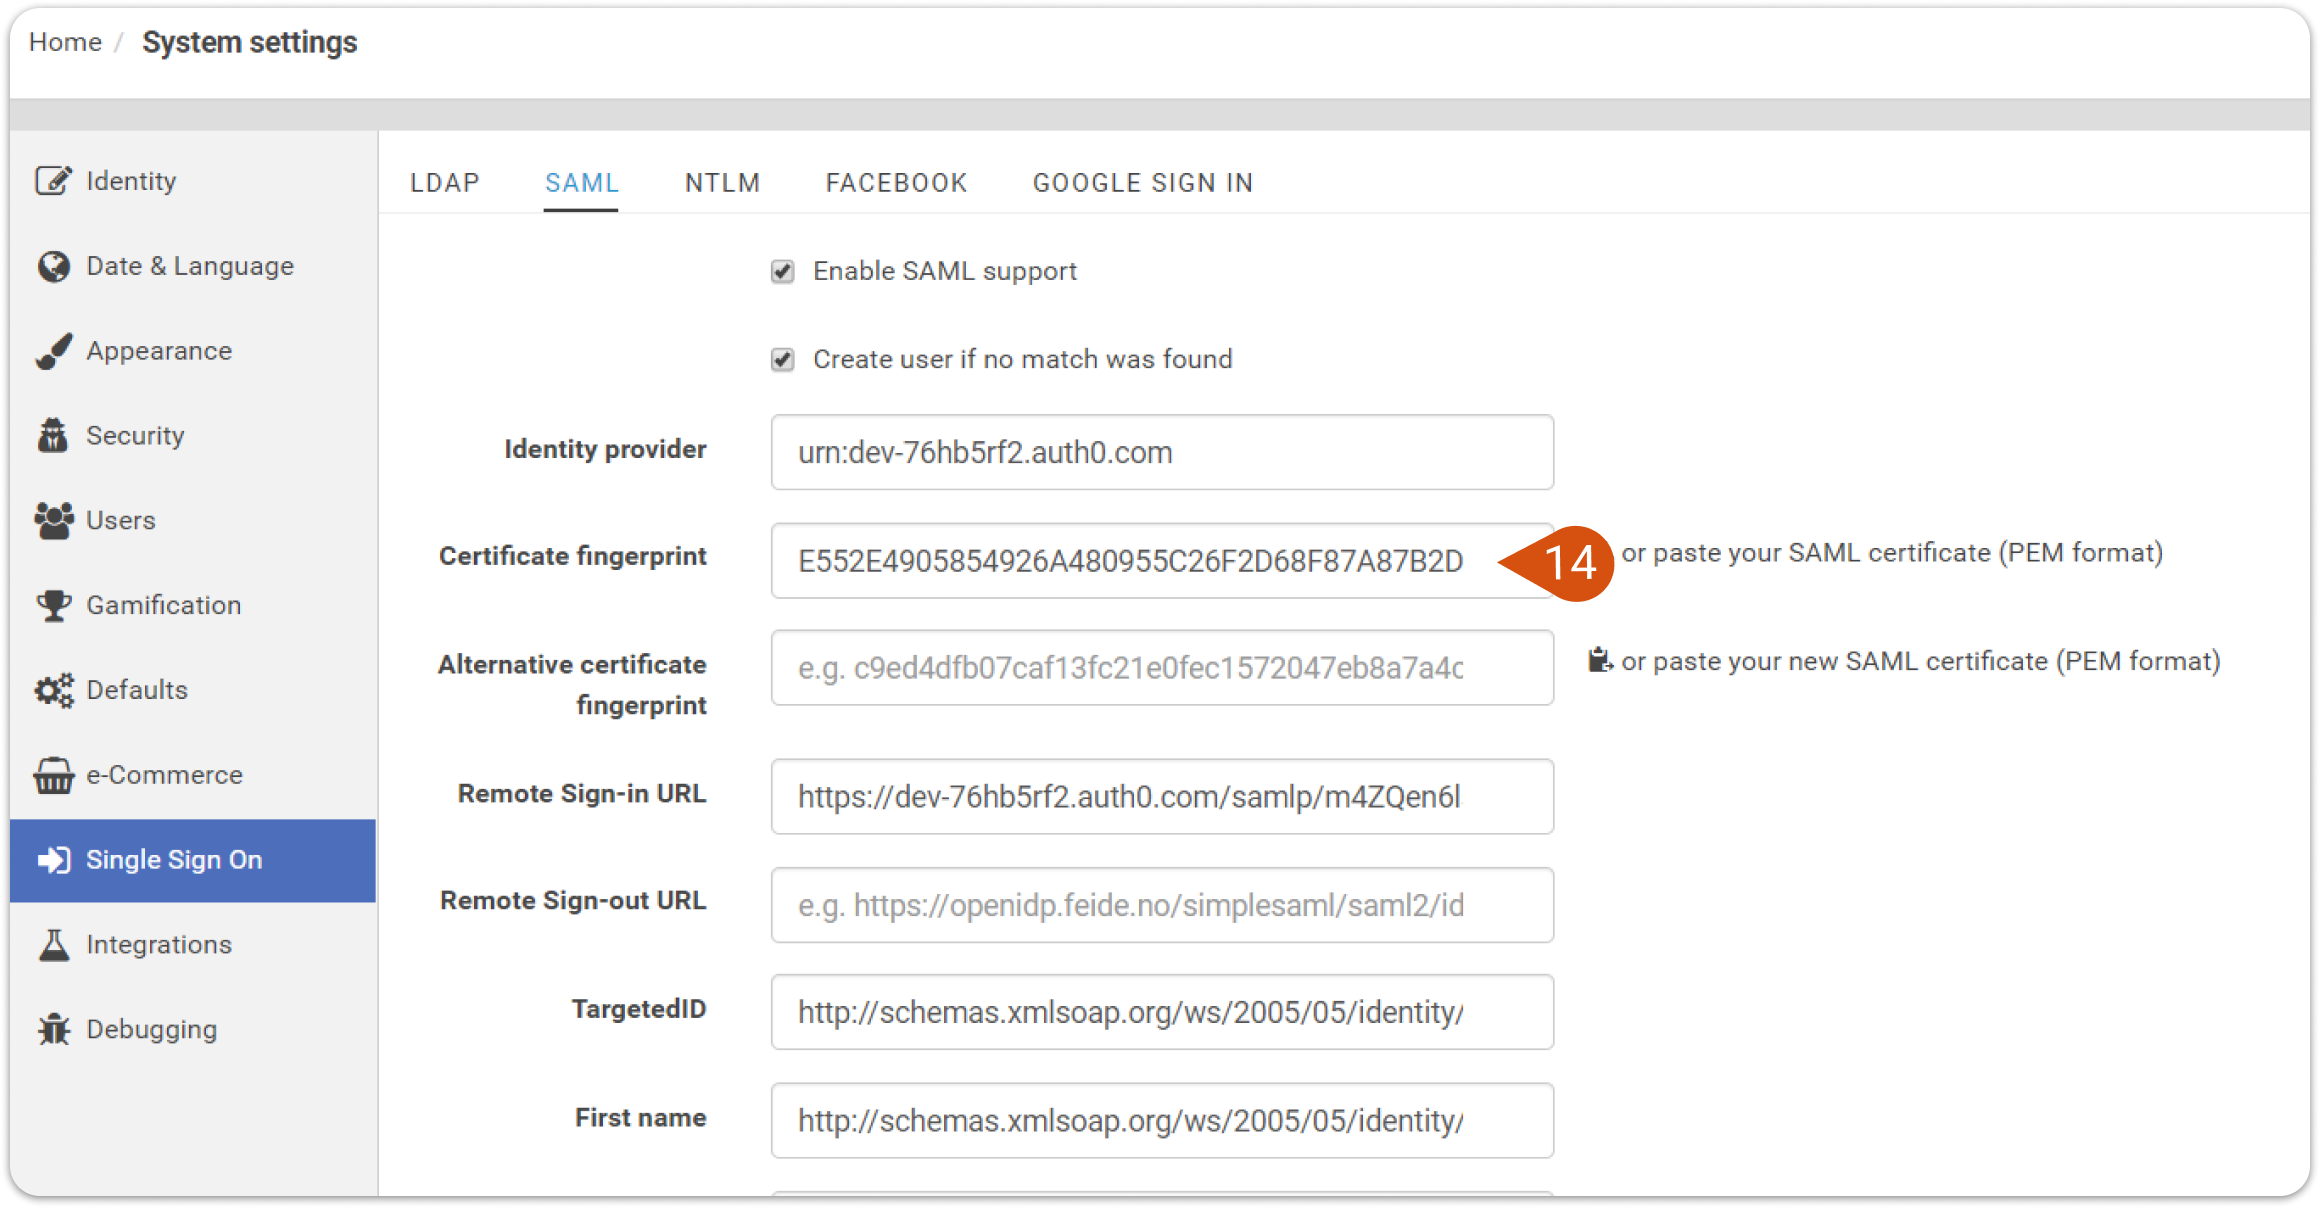
4. This needs to be entered into eFront’s SAML settings System Settings -> Single Sign On -> SAML, in the Certificate fingerprint (14).
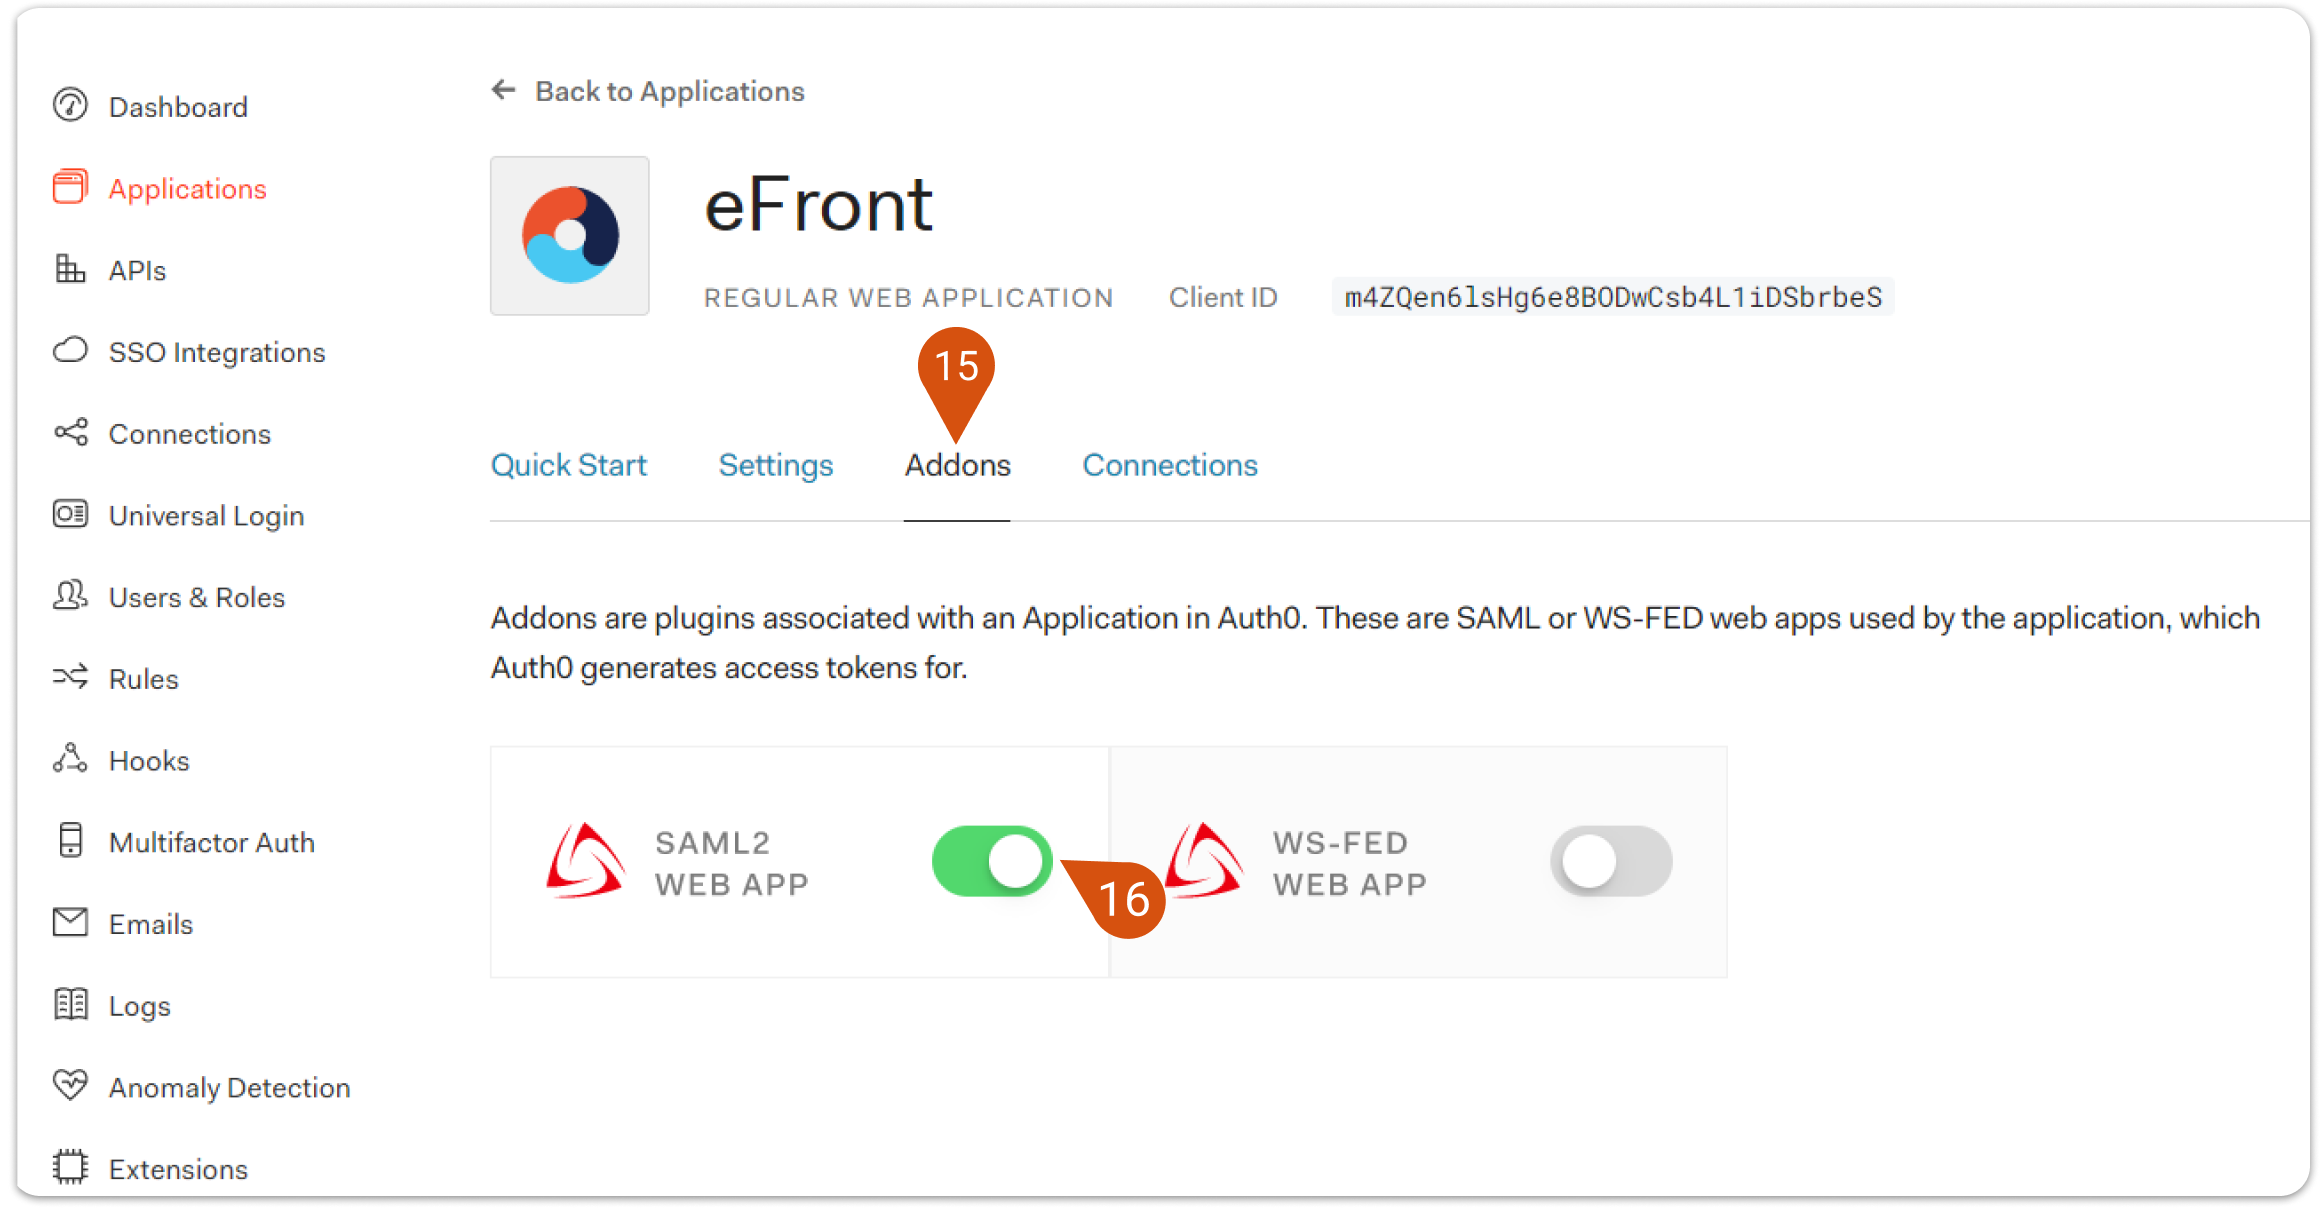
5. Go back to Auth0, to the Addons tab (15), and click the SAML2 WEB APP (16).
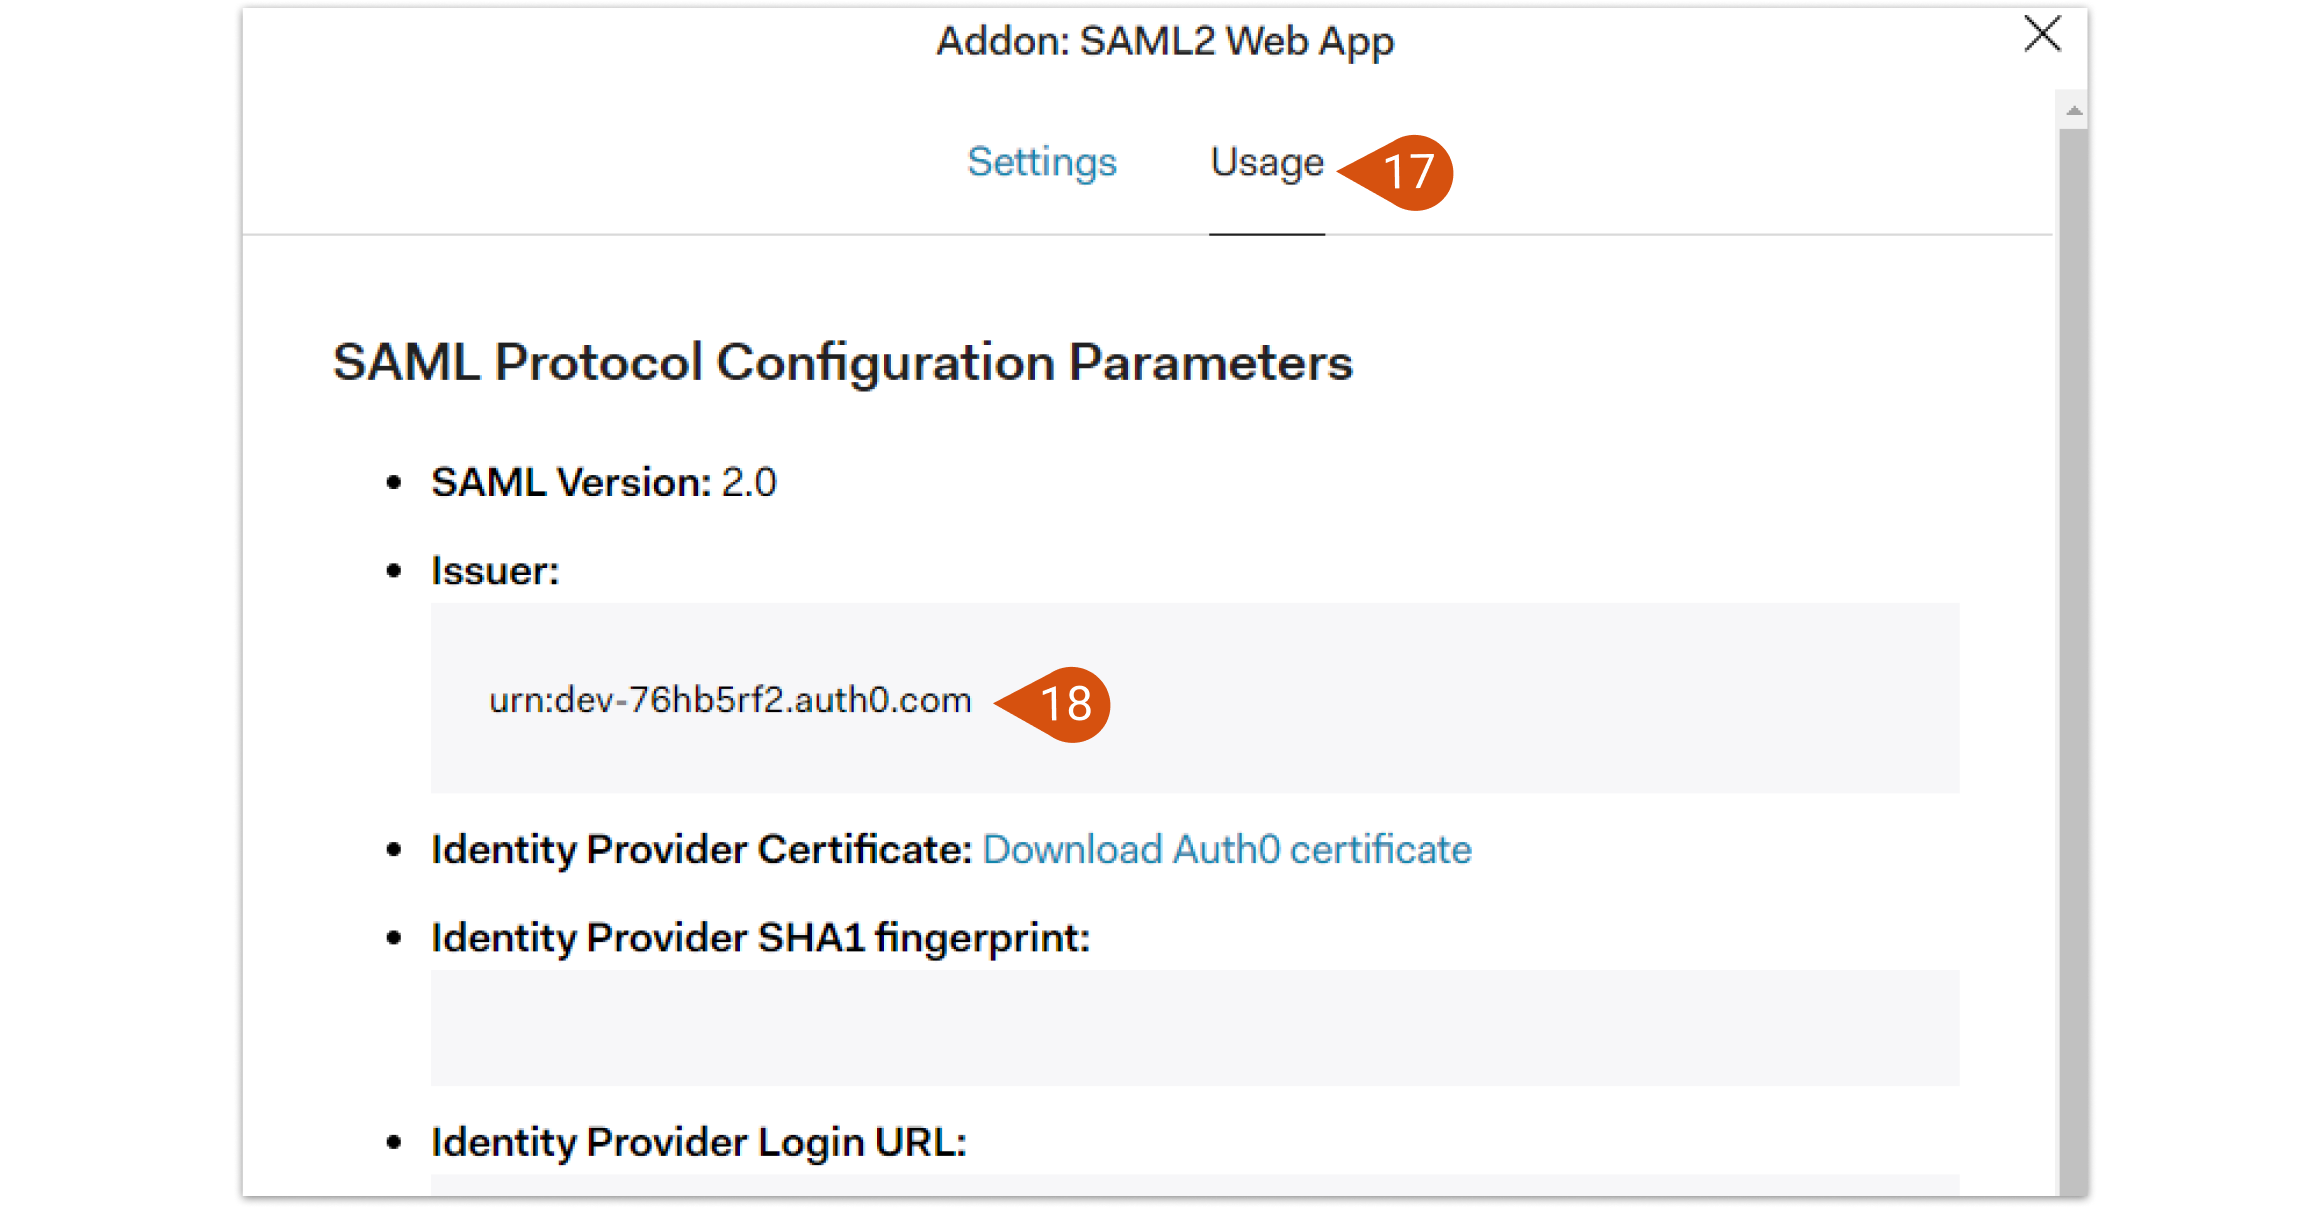
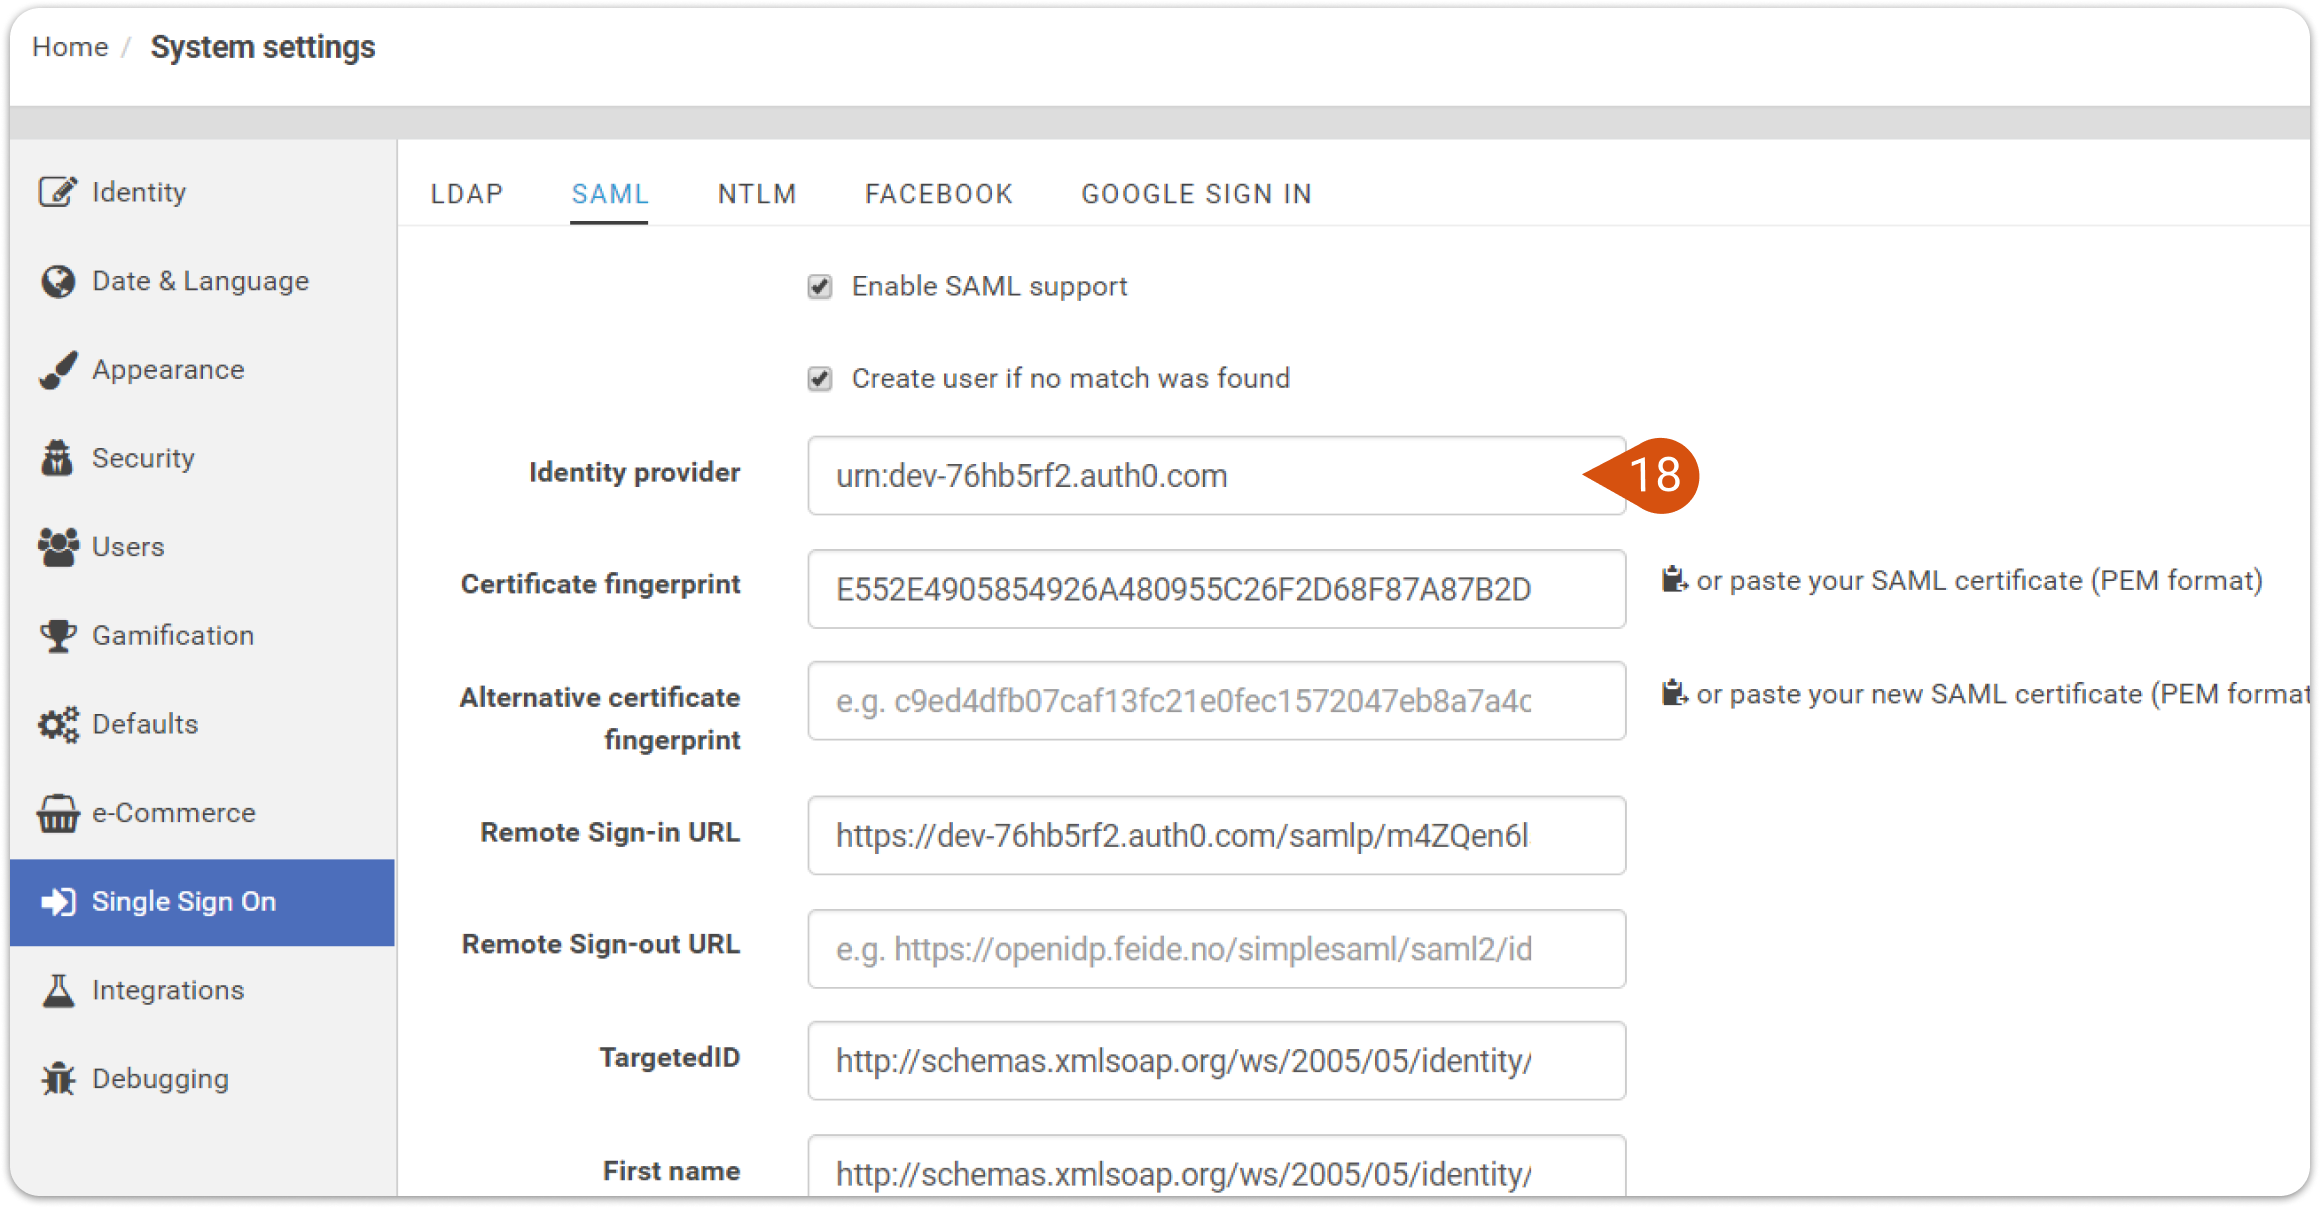
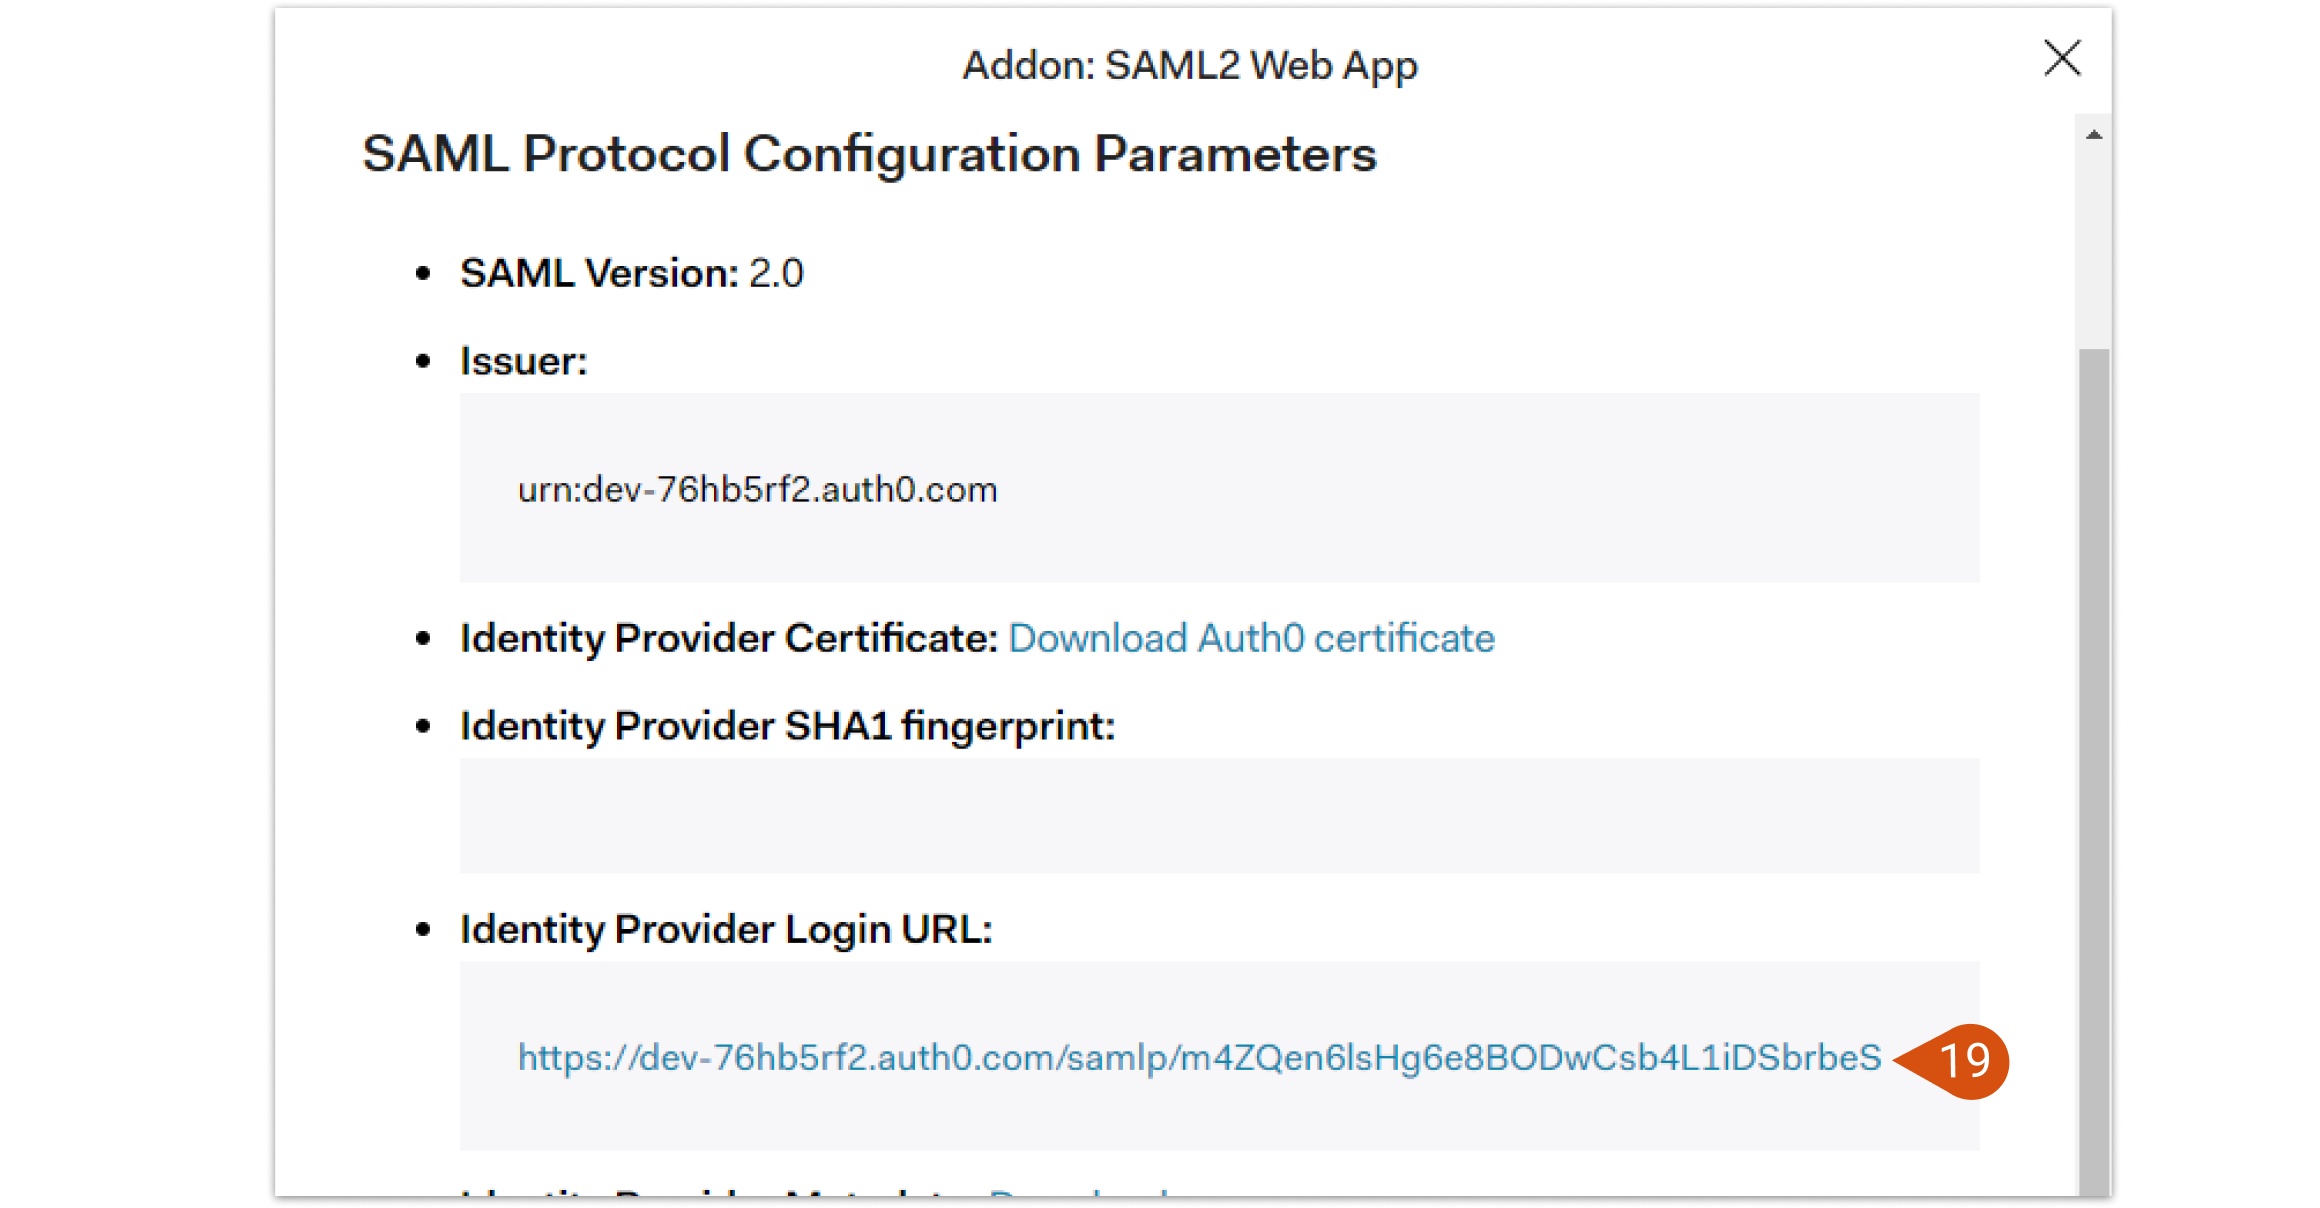
6. Select the Usage tab (17) and take the value of Issuer (18). This needs to be entered into eFront’s Identity Provider (18) setting, which you will find in System Settings -> Single Sign On -> SAML.
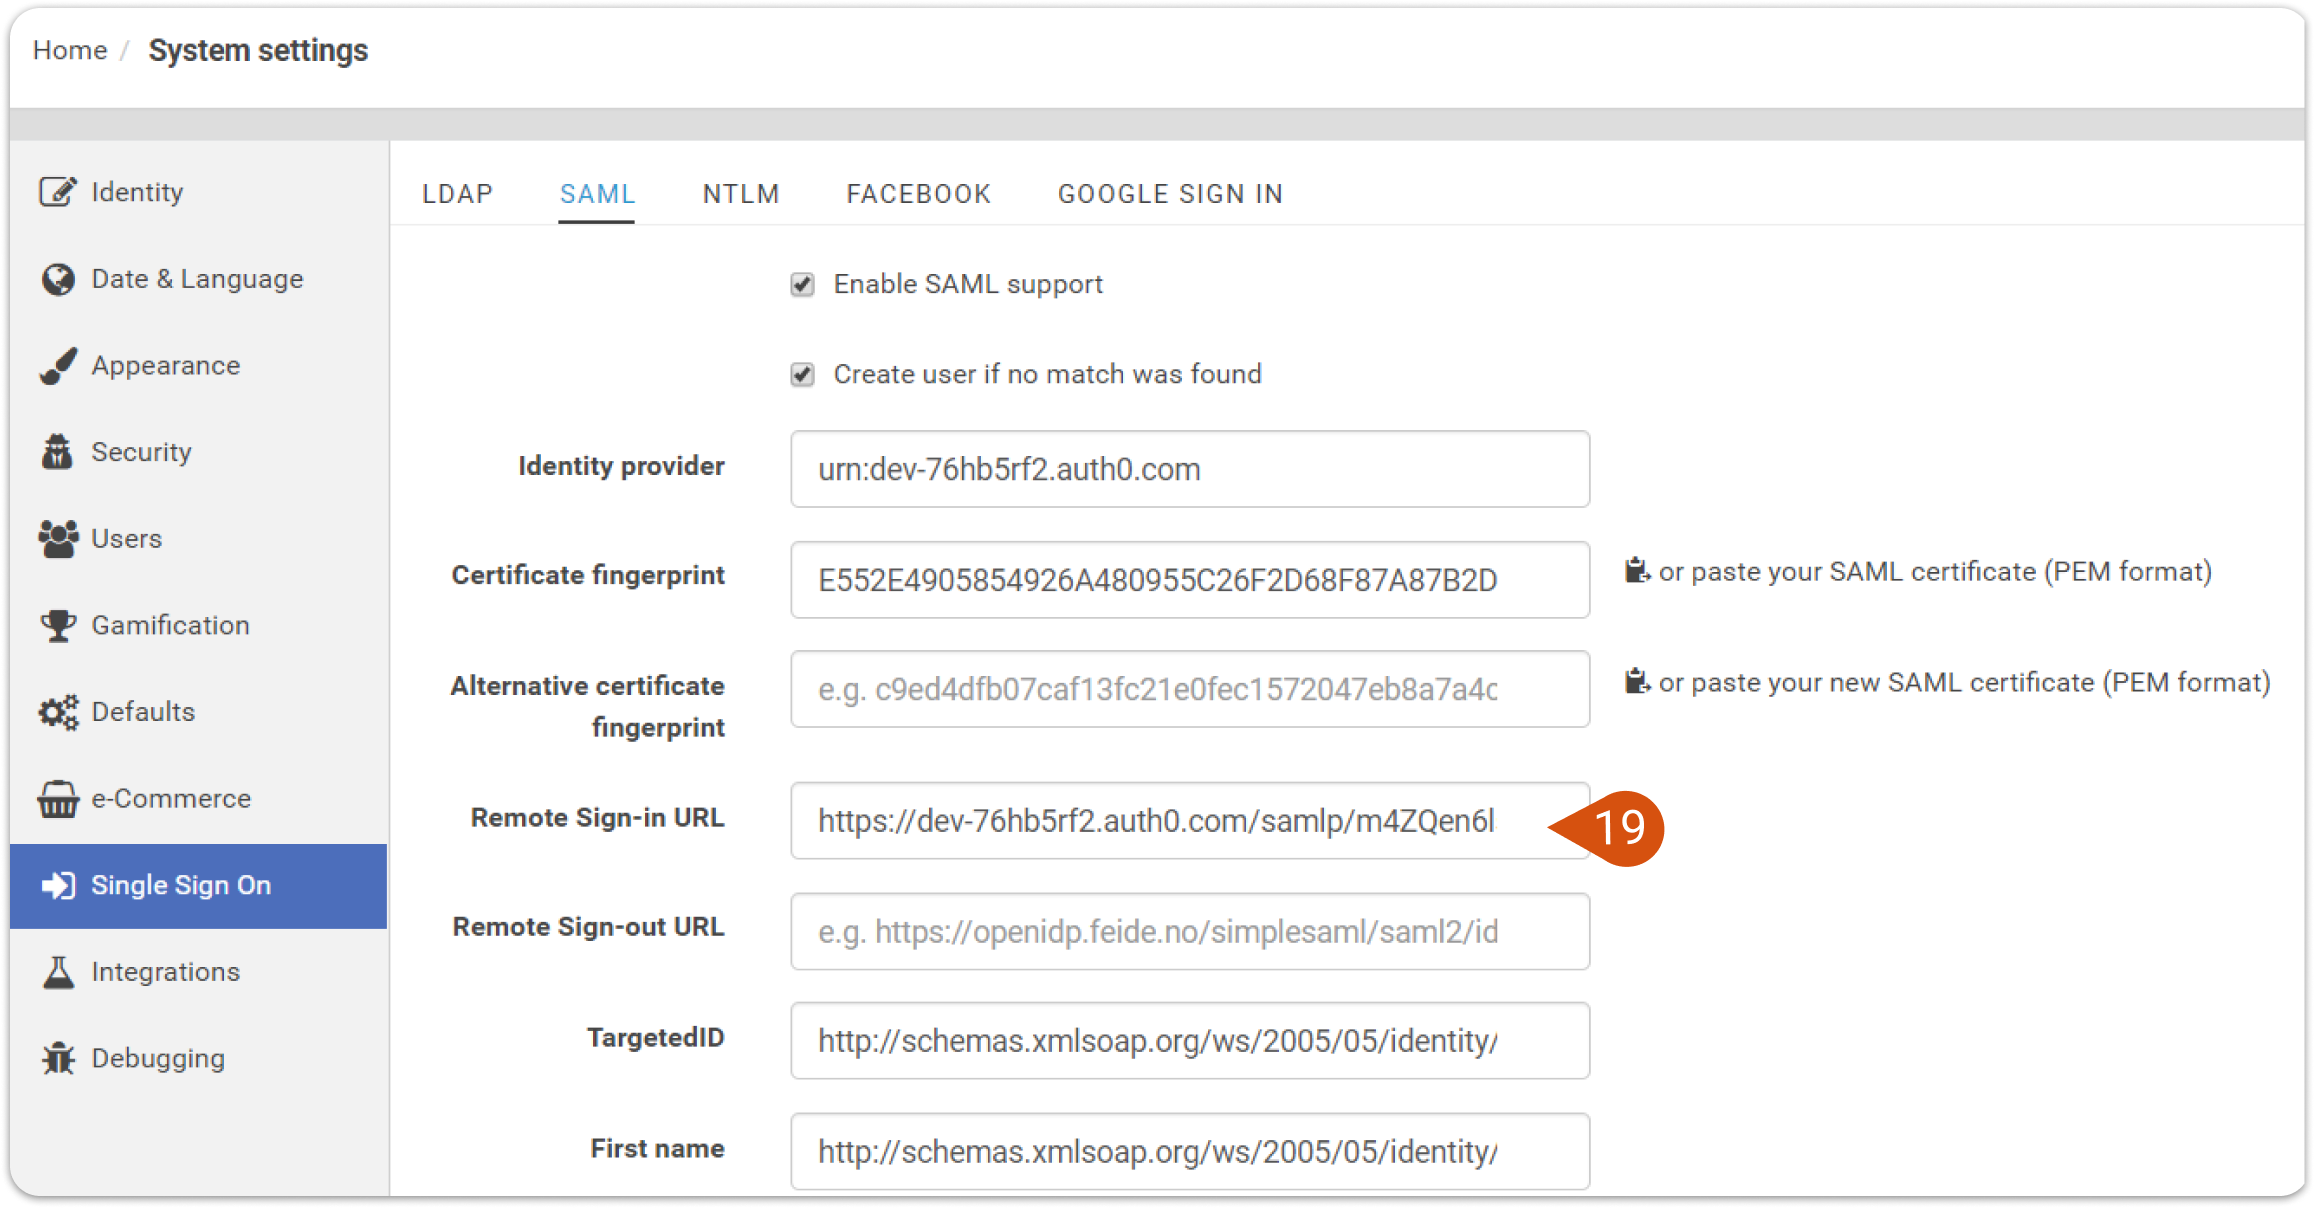
7. Copy the value of Identity Provider Login URL (19), which you will find in Addons -> SAML2 WebApp -> Usage tab in Auth0, in System Settings -> Single Sign On -> SAML -> Remote Sign In URL (19).
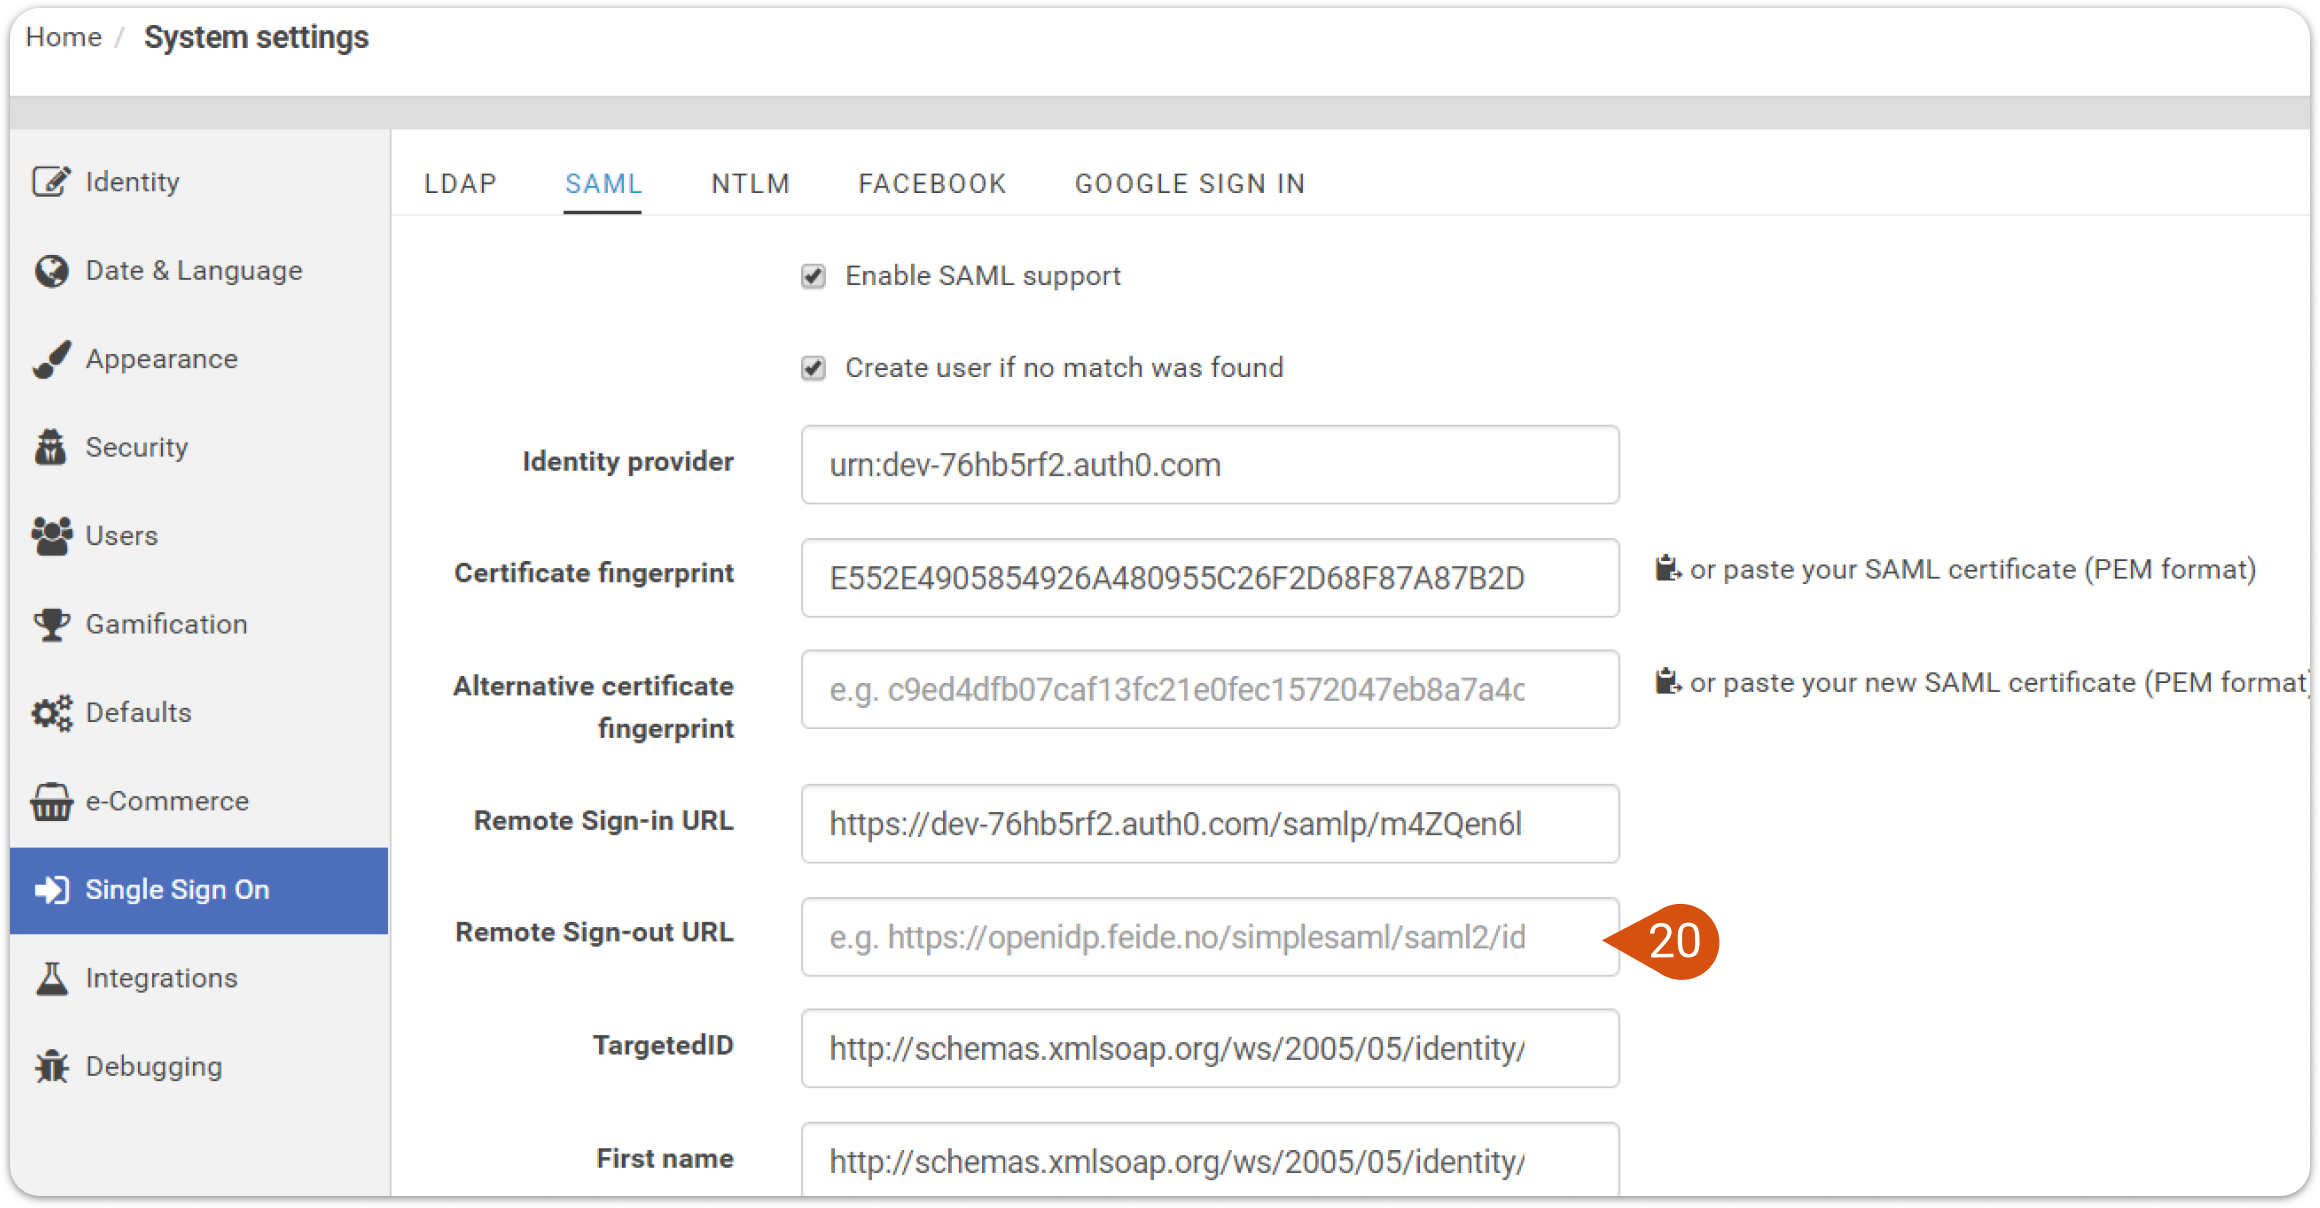
8. You need to paste the same value to Remote Sign-out URL (20), which you will find in eFront System Settings -> Single Sign On -> SAML, and add ‘/logout‘ (without the quotes) at the end.
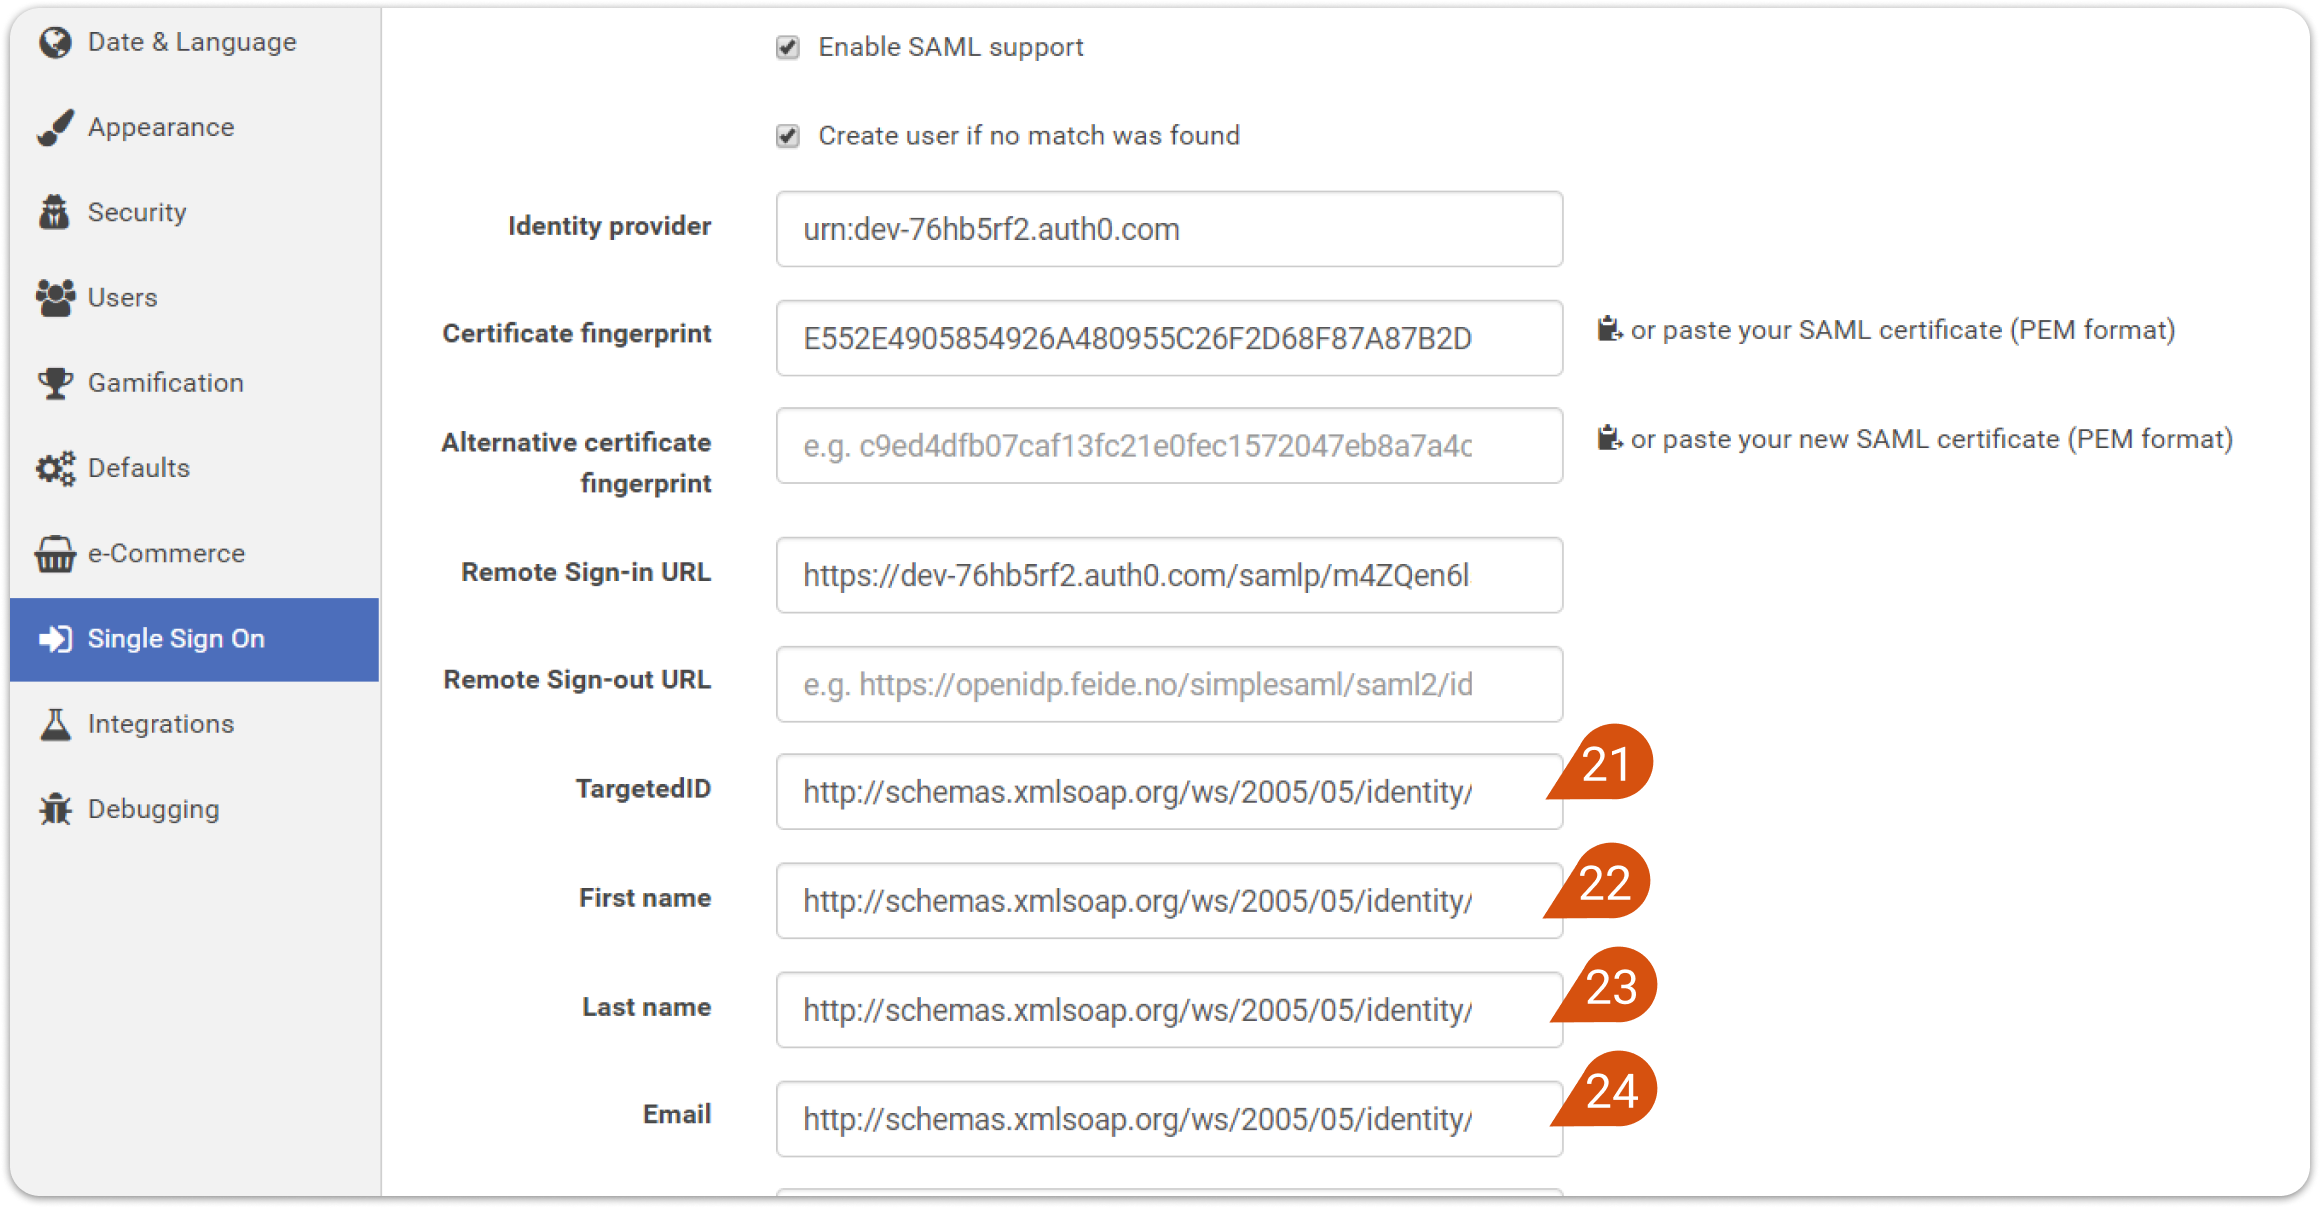
9. The last values in eFront’s settings are connected to the ones we created a rule for in our step 1.5: “Create Rule”. Please enter the following values for each field.
| TargetedID (21) | http://schemas.xmlsoap.org/ws/2005/05/identity/claims/emailaddress |
| First name (22) | http://schemas.xmlsoap.org/ws/2005/05/identity/claims/name |
| Last name (23) | http://schemas.xmlsoap.org/ws/2005/05/identity/claims/surname |
| Email (24) | http://schemas.xmlsoap.org/ws/2005/05/identity/claims/emailaddress |
10. Click Save.
Note: if you encounter the error message: "login,name,surname and password are required" with no sign-in form, then make sure that the values have been entered correctly in step 9.