Ιnstructor Led Training (ILT) can be defined as the training process which takes place under the guidance of a specific individual, usually on a predefined date and location.
In this article you will find how you can:
Creating an ILT course
In order to create an ILT course, you can sign in as either an administrator or an instructor.
But first, some terminology
A training Event is an entity that represents a training that happens in the physical world.
A Training Session represents the actual training. A Training Event can include multiple Training Sessions. For example, if the same training takes place in New York and London, then you can set up one Training Event and two different Training Sessions. Users will then be able to select which location is suitable for them.
A Lesson represents a training that purely consists of e-learning content.
A Course is a collection of lessons and/or training events. The user can buy/enroll to the course
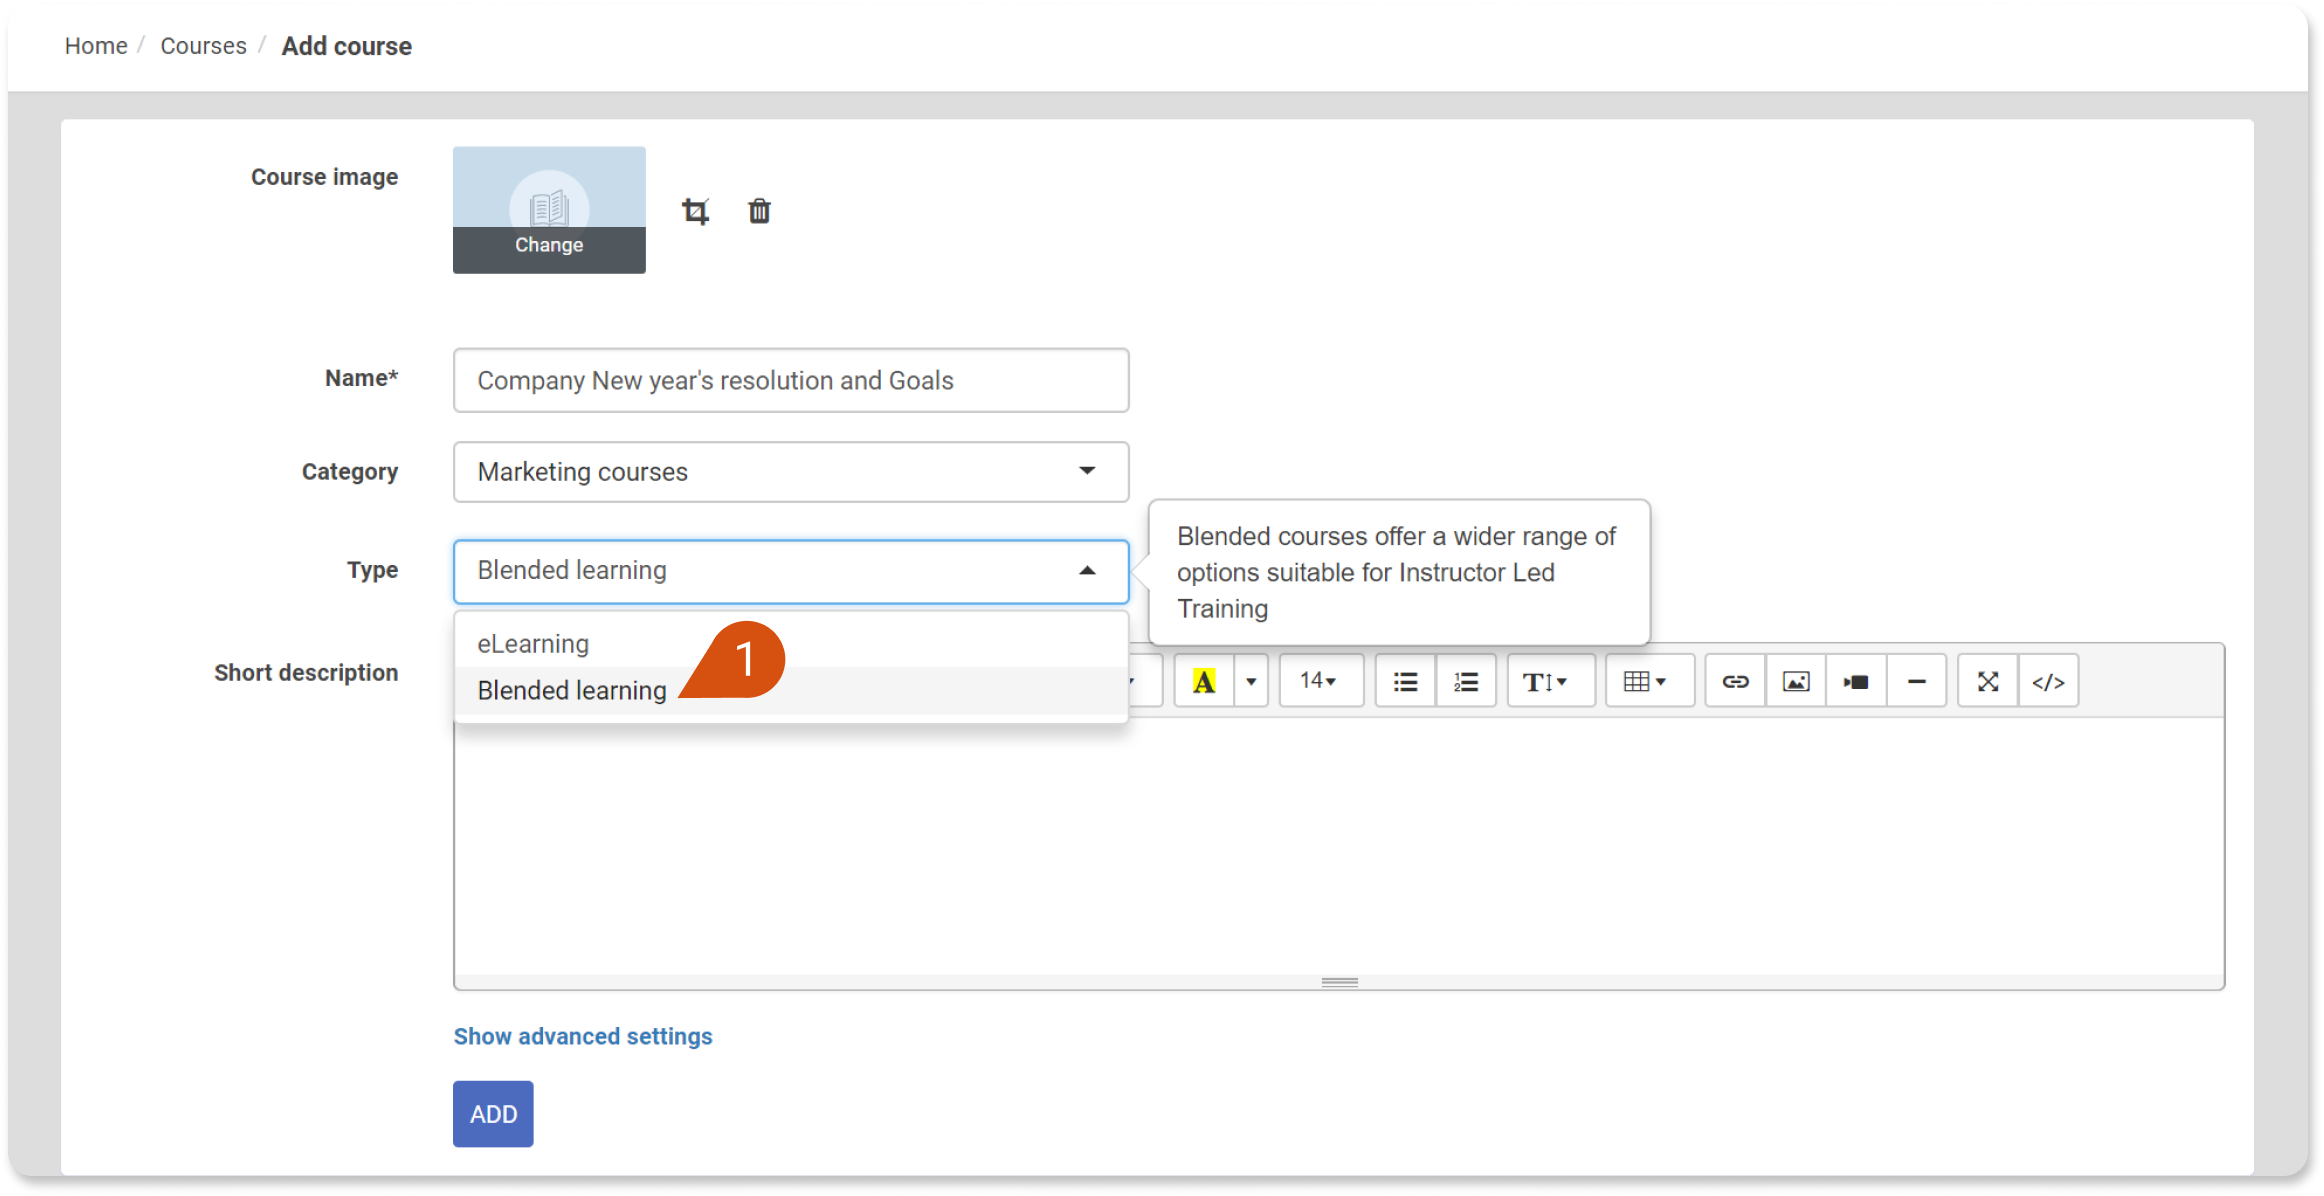
To create an ILT course, go to Courses > add a course to create a new course. Select “Blended learning” (1) from the “Type” drop-down list.
After creating the course, you will be directed to the course's dashboard tab and you will notice that a training event with the same name as the course, is automatically added (2).
Clicking on the Edit button you can edit your first event (3).
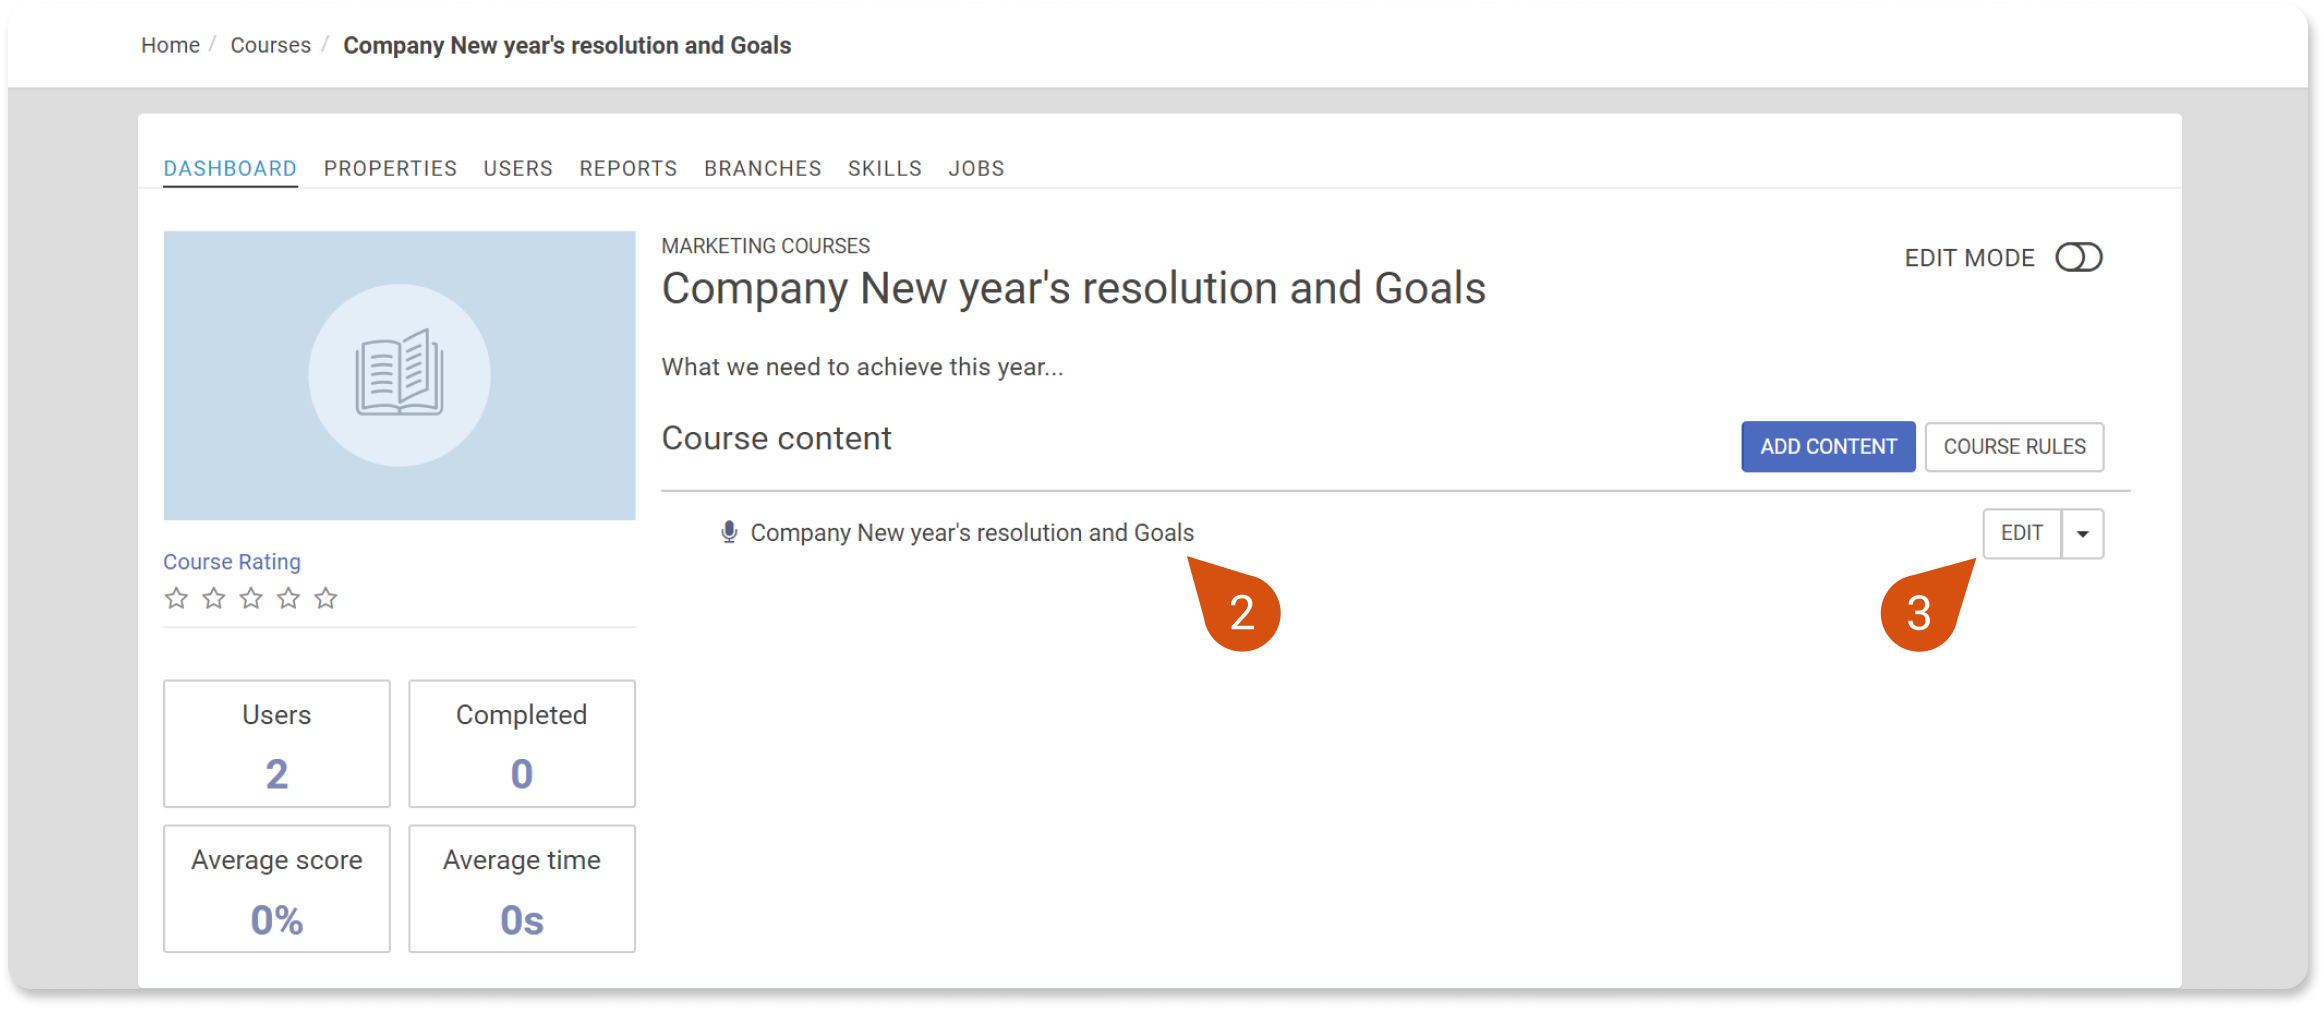
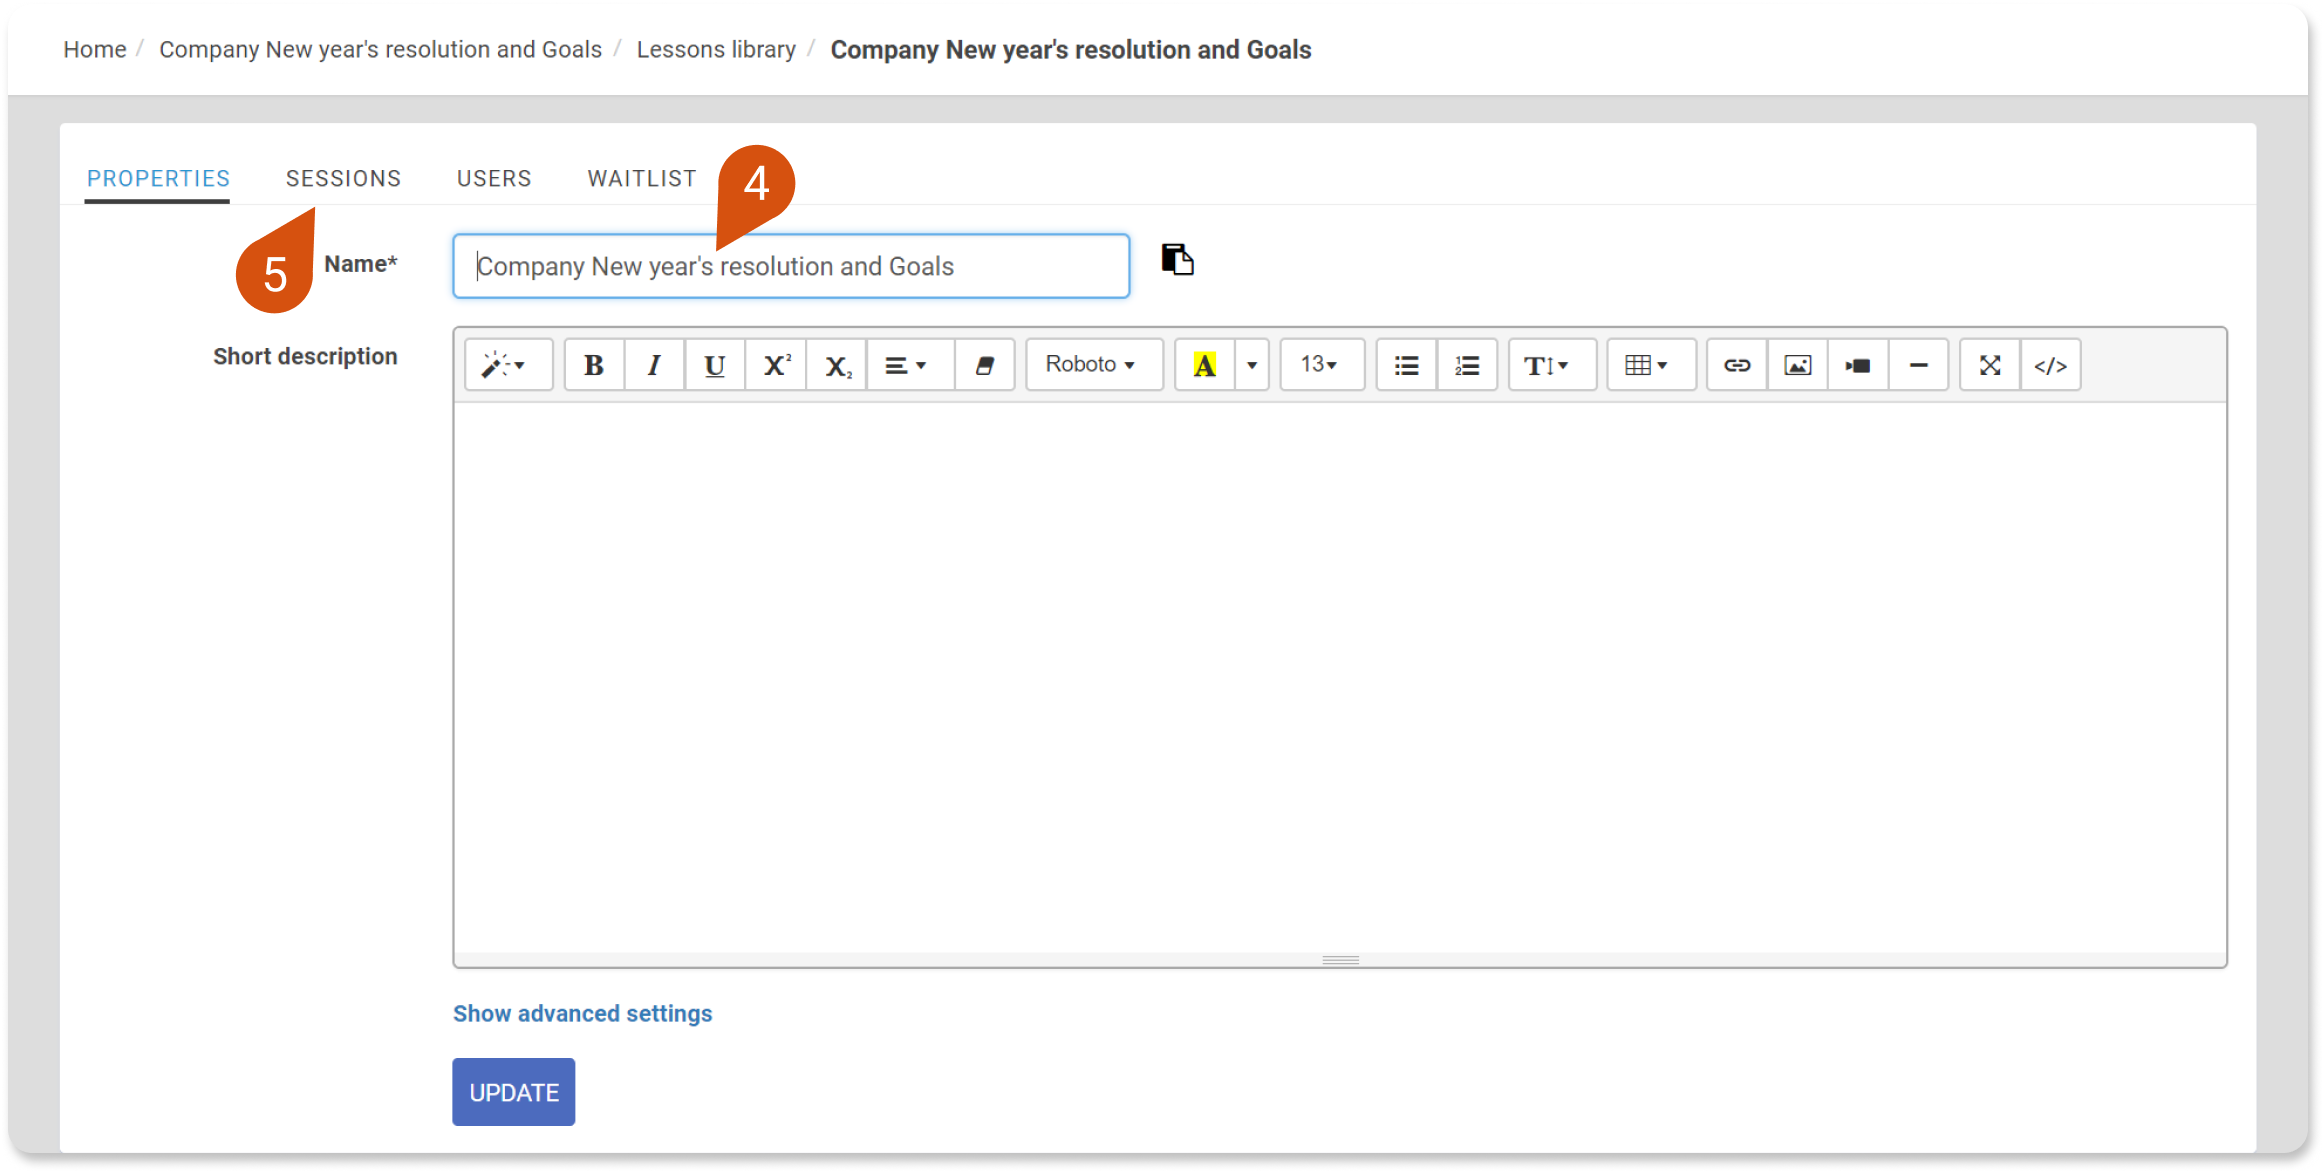
Through this page, you can edit the Event's title (4), add a description and move to the Sessions tab in order to add new sessions to it (5). So far, you have created a new blended learning course with one training event that has no sessions yet. The next step is to add training sessions.
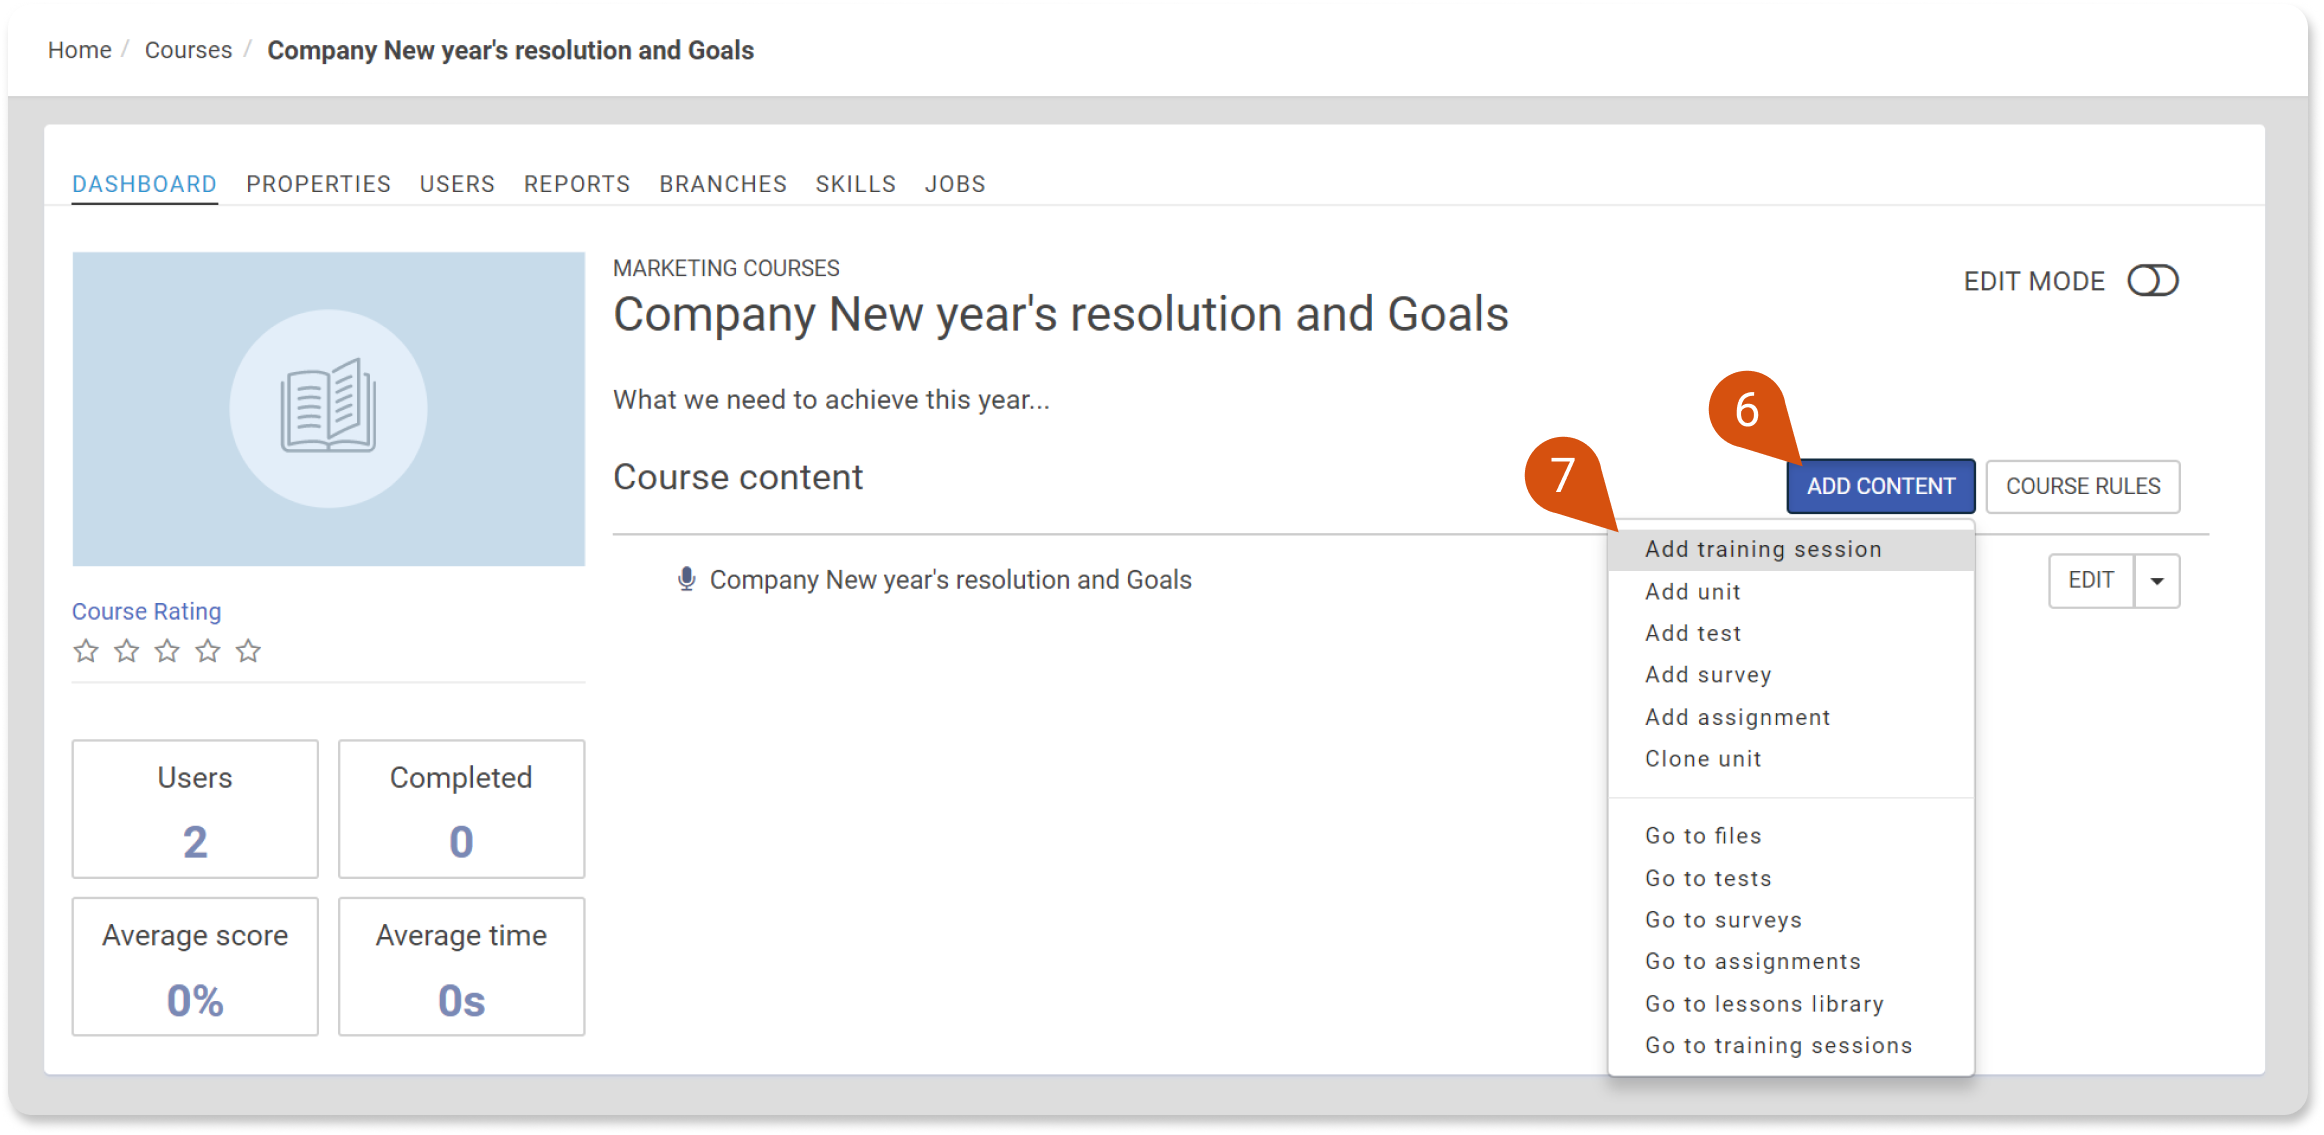
Training sessions can be added through the course dashboard as well. Just click on the Content (6) button and select the first option, Add Training Session (7).
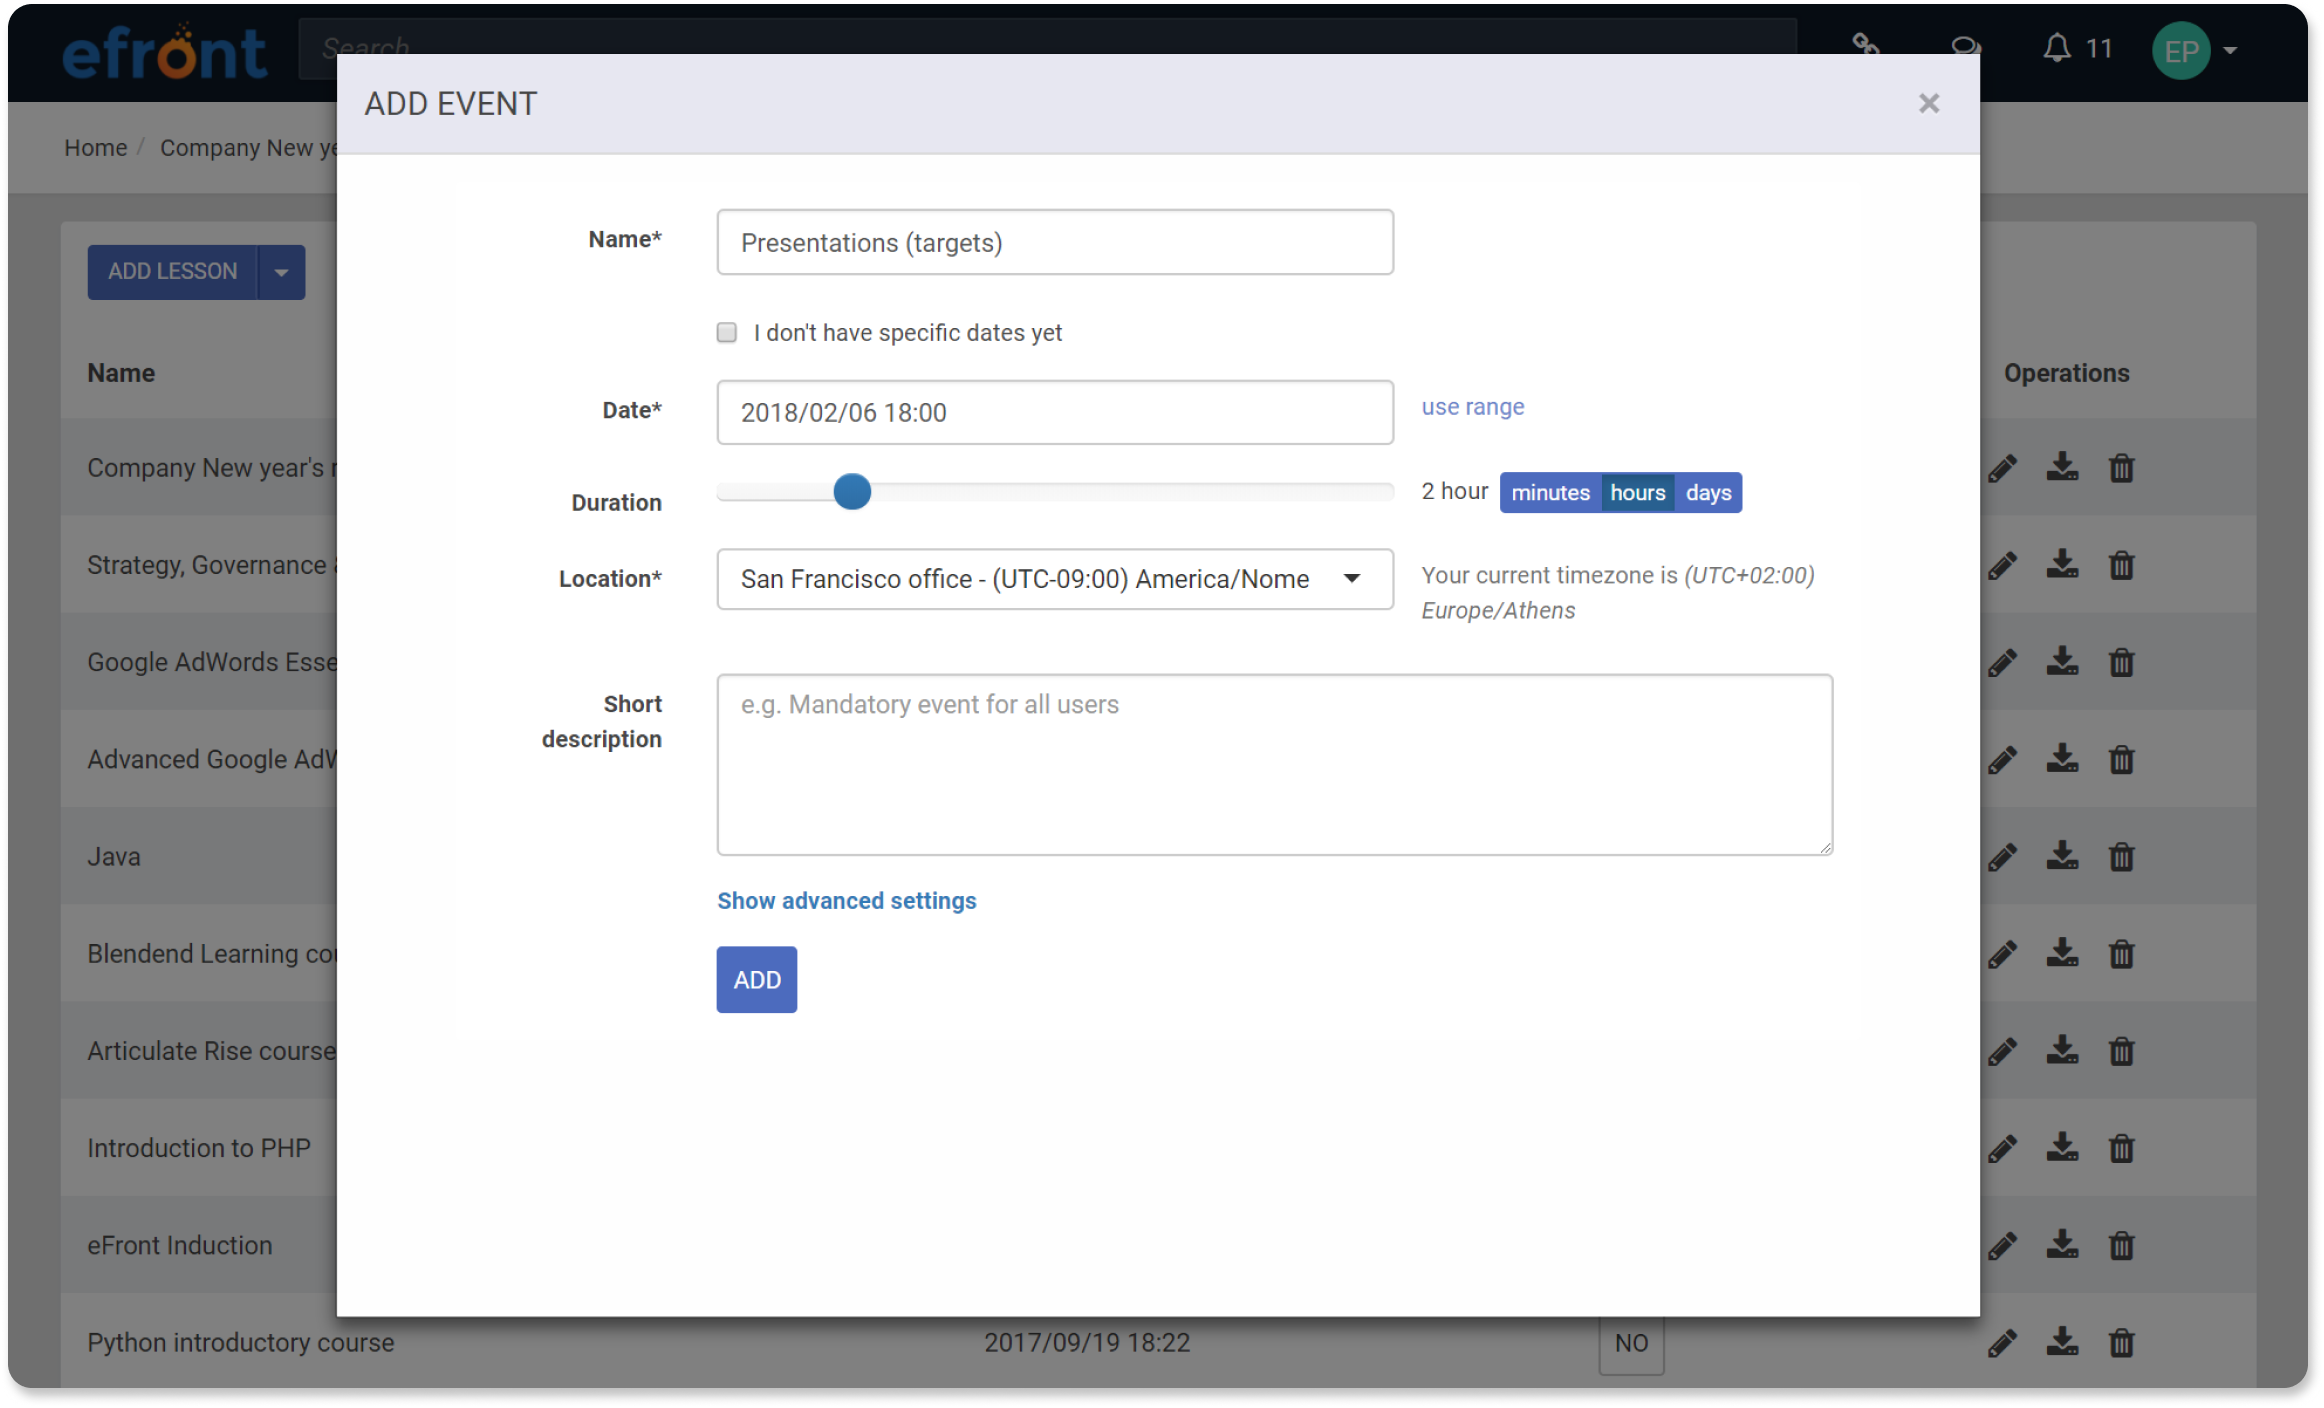
In order to add a new session, you have to type its name, select the location where it will take place, specify the date and the duration.
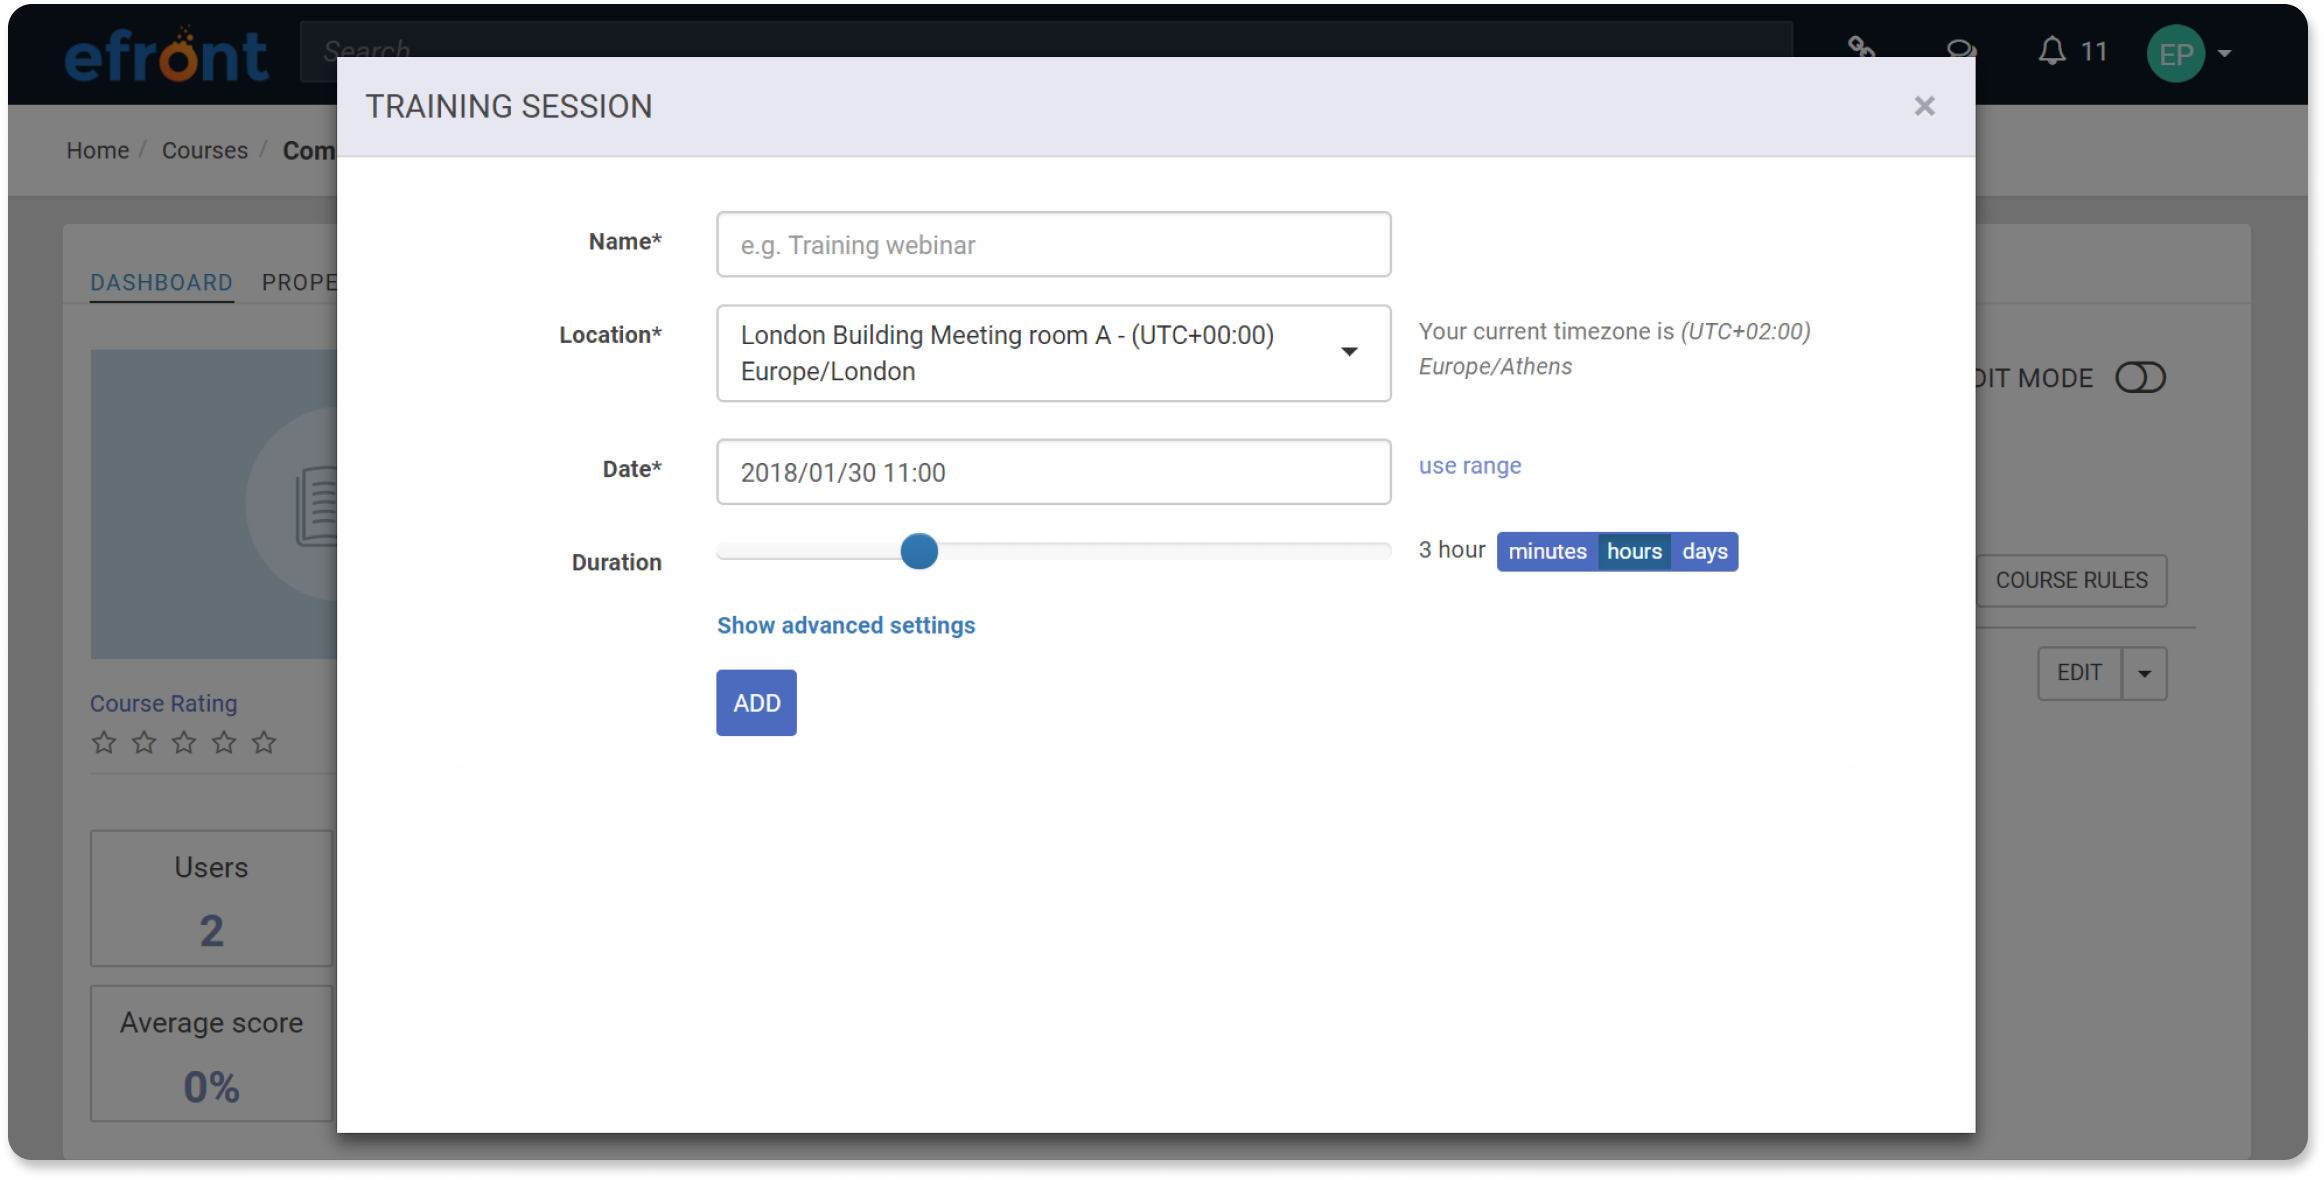
| Note: If another session is being conducted in the same location at the same time, the system will prevent you from creating the session. |
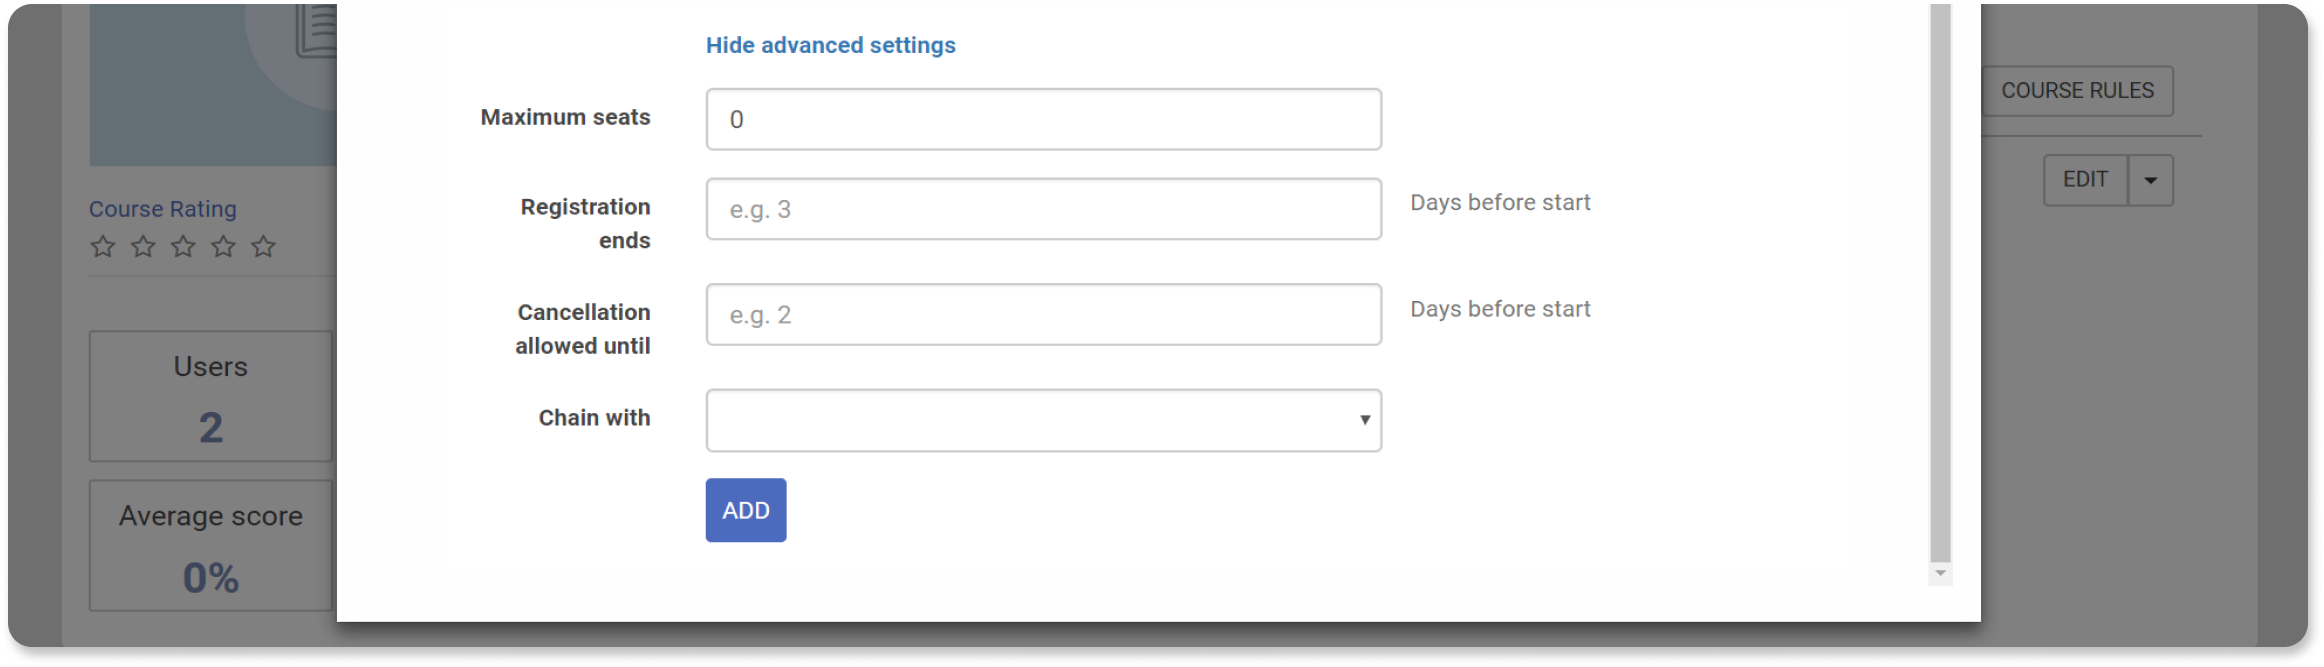
Apart from these basic settings that you can set up for the training sessions, there are some advanced settings available. You can set up:
- the maximum number of seats available for this session
- until when the users can register and cancel their registration
- the session with which this one is connected, meaning that the users have to attend all of them
As we already mentioned in the beginning, an event can have more than one sessions. In order to add another session to the same event, you have to follow the same steps.
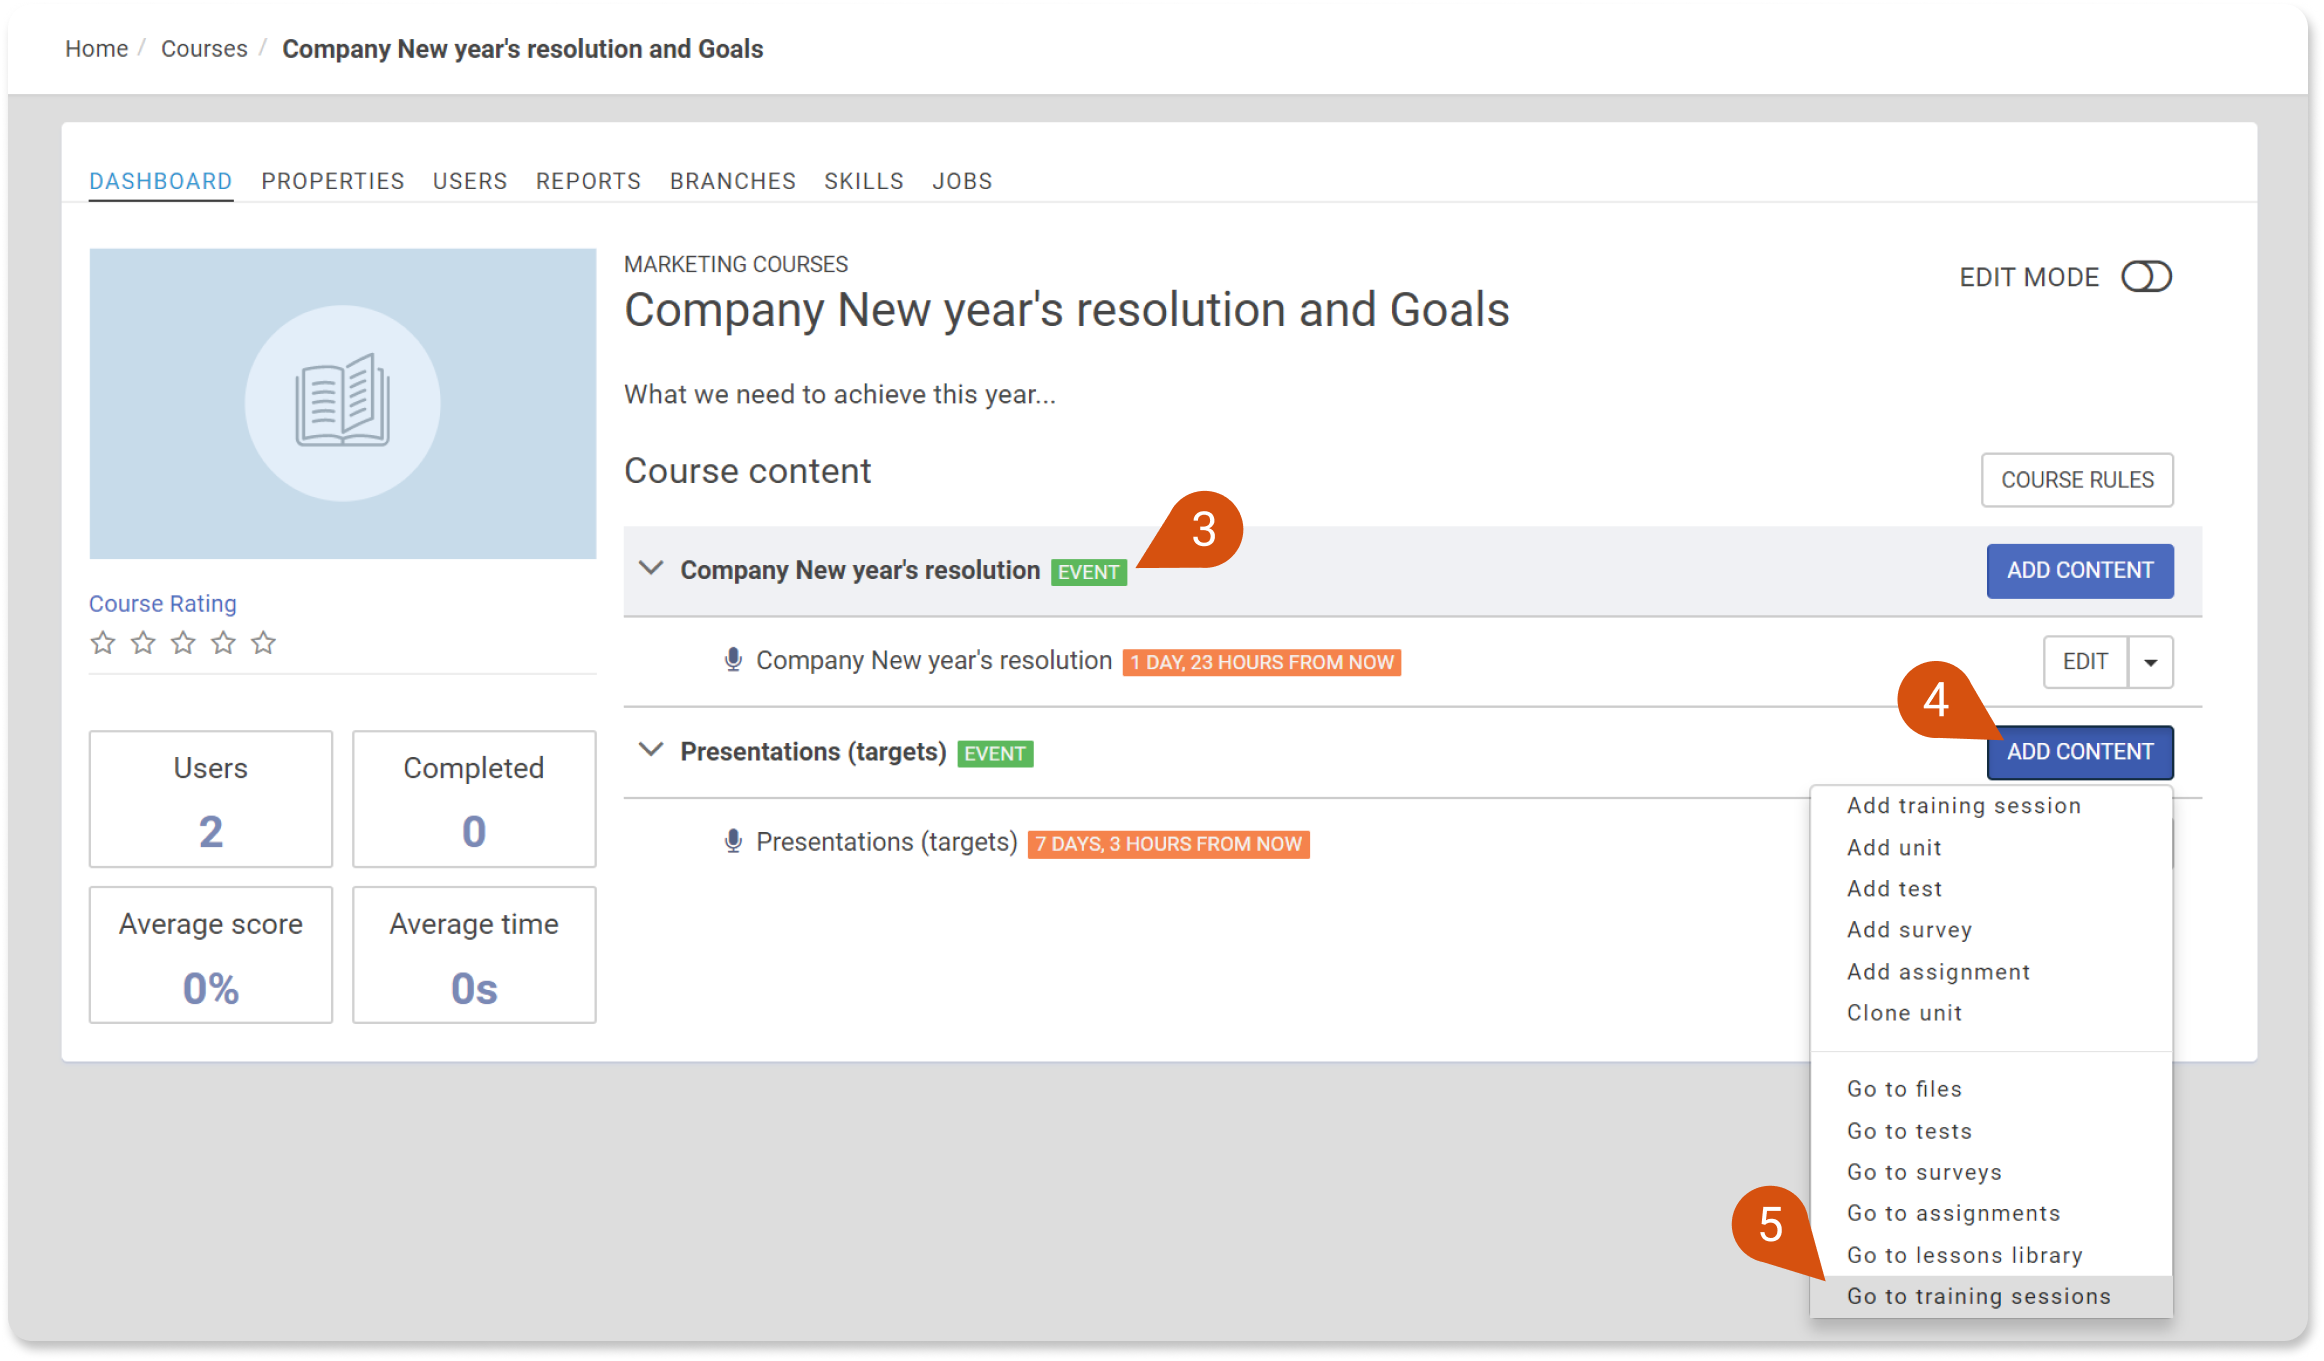
After adding your sessions to the event and going back to the course dashboard, you will notice a tag next to the event (8), informing you in how many days/hours the first session starts.
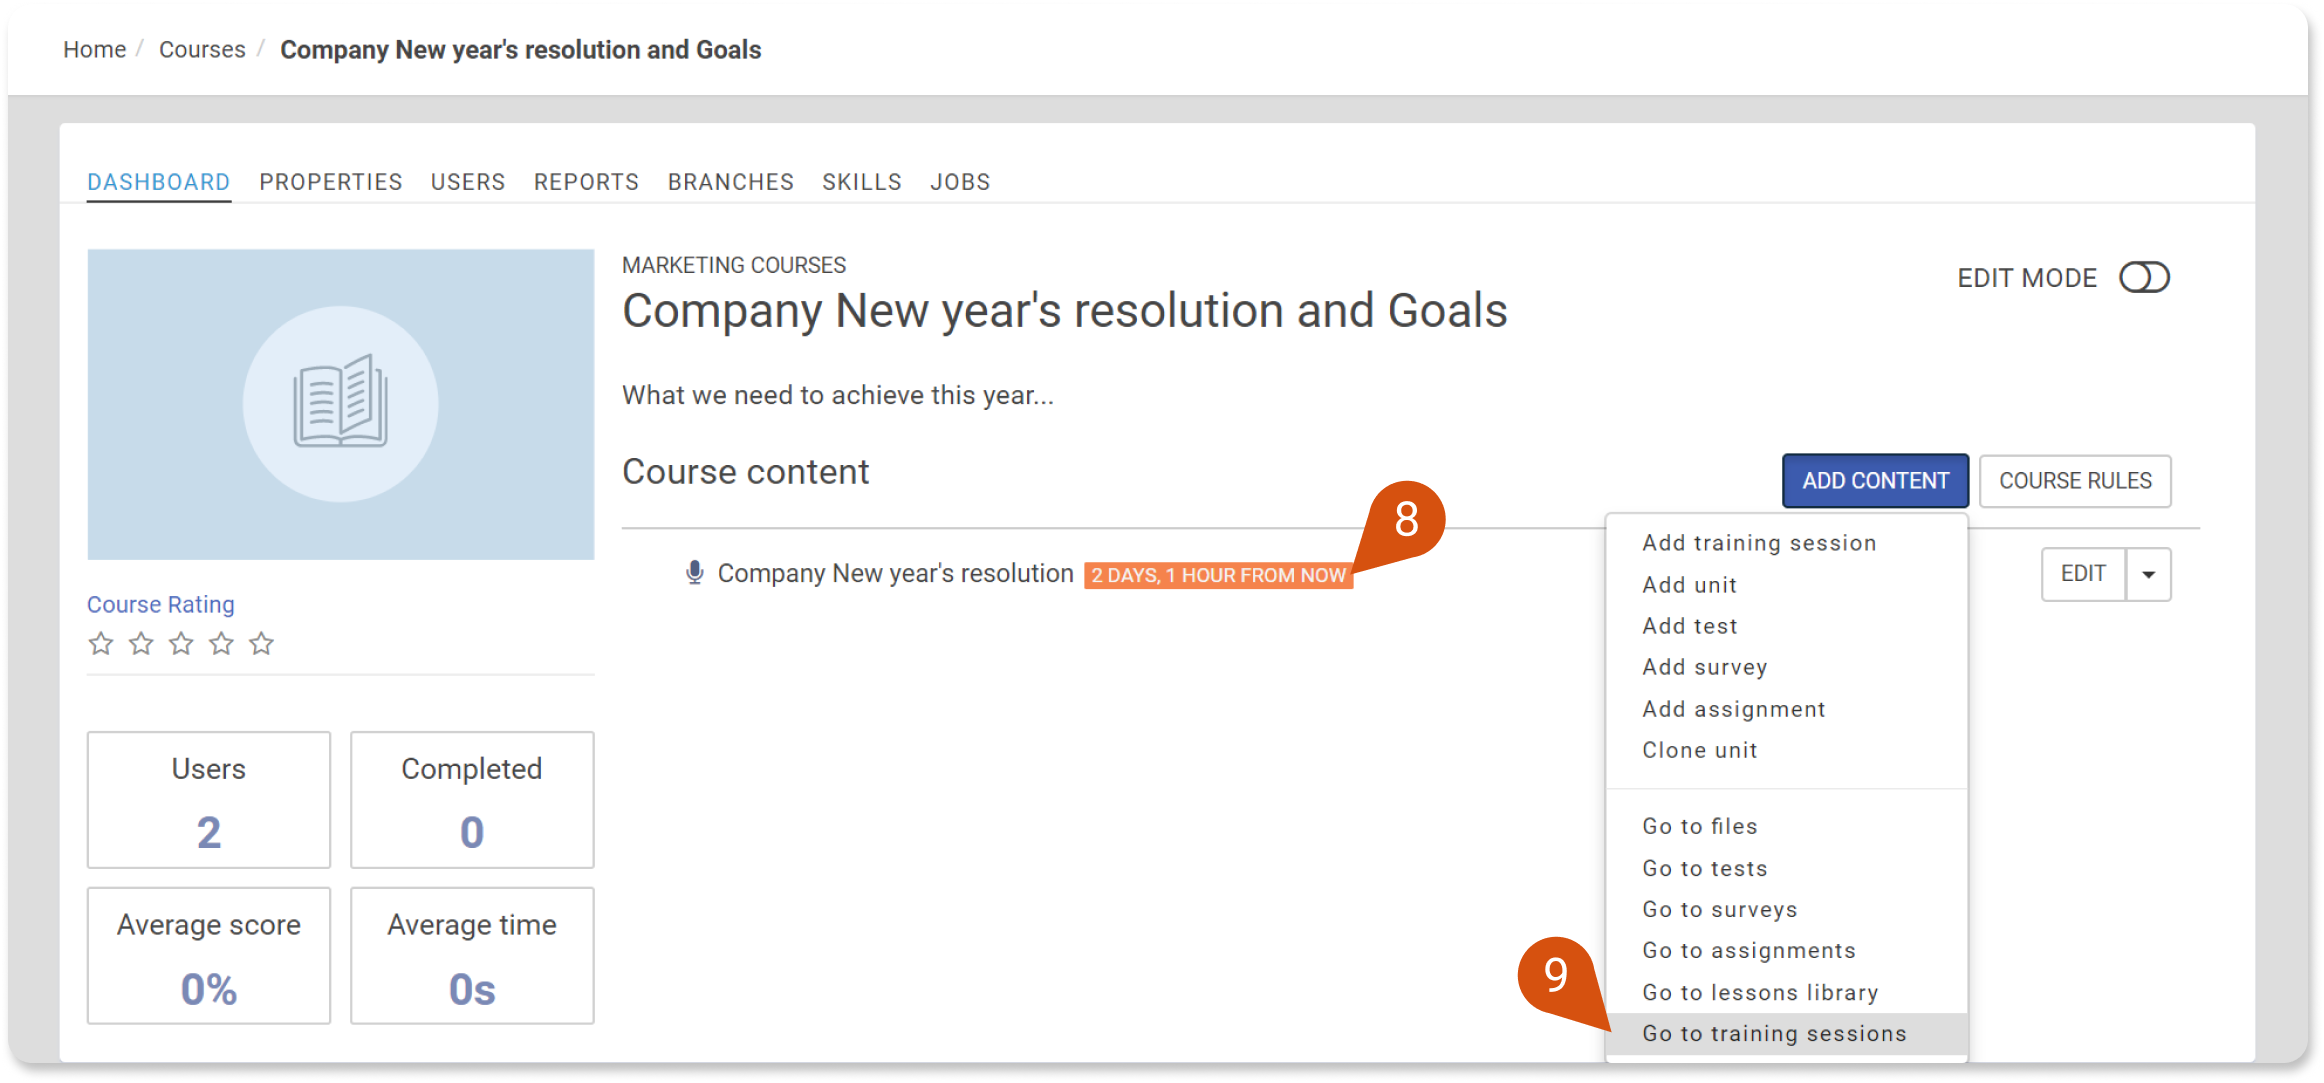
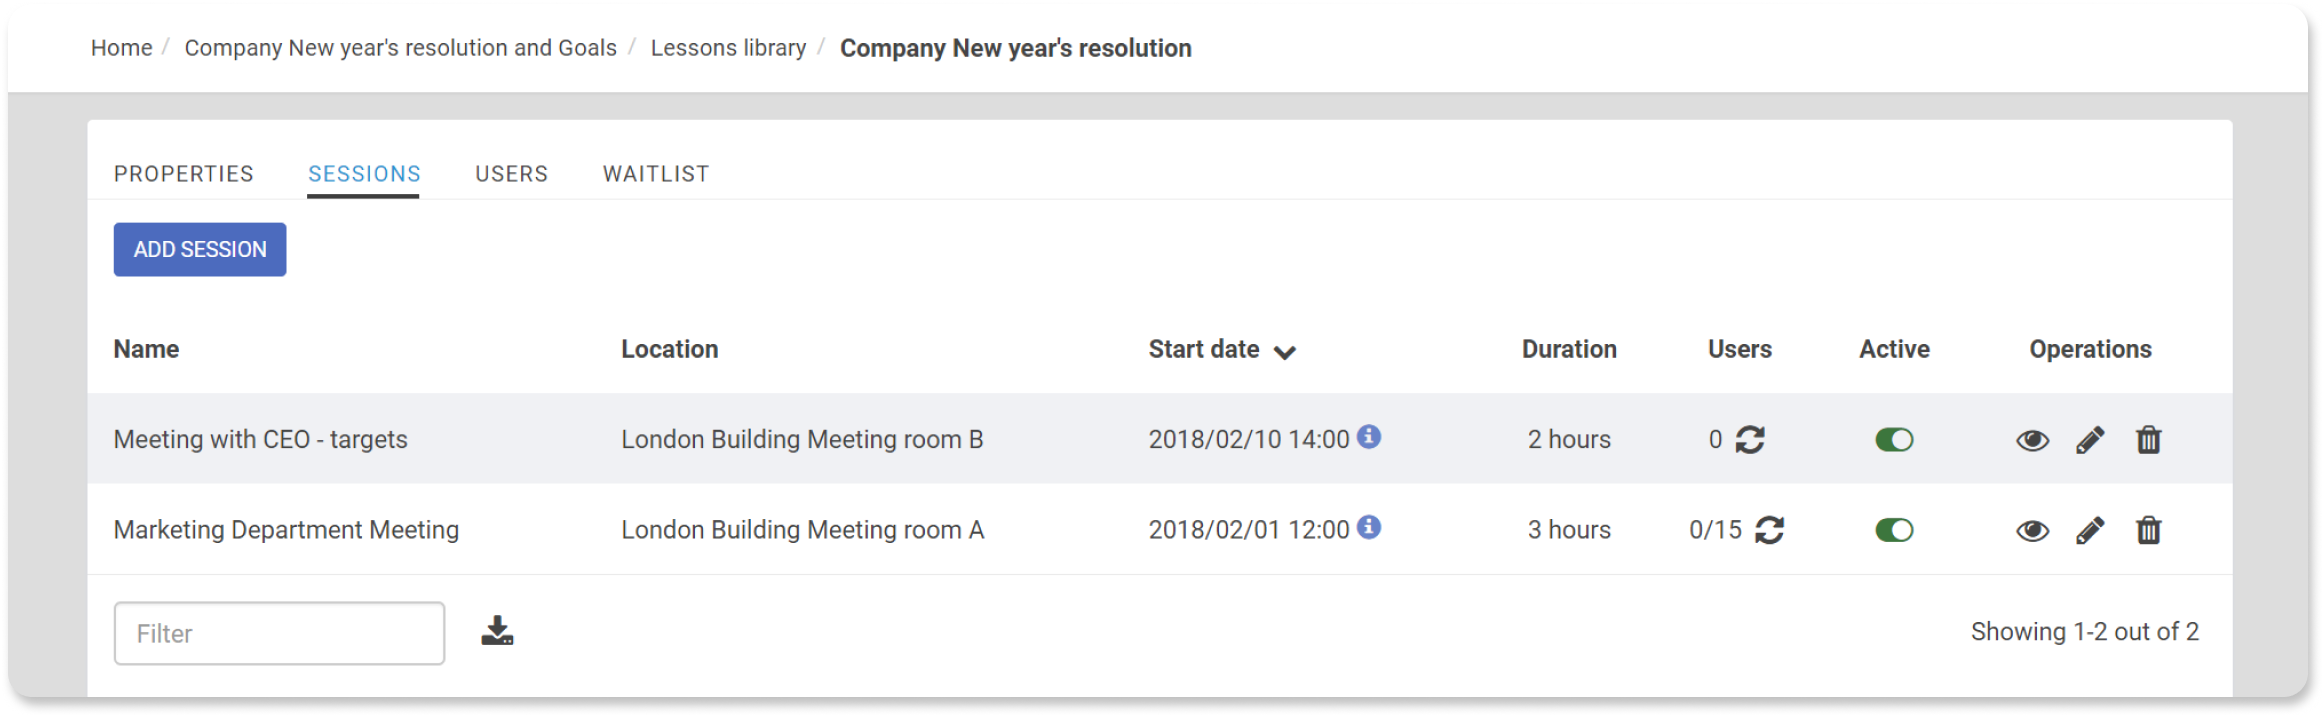
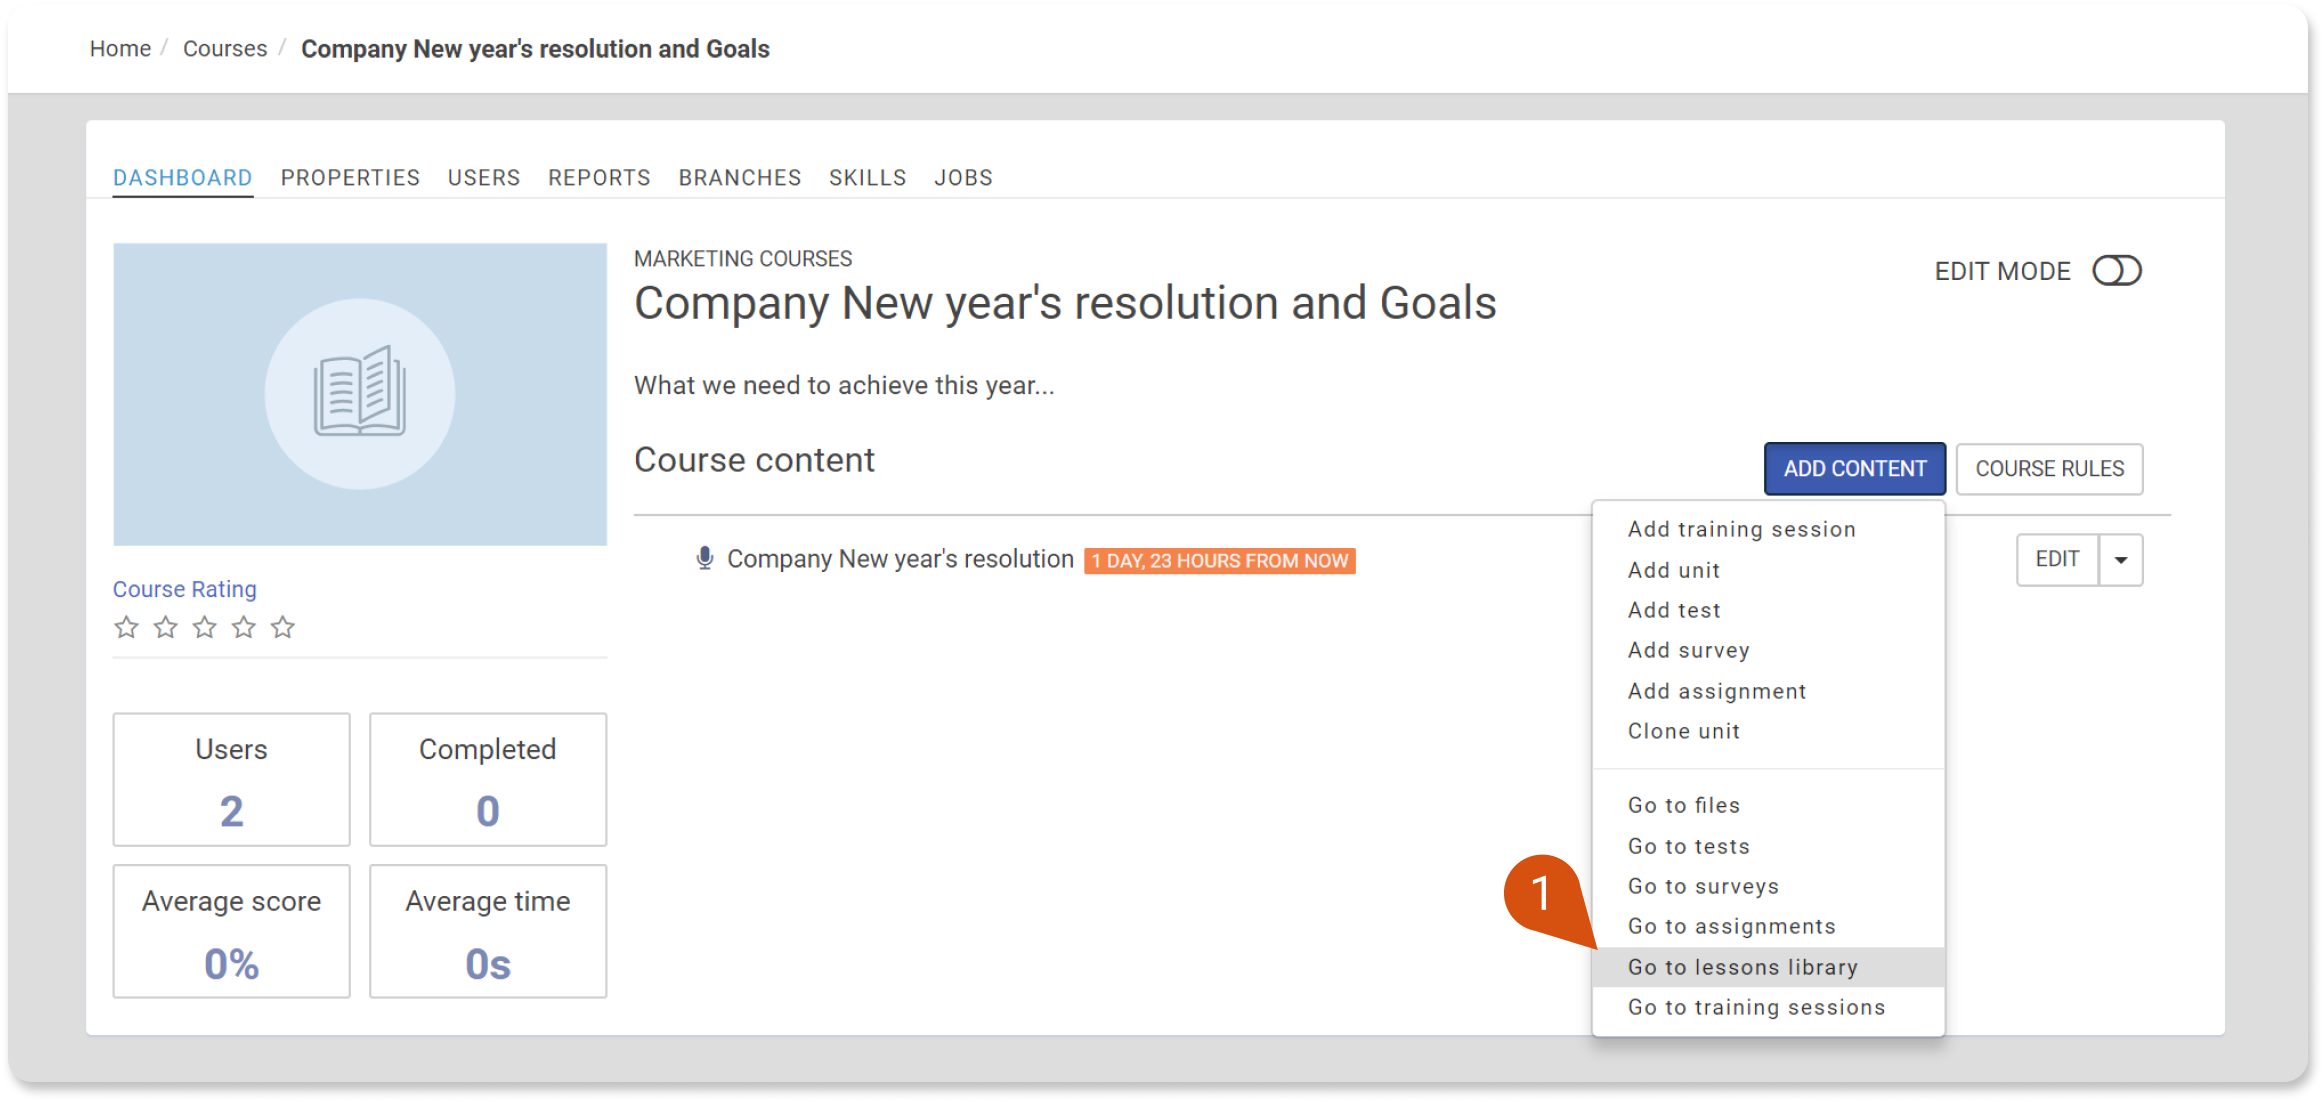
In order to access the event' sessions and edit them, you can click on the Content button and then Go to training sessions (9). Through this page, you can see the list of the sessions along with some information about them, for example how many users have registered to them.
Adding events
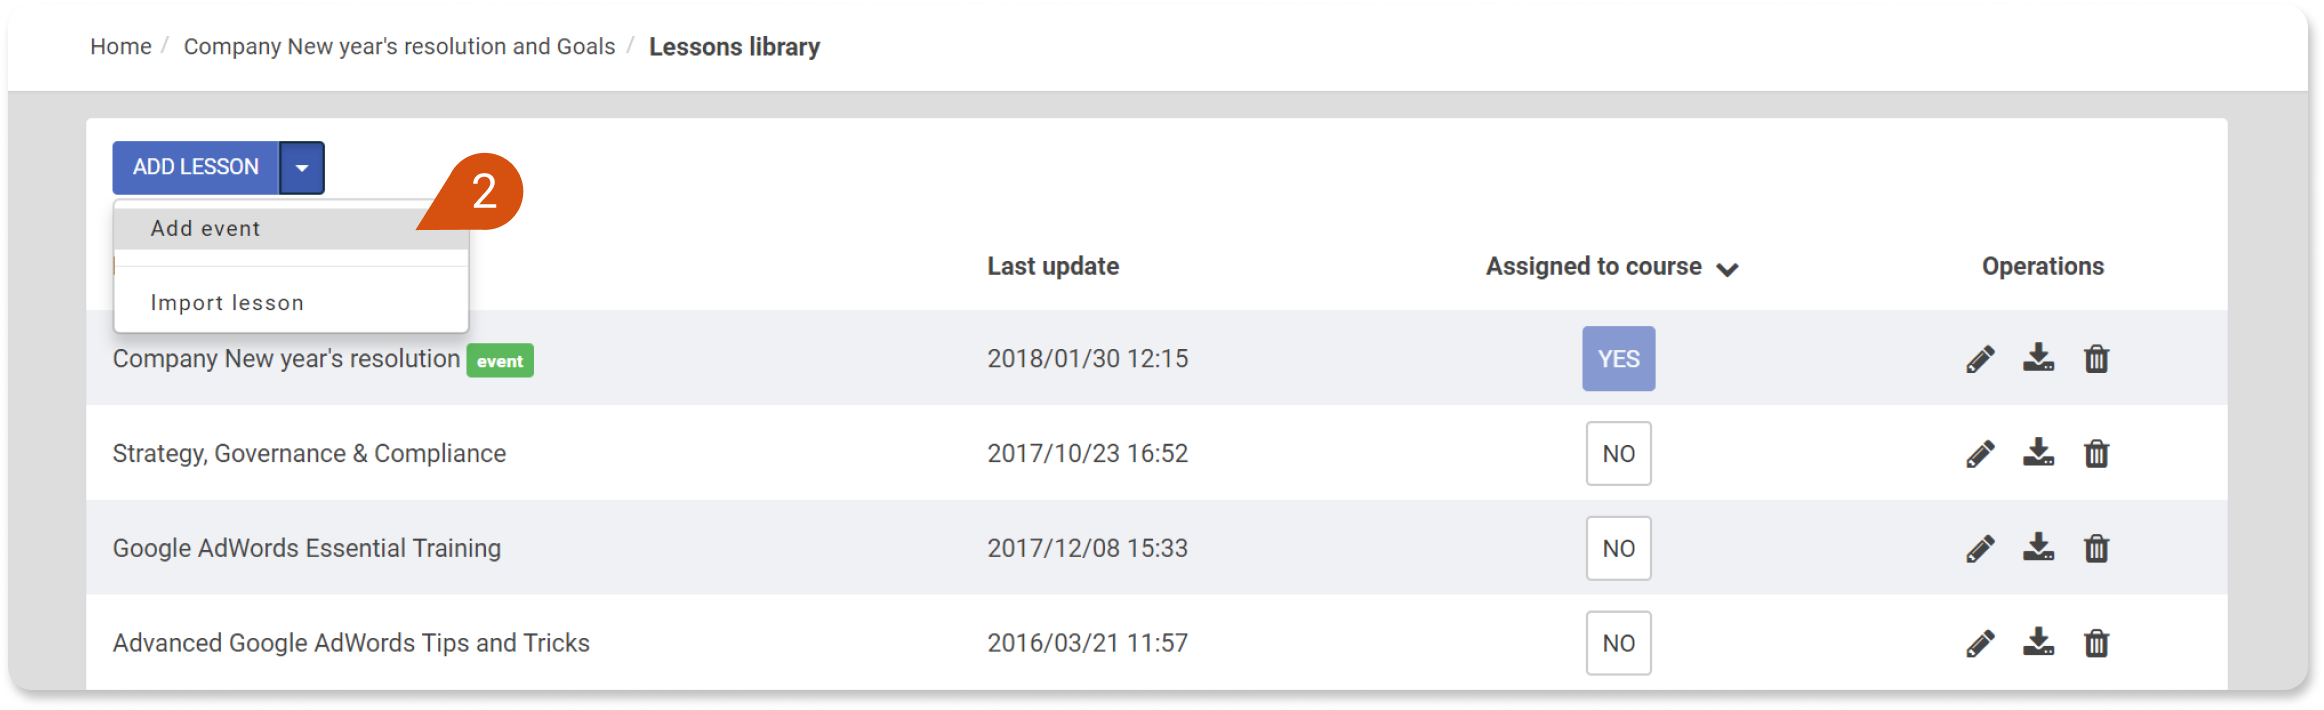
In case you want to add a new training event to your course, you have to click on the Content button again and then Go to the Lessons library (1).
Click on the arrow next to the Add Lesson button and click on the Add event option (2):
A pop-up will open and you will have to fill in the required information. When adding a new event, its first session is automatically created, this is why the pop up looks similar to the new sessions:
After clicking Add, you are redirected to the course dashboard and you can now see the two events with the Event tag next to their title (3). Each one of them has its own Content button (4) that allows you to manage their Training Sessions (5).
| Note: If you have originally created an eLearning-type course and later changed it to Blended, you will need to follow the above steps and add an event lesson in order to add Sessions. |
Enriching Event with Assets
Usually, the trainer will want to share additional resources with the Event's learners, such as files, content, etc. You can do this by adding e-learning content to the course, as described in this article. These will appear in the learner's dashboard just like they would if it were an eLearning-only Lesson.
Setting up a Location
Locations are names of the venues (real or virtual) that classes or meetings will take place, allowing you to organize your class schedule and inform your students of upcoming meetings.
You can find out more on how to manage the Locations of live training events in our knowledge base article.